


2.2 Procedure for Hardware Installation
2. Decide where to place your Wireless Broadband Router
You can place your Wireless Broadband Router on a desk or other flat surface, or you can mount it on
a wall. For optimal performance, place your Wireless Broadband Router in the center of your office
(or your home) in a location that is away from any potential source of interference, such as a metal
wall or microwave oven. This location must be close to power and network connection.
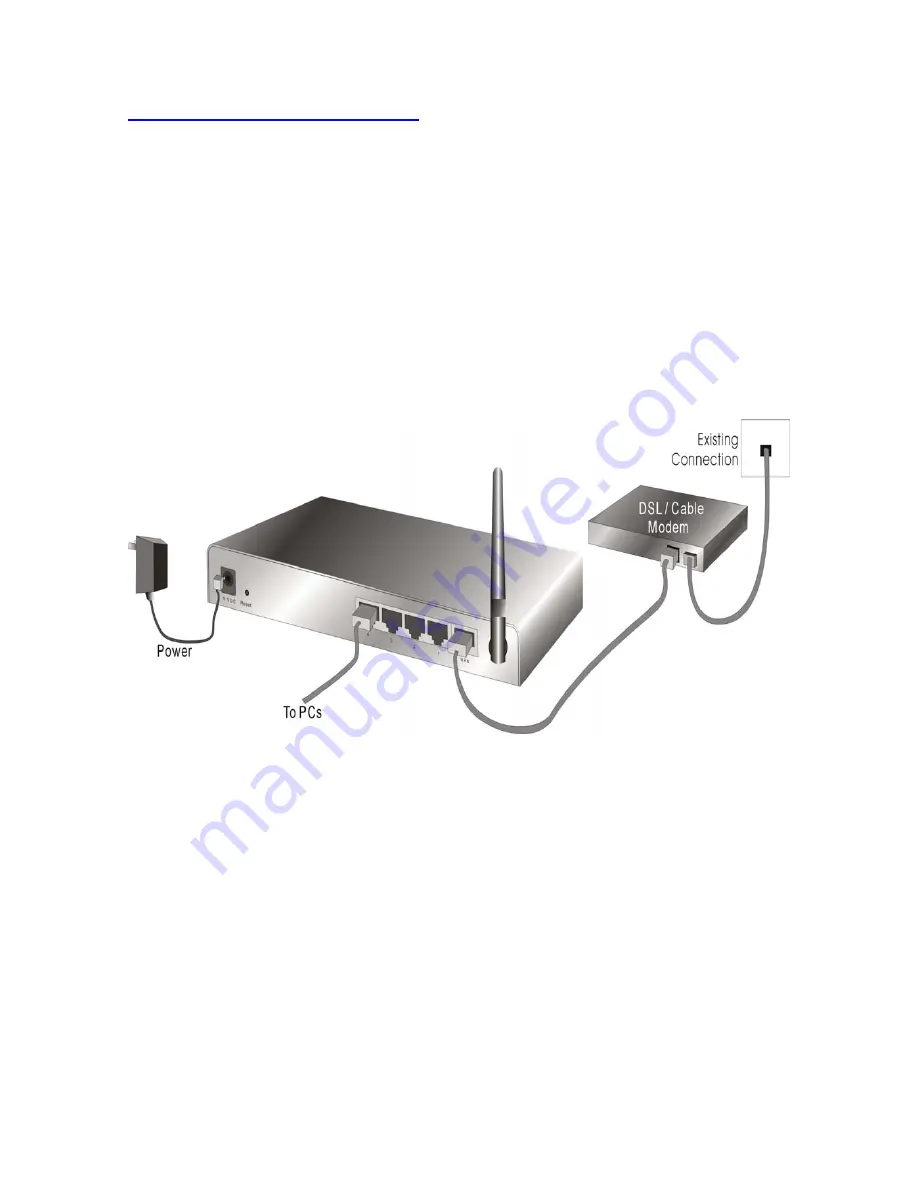
2. Setup LAN connection
a.
Wired LAN connection: connects
an Ethernet cable from your computer’s Ethernet port to one of
the LAN ports of this product.
b.
Wireless LAN connection: locate this product at a proper position to gain the best transmit
performance.
Figure 2-3 Setup of LAN and WAN connections for this product.
3. Setup WAN connection
Prepare an Ethernet cable for connecting this product to your cable/xDSL modem or Ethernet
backbone. Figure 2-3 illustrates the WAN connection.
4. Power on
Connecting the power cord to power inlet and turning the power switch on, this product will
automatically enter the self-test phase. When it is in the self-test phase, the indicators M1 will be
lighted ON for about 10 seconds, and then M1 will be flashed 3 times to indicate that the self-test
operation has finished. Finally, the M1 will be continuously flashed once per second to indicate that
this product is in normal operation.
8
Содержание Tornado 140
Страница 14: ...4 4 Basic Setting 4 4 1 Primary Setup WAN Type Virtual Computers 14...
Страница 17: ...connect to ISP automatically after system is restarted or connection is dropped 4 4 1 6 Virtual Computers 17...
Страница 21: ...WPA PSK 1 Select Preshare Key Mode 2 Fill in the key Ex 12345678 21...
Страница 24: ...4 5 Forwarding Rules 4 5 1 Virtual Server 24...
Страница 28: ...4 6 Security Settings 28...
Страница 41: ...4 7 Advanced Settings 41...
Страница 53: ...4 8 Toolbox 53...
Страница 54: ...4 8 1 System Log You can View system log by clicking the View Log button 54...
Страница 55: ...4 8 2 Firmware Upgrade You can upgrade firmware by clicking Firmware Upgrade button 55...
Страница 60: ...a Select Obtain an IP address automatically in the IP Address tab b Don t input any value in the Gateway tab 60...
Страница 65: ...4 We will change EAP type to fit the variable test condition Figure 2 Enable IEEE 802 1X access control 65...
Страница 67: ...Figure 4 Certificate information on PC1 Figure 5 Authenticating 67...
Страница 71: ...3 Add and edit some settings 71...
Страница 73: ...Choose View available Wireless Networks like below Advanced choose 123kk 73...
Страница 76: ...5 Then Choose certificate like above 76...
Страница 77: ...6 Then go to Authentication and first Remove EAP TLS and Add EAP TLS again 77...
Страница 78: ...7 Go Network and Select 1 and ok 78...
Страница 80: ...2 Then Install this certificate and finish 3 Setting on the router and client Router 80...


