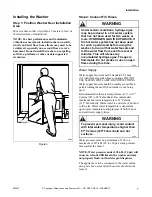
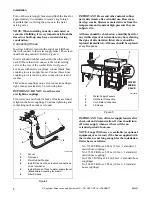
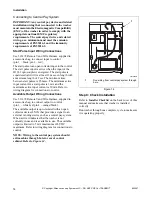
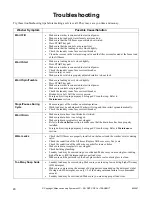
background image

Maintenance

19

803447

© Copyright, Alliance Laundry Systems LLC – DO NOT COPY or TRANSMIT

Reinstallation of Shipping Materials

To prevent damage while moving the washer, the 
shipping materials MUST be reinstalled.

Disconnect washer from electrical supply.

While supporting the front access panel, remove 
two screws from the bottom edge of the panel.

Gently lower the panel to remove it from the 
washer.

Place the shock sleeves on all four shock 
absorbers. Refer to 

Figure 21

.

Insert hooked end of shipping brace into the open 
slot of the motor mount. Refer to 

Figure 21

.

Attach the brace with the five bolts and washers. 
Refer to 

Figure 21

.

Reinstall front access panel.

Figure 21 

Refer to 

Installation


section, step 5 for proper 

procedures whenever the washer is moved.

Cleaning Foreign Object Trap

The washer’s pump has a trap that may collect foreign 
objects. The trap may need to be cleaned if water is 
draining slower than usual. To clean:

Disconnect washer from electrical supply.

While supporting the front access panel, remove 
two screws from the bottom edge of the panel.

Gently lower the panel to remove it from the 
washer. 

NOTE: The pump may have some water in it. Use a 
rag or a container to catch water. If the wash drum 
is full of water, use a wet/dry shop vacuum to catch 
the water. 

With rag or vacuum ready, unscrew the cap on 
the left side of the pump and remove trap.

Clean the debris from the trap.

Reinstall the trap and access panel.

Reconnect washer to electrical supply.

FLW2124N

1

Shock Sleeves

2

Motor Mount

3

Hooked End of Shipping Brace

4

Bolts and Lockwashers

FLW2124N

2

1

4

3

Содержание FLW1527C

Страница 1: ...ration www comlaundry com Frontload Washers Metered Commercial FLW1527C Part No 803447R1 January 2010 Keep These Instructions for Future Reference If this machine changes ownership this manual must ac...

Страница 2: ......

Страница 3: ...arefulness are factors which cannot be built into these washers These factors MUST BE supplied by the person s installing maintaining or operating the washer Always contact the distributor service age...

Страница 4: ...eceptacle 9 Step 4 Position and Level the Washer 10 Step 5 Remove the Shock Sleeves and Shipping Brace 11 Step 6 Wipe Out Inside of Wash Drum 11 Step 7 Connect the Washer to Electrical Power 12 Step 8...

Страница 5: ...nces give off vapors that could ignite or explode 5 Under certain conditions hydrogen gas may be produced in a hot water system that has not been used for two weeks or more HYDROGEN GAS IS EXPLOSIVE I...

Страница 6: ...mping or dropping the washer can damage safety features If this occurs have your washer checked by a qualified service person 19 If the supply cord is damaged it must be replaced by a special cord or...

Страница 7: ...1 cm 29 6 in 71 1 cm 28 in 61 0 cm 24 in 68 3 cm 26 9 in 79 cm 31 1 in 5 1 cm 2 in 93 83 cm 36 94 in 37 08 cm 14 6 in 33 3 cm 13 1 in 3 8 cm 1 5 in COIN MODELS FLW2249N FLW2249N 104 6 cm 41 2 in 75 1...

Страница 8: ...up NOTE Install dryer before washer This allows room for attaching exhaust duct NOTE Some moisture in the wash drum is normal Water is used during testing at the manufacturer Central Pay Models The ma...

Страница 9: ...125 Fahrenheit Warm water is a mixture of hot and cold water Warm water temperature is dependent upon water temperature and pressure of both the hot and cold water supply lines Water pressure must be...

Страница 10: ...Figure 4 IMPORTANT Hoses and other natural rubber parts deteriorate after extended use Hoses may develop cracks blisters or material wear from the temperature and constant high pressure they are subje...

Страница 11: ...he shipping tape IMPORTANT Drain receptacle must be capable of handling a minimum of 3 5 cm 1 3 8 inch outside diameter drain hose Figure 7 Standpipe Installation Place the drain hose into the standpi...

Страница 12: ...ck Refer to Figure 9 Loosen locknut and adjust legs until the washer is level from side to side and front to back using a level Washer should not rock Tighten the locknuts securely against the washer...

Страница 13: ...an 1 22 m 4 feet Refer to User Maintenance section for instructions Do not lift or transport washer from front or without shipping materials installed Store the shipping materials in the bag provided...

Страница 14: ...rity of the wall receptacle 240 Volt 50 Hertz without plug The washer is designed to be operated on a separate branch polarized three wire effectively earthed 240 Volt 50 Hertz AC alternating current...

Страница 15: ...earthing will reduce the risk of electric shock by providing a path of least resistance for electric current The washer is equipped with a cord having an equipment earthing conductor Some models are...

Страница 16: ...me between start pulses is 25 msec The minimum active input current for a start pulse is 3 mA and the maximum active input current is 30 mA Refer to wiring diagram for connections to control Available...

Страница 17: ...hine operation Step 1 Load Laundry Load items loosely into wash drum 8 1 Kg maximum dry clothes load NOTE Small items such as baby socks may get caught around the door Place these articles inside a me...

Страница 18: ...turer s recommended amount Figure 17 Step 4 Set Fabric Selector Wash Temperature Push touchpad for HEAVY NORMAL PERM PRESS or DELICATES cycle Light indicates selection NOTE Changes can be made to Fabr...

Страница 19: ...door cannot be opened when this light is on START START flashes one second on and one second off when the full vend price has been satisfied IMPORTANT If washer fails to operate properly after instal...

Страница 20: ...ass Sealing Area In order to assure that the door properly seals against water leaks the following surfaces should be wiped off periodically The outside perimeter of the door glass where the seal cont...

Страница 21: ...section step 5 for proper procedures whenever the washer is moved Cleaning Foreign Object Trap The washer s pump has a trap that may collect foreign objects The trap may need to be cleaned if water i...

Страница 22: ...o Maintenance section Stops Pauses During Cycle Pauses are part of the washer s normal operation Wash load may be unbalanced Washer will stop and then restart spin automatically Check the laundry room...

Страница 23: ...ction step 4 Is Noisy Make sure washer is level Uneven leveling can cause vibration Some sounds may be a part of normal operation for a frontload washer Load is too Wet Wash load may be unbalanced The...

Страница 24: ...nameplate will be in the location shown in Figure 22 Date Purchased ____________________________ Model Number ____________________________ Serial Number ____________________________ Please include a c...

Страница 25: ......

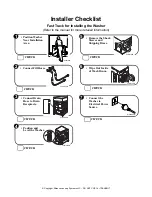
Страница 26: ...n Area 1 CHECK H054IE0A H054IE0A 2 CHECK Connect Fill Hoses TLW1976N HOT COLD TLW1976N 3 CHECK ConnectDrain Hose to Drain Receptacle FLW1983N FLW1983N 4 CHECK FLW2134N FLW2134N Position and Level the...

Отзывы: