BRIDGE DECK FINISHER SET-UP GUIDE - 069596
Page 3
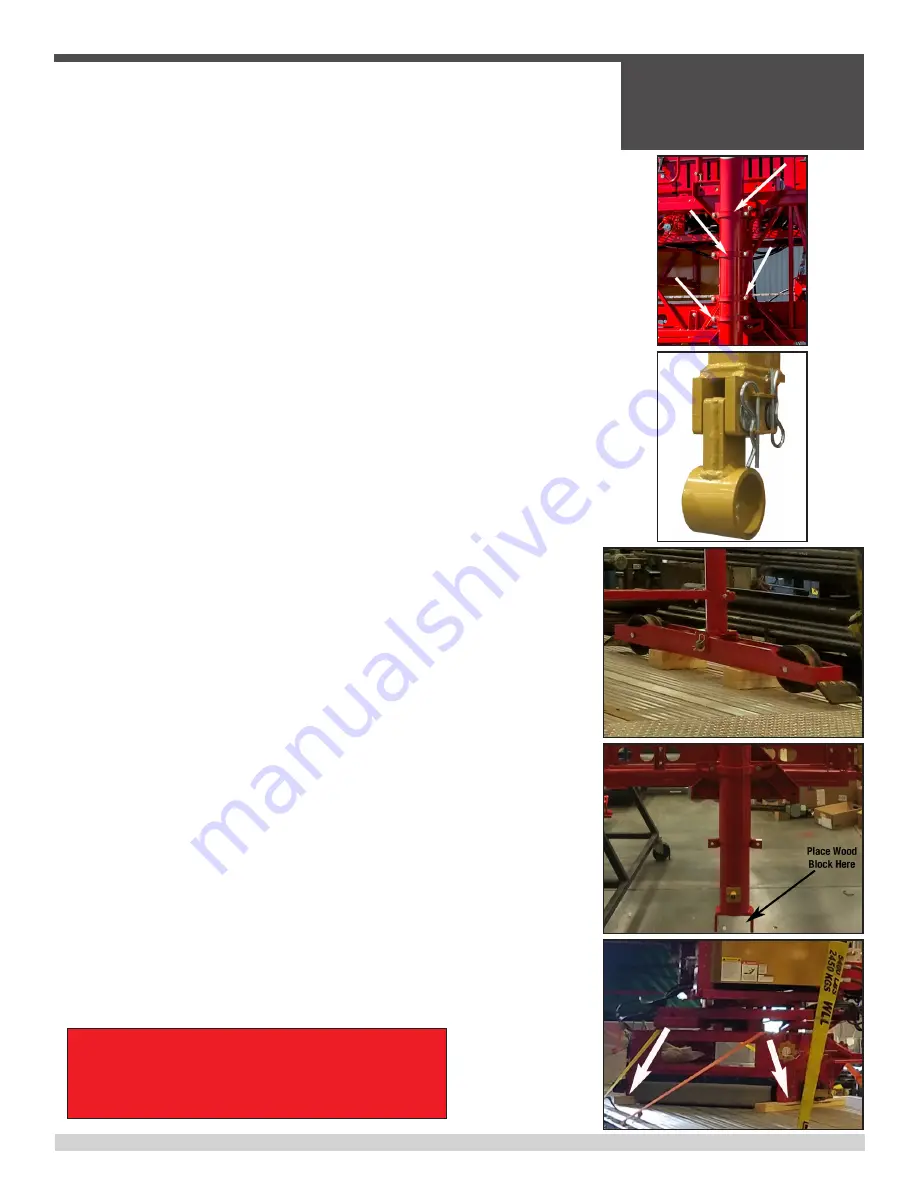
• CHECK all height restrictions prior to loading the
machine as all Drop-Deck trailers and flat-bed trailers
have different dimensions. Paving Carriage may need to
be removed for legal transport. Tighten the leg clamps
on the four legs (SEE PICTURE 2).
• DO NOT secure the BDF to the trailer over the truss
frame in the center of the machine. Use the tie-down
loops on the end frames (SEE PICTURE 3) of the machine
using chains.
• Tighten the chains by pulling towards the center of the
machine.
• When loading
with
Bogie Wheel Frames attached to the
legs –
IT IS IMPORTANT
to keep the frame & bogies
elevated above the trailer bed. Multiple 2 x 4’s or a 4 x
4 block needs to be place in between the bogie wheels
and under the bogie frame (SEE PICTURE 4). Screw or
nail the wood to secure it to the truck bed.
• When loading
without
Bogie Wheel Frames - Place
multiple 2 x 4’s or a 4 x 4 the width of the trailer under
the leg yokes on both ends of the machine (SEE PICTURE
5). Secure the wood by screwing or nailing it to the truck
bed.
• When loading the machine with the Paving Carriage
attached - block the carriage so that the machine or
carriage weight does not rest on the paving rollers.
Place the blocks under the end frames of the carriage
and nail them to the deck. (SEE PICTURE 6). With the
carriage frame now setting on the blocks, adjust the hold
down rollers, located on the carriage hanger frame at
the top of the carriage, to the lowest position. Using the
leg cranks or power leg option, lower the machine just
enough so that the carriage rollers are not tight against
the carriage rail. This allows movement of the machine
truss while transporting and will not cause damage
to the carriage rail. If the paving carriage is loaded
separately, block the carriage in the same manner under
the end frame and secure the carriage to the truck.
PLEASE NOTE:
Whether transporting with or without
carriage, the carriage rollers cannot rest on the
trailer bed and need to be blocked under the end
frames.
Picture 2
Picture 3
Picture 6
Picture 5
Picture 4
When Loading & Transporting Your Machine


