¦¨¥©·À²¨¨¤Â¦µª¹À®¡¥¶·¹À¡
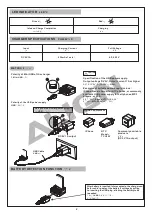
14.BINDING OF RADIO TRANSMITTER AND RECEIVER3
» ±¾ » ±¦ ¾ ª ¹ À
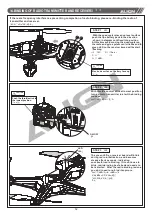
If there are frequency interference preventing completion of radio binding, please re-binding the radio of
transmitter and receiver.
12
±¥¶ ¦ ¾ ¸ ©¥©¦ ¸ ¡ ¨¹ ¥¤¦ ´ ¤
Po-Li
¹
¦ ¦ ©¦ ¡ ¤¦ ² °¾ ¨¡ ¨ª Á » Å ¨¤¥Â ¡ ¦
® ±¦ ª ¤º ¦
LED
¿ ·°Ã ¡
¨Æ
1
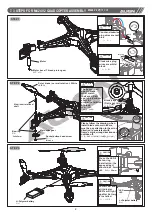
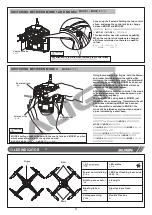
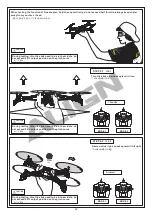
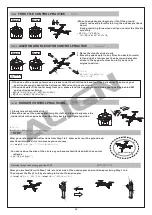
STEP 1
,With the quadcopter placed on level surface
push the lipo battery pack in the direction
shown in diagram until fixed into position
.
At this time avoid moving the quadcopter so
the radio and gyro system can initialize and the
green LED on the receiver borad will be start
flashing
.
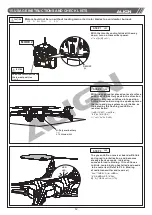
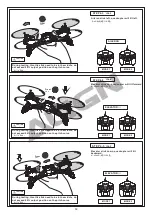
Push the throttle stick to
the lowest position
ON/OFF
¹·¶Ã
ªª·±±¦³§¡
¨Æ
3
STEP 3
The green LED on receiver board will blink
during radio initialization, and becomes
steady after 4 seconds, indicating
successful radio binding. If it continues to
blink, radio binding has failed and needs to
be restarted. After the radio binding is done,
you don't need to re-bind it anymore.
¹À¤±¦ªªº¦
LED
·°Ã¡¬
4
¬«
LED
««ª¥
¹À¦¥¡
LED
¤«Ä°Ãª¥¹À¥±¡¥¶¦¦
°¦¨Æ
1
¦¨Æ
2
¡¥¹À¦¥¡¨¦¦§¤¶¦
·¹À¤¡
ª ·
CAUTION
With throttle control stick at lowest position,
turn on radio transmitter to start the binding
process.
±µ±ªª·±±¦³§¡¥¶»±¾¹·¶¦¹À¡
¨Æ
2
STEP 2
LED
LED
¿
¹¦ª¹· ´¤¡
Electrode surface of battery face up.
ª ·
CAUTION


