4
www.observint.com
© 2015 Observint Technologies. All rights reserved.
5.
If this login is the first login to an Alibi camera from your computer and browser, continue with the
following sub-steps to install a plugin:
a.
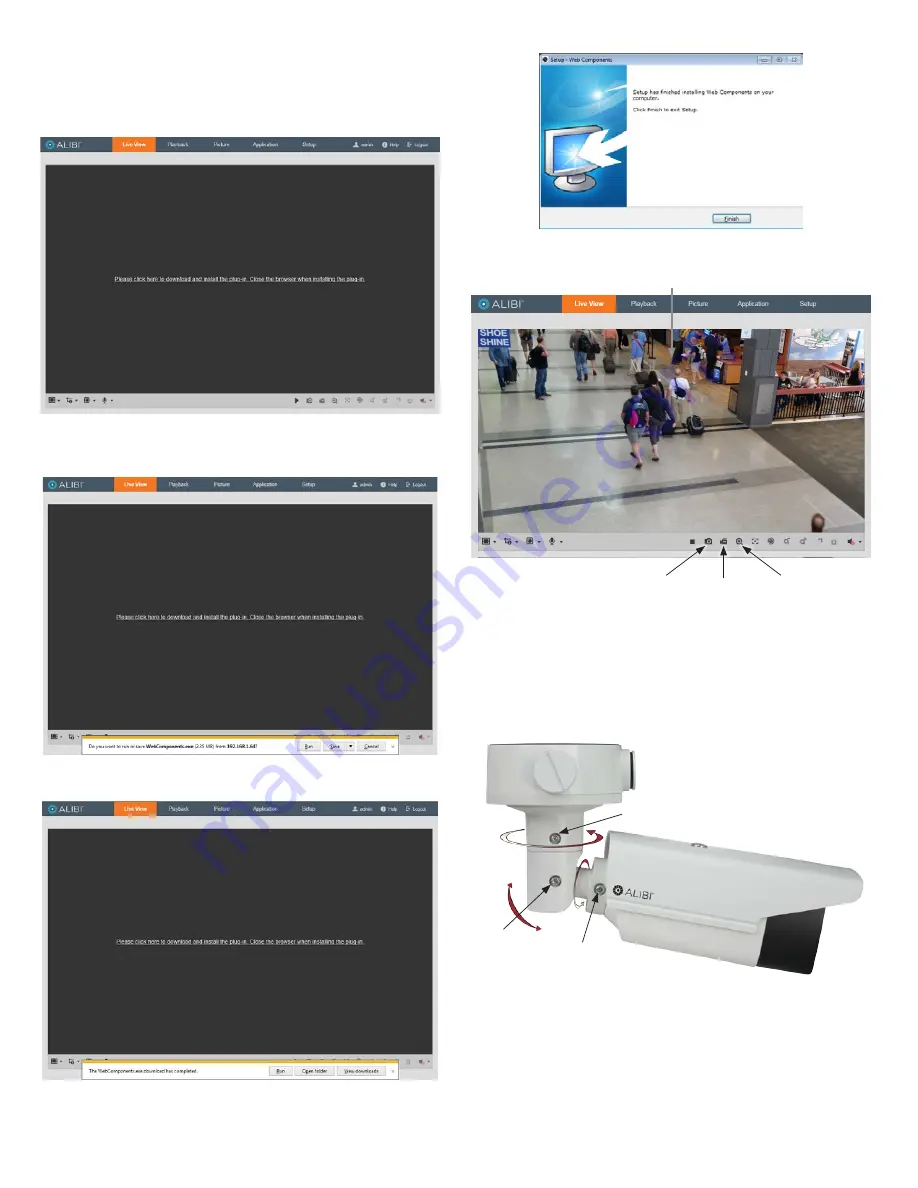
After a successful login to the camera, a message will appear in the middle of the Live View
window requiring you to load a plug-in. Click on the message to continue.
b.
When the following screen appears, click
Run
to download the plug-in (WebComponents)
and continue.
c.
When the following screen appears, click
Run
to install WebComponents.
d.
Allow the plug-in installation to complete. When the following window appears, click
Finish
.
6.
Log into the camera again to see the Live View - Main stream window.
Capture Record Zoom
Live View image
NOTE
: You can also observe video from the camera by plugging the Video Test Monitor cable into the CVBS
monitor connector in the camera, then attaching it to a spot monitor.
Step 4. Adjust the camera for your surveillance target
1.
While observing live video from your camera, loosen the Pan, Tilt and Rotation lock screws at least
two turns using the security L-wrench provided, then move the camera to point at the center of your
surveillance target. Tighten the lock screws to hold the camera in position.
Pan lock screw - Pan: 0˚ ~ 360˚
Tilt lock screw
Tilt: 0˚ ~ 100˚
Rotation lock screw
Rotation: 0˚ ~ 360˚
2.
Reinstall the black liner (if removed).
3.
Click the
Zoom
icon at the bottom of the Live View window (see above) to adjust the camera zoom.
4.
Reinstall the dome assembly.
Step 5. Adjust the video display
The video Display Settings menu includes the image-related configurable parameters for the camera. It
contains several sub-menus such as Image Adjustment, Exposure Settings, Day/Night Switch, etc. that can


