Manual
Photo Finish OPTIc3
- 54-
9
Evaluation Windows
The software OPTIc3.NET allows you to see the photo finish picture in three different windows.
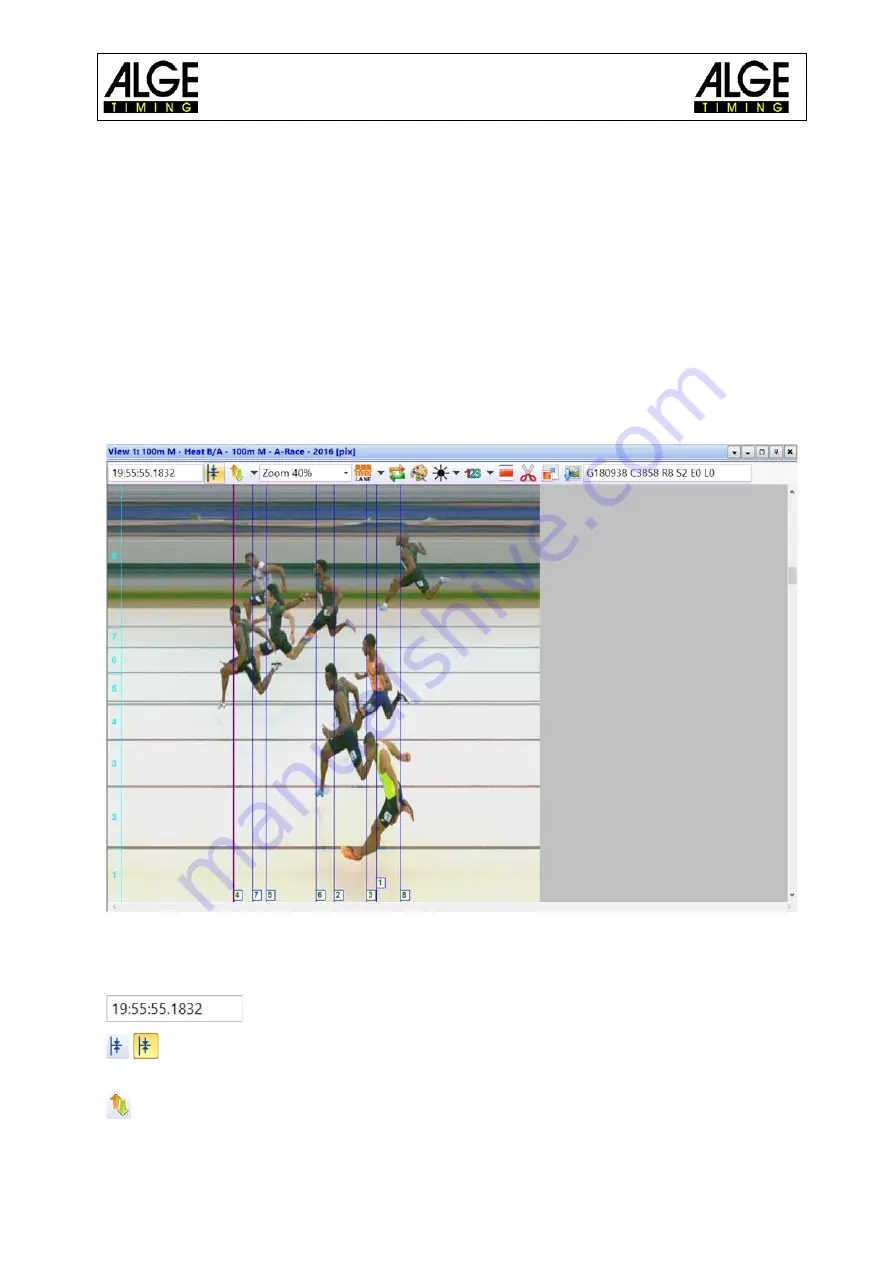
Window <View 1> is the main picture in which you make the evaluation. Window <View 2> can
be used e.g. as zoom window, where you see the part of the picture that you evaluate in a bigger
scale. Window <Overview> is used to show long recordings on a small scale to have a good
overview of the total picture.
All three pictures are linked with each other. If you double click in one picture, the others show
the same picture in the adjusted scale.
9.1
View 1
This is the main picture that you must use for evaluation. You can adjust the zoom scale that is
ideal for you. Please note that if you use a zoom scale below 100 % you are not able to adjust
the time cursor with the highest precision. Therefore, it would be good to have view 2 on a zoom
scale of 100 % or more and to check the time cursor in view 2 as well.
In the header of <View 1> you see the <event name>, <heat name> and <vertical resolution>
Top status line:
time of day of the position of the <Time Cursor>
Centring Function: If you double click in another “evaluation window”, the
position of the mouse is used as centre for the picture shown in <View 1>.
You can input the offset for the Y-Position (vertical) (e.g. if you click on the
lane so that it shows the chest of the athlete in the zoom window).
Содержание OPTIc3
Страница 1: ...Version E220509 Manual Photo Finish OPTIc3 ...
Страница 118: ...Manual Photo Finish OPTIc3 118 ...
Страница 119: ...Manual Photo Finish OPTIc3 119 ...
Страница 120: ...Manual Photo Finish OPTIc3 120 ...


