28
Chapter 3—Getting Around the User Interface
03D—Owner’s Manual
Display Elements
This section explains the various elements that appear on display pages.
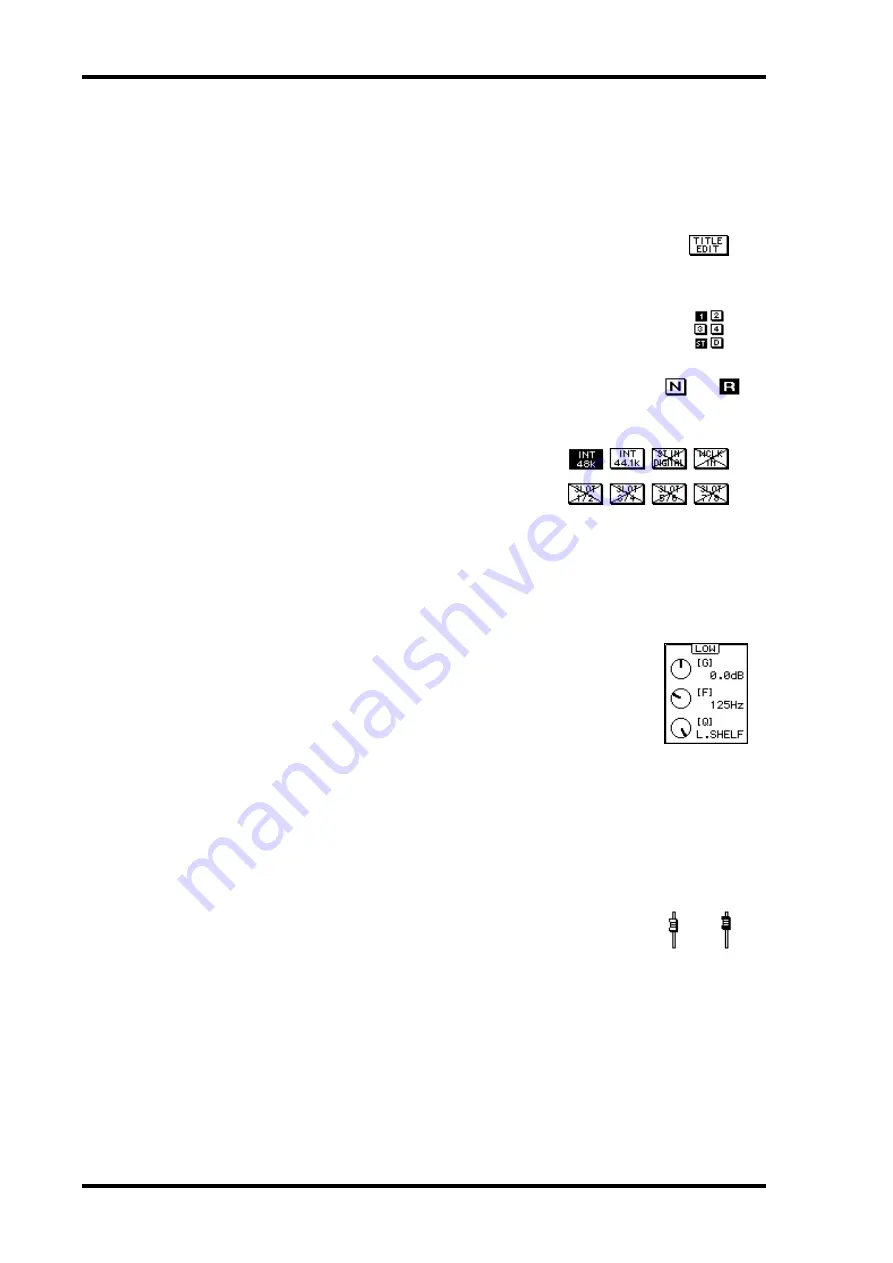
Switches
Switches appear as boxes with a shadowed outline (i.e., a thicker out-
line on the right side and bottom of the box).
Simple on/off-type switches are highlighted when they are turned
on. In this example, the [1] and [ST] switches are on.
The labels inside some switches change when they turned on or off,
as these Normal and Reverse phase switches show.
For option-type switches, only one option can be
chosen. In this example, the wordclock source is
set to INT 48K.
To operate a switch, use the cursor buttons to select it and the [ENTER] button to turn
it on or off. With a mouse, position the mouse cursor over the switch and click.
Rotary Controls
Parameters with a variable range appear as rotary controls, as this
example from the EQ page shows. To adjust a rotary control, use
the cursor buttons to select the control and the PARAMETER
wheel to adjust the value. To adjust a rotary control using a mouse,
position the mouse cursor over the control, press and hold the left
mouse button, and then drag the mouse. Parameters with a wide
range, such as effects delay times, can be adjusted much quicker by
holding down the right mouse button and dragging. Rotary con-
trols can also be adjusted in single-step increments by clicking once
with a mouse. Clicking with the left mouse button decreases a
value; clicking with the right button increases it.
Faders
Some pages, such as the CH View page, display faders graphically.
Usually, faders are adjusted using the real faders. But they can also
be adjusted using the PARAMETER wheel or a mouse. To adjust a
fader using the PARAMETER wheel, use the cursor buttons to
select the fader and the PARAMETER wheel to adjust it. To adjust
a fader using a mouse, position the mouse cursor over the fader,
press and hold the left mouse button, and then drag the mouse.
Fader knobs appear highlighted when set to the nominal position.
Faders can also be adjusted in single-step increments by clicking
once with a mouse. Clicking with the left mouse button lowers the
fader; clicking with the right button raises it.
Nominal
Содержание 03D
Страница 18: ...8 Chapter 1 Welcome to the 03D 03D Owner s Manual ...
Страница 32: ...22 Chapter 2 Touring the 03D 03D Owner s Manual ...
Страница 44: ...34 Chapter 3 Getting Around the User Interface 03D Owner s Manual ...
Страница 66: ...56 Chapter 5 EQ 03D Owner s Manual ...
Страница 80: ...70 Chapter 6 Pan Routing Surround Pan 03D Owner s Manual ...
Страница 98: ...88 Chapter 8 Stereo Output 03D Owner s Manual ...
Страница 106: ...96 Chapter 9 Aux Sends 03D Owner s Manual ...
Страница 120: ...110 Chapter 11 Channel Library View 03D Owner s Manual Aux send view page Bus out view page Stereo output view page ...
Страница 121: ...Groups Pairs 111 03D Owner s Manual Groups Pairs 12 In this chapter Fader Groups 112 Mute Groups 113 Stereo Pairs 114 ...
Страница 126: ...116 Chapter 12 Groups Pairs 03D Owner s Manual ...
Страница 172: ...162 Chapter 14 Dynamics Processors 03D Owner s Manual ...
Страница 240: ...230 Chapter 18 Digital I O 03D Owner s Manual ...
Страница 290: ...280 03D Owner s Manual ...
Страница 302: ...YAMAHA CORPORATION P O Box 1 Hamamatsu Japan 97 03 3000 AP Printed in Japan ...


