-37-
The air pressure differs depending on the altitude (compared to sea level).
For a correct weather forecast, it’s essential to set the correct air pressure,
also when you’re e.g. 100 meters above sea level. This is called the relative
air pressure. For every 8 meters, the air pressure is decreased by 1 hPa. If
you’re not in a mountain area, you don’t have to adjust the air pressure. This
setting also allows you to calibrate the air pressure value.
• Press the “+” or “-” button to select a value between 800 hPa and
1100 hPa.
• Press the “SET” button to set the air pressure adjustment limit. In this
mode, a threshold can be set for when a change in weather conditions
will be actually shown using the forecast icons. By default, this is set to
2 hPa. Therefore, there must be an air pressure difference of 2 hPa before
a change in weather conditions will be actually shown in the display. The
value of 2 hPa can be changed to 3 hPa or 4 hPa.
• Press the “+” or “-” button to set the threshold.
• Press the “SET” button to set the pressure change threshold in case of
stormy weather. In this mode, you can set the threshold for when a change
in weather conditions in relation to a storm will be actually displayed
(flashing weather icon). By default, this is set to 4 hPa per 3 hours.
Therefore, there must be a difference in air pressure of 4 hPa within
3 hours before the display will actually show stormy weather conditions.
You can adjust the value of 4 hPa to between 3 and 5 hPa.
• Press the “+” or “-” button to set the storm threshold.
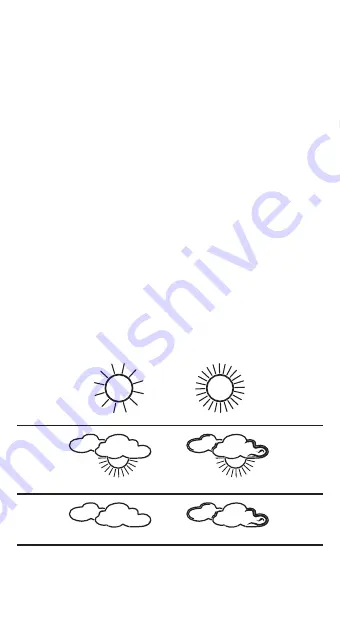
• Press the “SET” button to set the weather icons.
• Press the “+” or “-” button to switch between the basic icons.
•
Press the “SET” button or don’t press any button for 30 seconds to exit the
programming mode.
You can also press and hold the “+” or “-” button for over 3 seconds to adjust
the values quicker.
Weather forecast display:
sunny
partly cloudy
cloudy


