16
The test leads can now be moved to the next cell. The cell number display
automatically indexes to the next higher number as soon as the cell voltage
sense leads are lifted.
If the test requires taking two or more separate intercell readings, the display
fills in the first resistance reading when TEST is initially pressed, and fills in
the next reading after the test leads have been moved and TEST is pressed a
second time. In this case, the cell display does not automatically index until
the last resistance reading has been taken.
Allow 15 seconds between tests. If TEST is pressed immediately after a test,
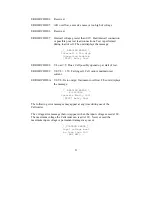
the following message appears:
_ _ MULTIMETER _ _
TEST
INITIALIZATION
PLEASE
WAIT.
Continue reading until all the cells are measured. If the leads are incorrectly
connected or a bad connection is encountered, the unit advises what to do. If
an error code is displayed, refer to
Error Codes and Warning Messages
.
It is possible to find a cell that is failing so badly that the loaded voltage
drops by more than 1.5 volts. In this case, the cell is declared as a failing cell
and Error Code 9 is displayed.
3.4.4 Storing Data for More Than One String
The Cellcorder has two memory configurations available under the Setup
selection on the Main Menu. One mode is 7 x 256 (7 batteries with 256 cells
in each battery), and the other is 28 x 64 (28 batteries with 64 cells in each
battery). Select the proper configuration prior to using the unit and do not
change it until all readings are transferred to the computer.
After Battery ID #1 location has been used, the other Battery ID locations
can be used by selecting a new string as follows:
•
Verify the blinking cursor is located in the Cell number display. If not
already there, press the CELL key.
•
Press the ENTER key. This moves the cursor to the Battery ID location.
•
Select the desired number using the numeric keys, then press ENTER.


