background image

Arctic Oven 10 X 20 Instructions                                                                 www.alaskatent.com 

November 5, 2003                        Page 5 of 9 


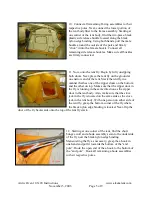
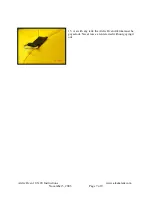
10.  Connect all remaining O-ring assemblies to their 
respective poles. Next, connect the lower portion of 
the tent body liner to the frame assembly. Starting at 
one corner of the tent body, find the two-piece, black 
plastic side release buckle located along the black 
nylon edge binding. Using both hands, pull the male 
buckle around the outside of the pole and firmly 
“click” it into the female buckle. Connect all 
remaining side release buckles. Make sure all buckles 
are firmly connected.  


11. Now, onto the tent fly. Begin by fully unzipping 
both doors. Next, place the tent fly on the ground at 
one narrow end of the tent. Stack the tent fly in a 
manner that has one of the zipper doors on the bottom 
and the other on top. Make sure that the zipper door in 
the fly is running in the same direction as the zipper 
door in the tent body. Also, make sure that the stove 
jack in the fly is located on the same side as the stove 
jack in the tent body. With one person on either side of 
the tent fly, grasp the bottom corner of the fly where 
the black nylon edge binding is located. Next, flip the 

door of the fly backwards onto the top of the tent fly stack.  


12.  Starting at one corner of the tent, find the short 
bungee cord and s-hook assembly sewn to the underside 
of the fly near the black nylon edge binding. 
Maneuvering the fly as necessary, grasp the s-hook in 
one hand and pull it towards the bottom of the “end 
pole”. Hook the open end of the s-hook to the bottom of 
the “end pole”.  Hook all remaining s-hook assemblies 
to their respective poles.  


Содержание ARCTIC OVEN ARKTIKA

Страница 1: ...sed of five shock corded aluminum sections and a small J bolt Two 2 center poles are included Slightly shorter than the end poles center poles are also comprised of five shock corded aluminum sections...

Страница 2: ...non typical leg of the end spider is pointed toward the center of the tent body With the other hand firmly slide the larger end of one end pole over one of the end spider s typical legs 4 Following on...

Страница 3: ...nylon edge binding locate the middle side ring and pin assembly While holding the center pole in one hand and the ring and pin assembly in the other insert the pin into the bottom of the pole Moving...

Страница 4: ...rasp the black nylon web loop located at the top of the tent body liner Pull the web loop up and slide it over the gate of the carabiner 9 The tent body should now be suspended from the tent frame at...

Страница 5: ...tent fly in a manner that has one of the zipper doors on the bottom and the other on top Make sure that the zipper door in the fly is running in the same direction as the zipper door in the tent body...

Страница 6: ...ough the D ring Connect all remaining spring snaps and D ring assemblies 14 Finally nest the vent tubes One vent tube is located on each side of the tent body and fly From outside the tent reach throu...

Страница 7: ...Arctic Oven 10 X 20 Instructions www alaskatent com November 5 2003 Page 7 of 9 15 As with any tent the Arctic Oven Arktika must be guyed out Never leave a tent erected without guying it out...

Страница 8: ...the stake bag to take care of this potential inconvenience Lay the tent and fly out flat Apply seam sealer to all seams of the coated nylon portions that may be exposed to water Draw the tube of seale...

Страница 9: ...cs zippers sliders and poles in stock If you loose or damage any part of the tent give us a call WARNING ARCTIC OVEN TENTS The fabric used in the construction of the tent is Fire Retardant NOTE Fire R...

Отзывы: