Arctic Oven 10 X 20 Instructions www.alaskatent.com
November 5, 2003 Page 2 of 9
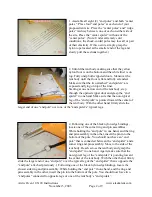
1. Assemble all eight (8) “end poles” and both “center
poles “. Place four “end poles” at each end of your
proposed tent site. Place the “center poles” and “ridge
poles” midway between, one of each on either side of
the site. Place the “center spider” with one of the
“center poles”. (Note: Under extremely cold
conditions, the shock-corded poles may lose all or part
of their elasticity. If this occurs, simply grasp the
nylon rope located at the smaller end of the leg and
slowly pull the sections together.)
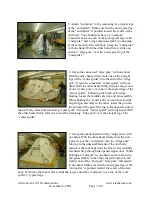
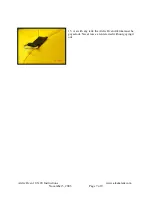
2. Unfold the tent body making sure that the yellow
nylon floor is on the bottom and the white liner is on
top. Fully unzip both zippered doors. Maneuver the
tent body until the floor is flat and fully extended.
Make sure that the two attached “end spiders” are
exposed and lying on top of the liner.
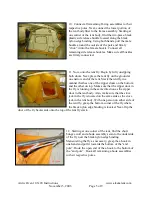
Starting at one narrow end of the tent body, step
through the opened zipper door and grasp the “end
spider” in one hand. Make sure that the non-typical
leg of the “end spider” is pointed toward the center of
the tent body. With the other hand, firmly slide the
larger end of one “end pole” over one of the “end spider’s” typical legs.
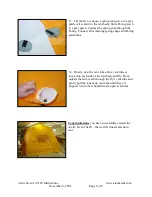
4. Following one of the black nylon edge bindings,
locate one of the corner ring and pin assemblies.
While holding the “end pole” in one hand, and the ring
and pin assembly in the other, insert the pin into the
bottom of the pole. You should now have an “end
pole” that is connected between the “end spider” and a
corner ring and pin assembly. Move to the side of the
tent body.
Reach across the tent body and grasp the
“end spider” in one hand. Again, make sure that the
non-typical leg of the “end spider” is pointing toward
the center of the tent body. With the other hand, firmly
slide the larger end of one “end pole” over the typical leg of the “end spider” that is opposite the
“end pole” attached previously.
)
Following one of the black nylon edge bindings, locate the
closest side ring and pin assembly. While holding the “end pole” in one hand, and the ring and
pin assembly in the other, insert the pin into the bottom of the pole. You should now have two
“end poles” connected to opposite legs of one of the tent body’s “end spiders”.


