Page 8
Nozzle Installation
The nozzle should be threaded onto the outlet of the monitor. Place the pattern actuator in a position that does not
stretch the power cord, and then tighten the swivel.
Verify that the actuator orientation does not interfere with
the monitor.
Controller Box Installation
This monitor is used with a 6032 Universal II Controller. It normally mounts on or below the deck and must be mounted
close enough to the monitor so that the 10 foot cable of the monitor wiring harness has sufficient slack to allow the
monitor to travel through its full rotational range. Refer to the “6032 Universal II Controller Installation, Operation &
Maintenance Manual” (part number 122552) as a guide.
Do not extend the monitor wiring harness.
Electrical Installation Instructions
Make the I/O and power connections to the 6032 controller and then plug the monitor harness into the controller. Refer
to the “6032 Universal II Controller Installation, Operation & Maintenance Manual” (part number 122552) as a guide
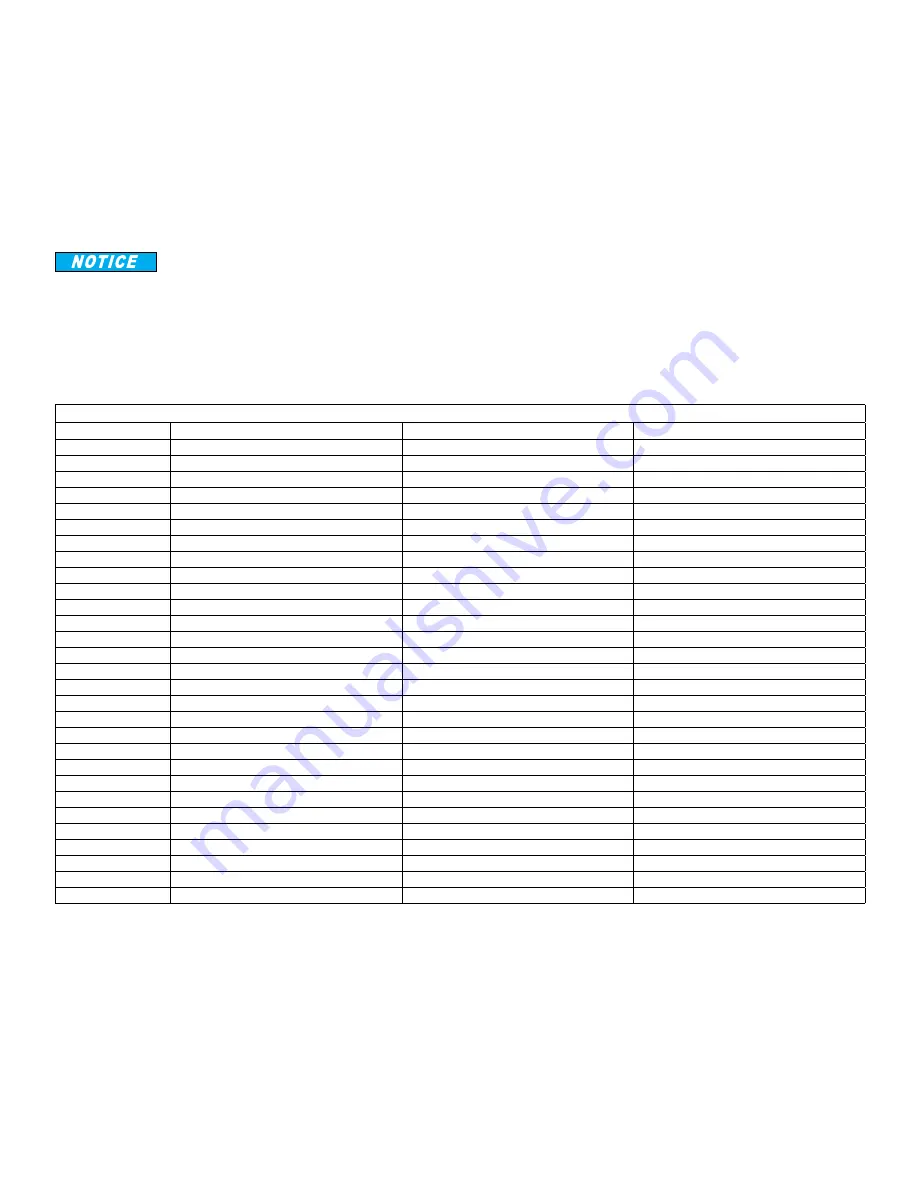
Harness 721582 for Power & Signal Connector J1 on Controller
Contact Position
Function
Comments
Wire Color & Size
1
Power In – Vehicle Battery (+12/24 VDC)
Red – 12 AWG
2
Power In – Vehicle Battery (−)
Black – 12 AWG
3
Power In – Auxiliary Battery (+12/24 VDC)
(Optional)
Green – 12 AWG
4
Power In – Auxiliary Battery (−)
(Optional)
Black – 12 AWG
5
Output – H-Bridge #5A
Red – 16 AWG
6
Output – H-Bridge #5B
Black – 16 AWG
7
Output – Logic #1
Panel LED
Brown – 16 AWG
8
Output – Logic #2
Discharge
Red – 16 AWG
9
Output – Logic #3
Orange – 16 AWG
10
Output – Bi-stable Relay Common
Yellow – 16 AWG
11
Output – Bi-stable Relay N.O.
Green – 16 AWG
12
Output – Bi-stable Relay N.C.
Blue – 16 AWG
13
Input – Switch #1 (System Enable)
Brown – 18 AWG
14
Input – Switch #2
+ Right / Left -
Red – 18 AWG
15
Input – Switch #3
+ Up / Down -
Orange – 18 AWG
16
Input – Switch #4
+ Stream / Fog -
Yellow – 18 AWG
17
Input – Switch #5
+ Valve Open / Close -
Green – 18 AWG
18
Input – Switch #6
+ Gallonage High / Gallonage Low -
Blue – 18 AWG
19
Input – Switch #7
+ Oscillate Set / Pause -
Violet – 18 AWG
20
Input – Switch #8
+ Deploy / Stow -
Gray – 18 AWG
21
Input – Switch #9
+ Aux Agent 2 / Aux Agent 1 -
White – 18 AWG
22
Power Out – Peripheral (+12/24 VDC)
Powers the System Enable (#13)
Brown – 18 AWG
23
Data – J1939 CAN High (+)
Yellow – 18 AWG
24
Data – J1939 CAN Low (−)
Green – 18 AWG
25
Power Out – Peripheral (−)
Drain – 18 AWG
26
Data – Proprietary CAN High (+) (Unused)
Sealing Plug
27
Data – Proprietary CAN Low (−) (Unused)
Sealing Plug
28
Data – V-Mux Com A (+) (Unused)
Sealing Plug
29
Data – V-Mux Com B (−) (Unused)
Sealing Plug
Table 1 – Power & Signal Harness Connections


