


C o p y r i g h t
© 2013
a J i l e S y s t e m s , I n c . A l l r i g h t s r e s e r v e d .
5
aJ-Orion User Manual
7
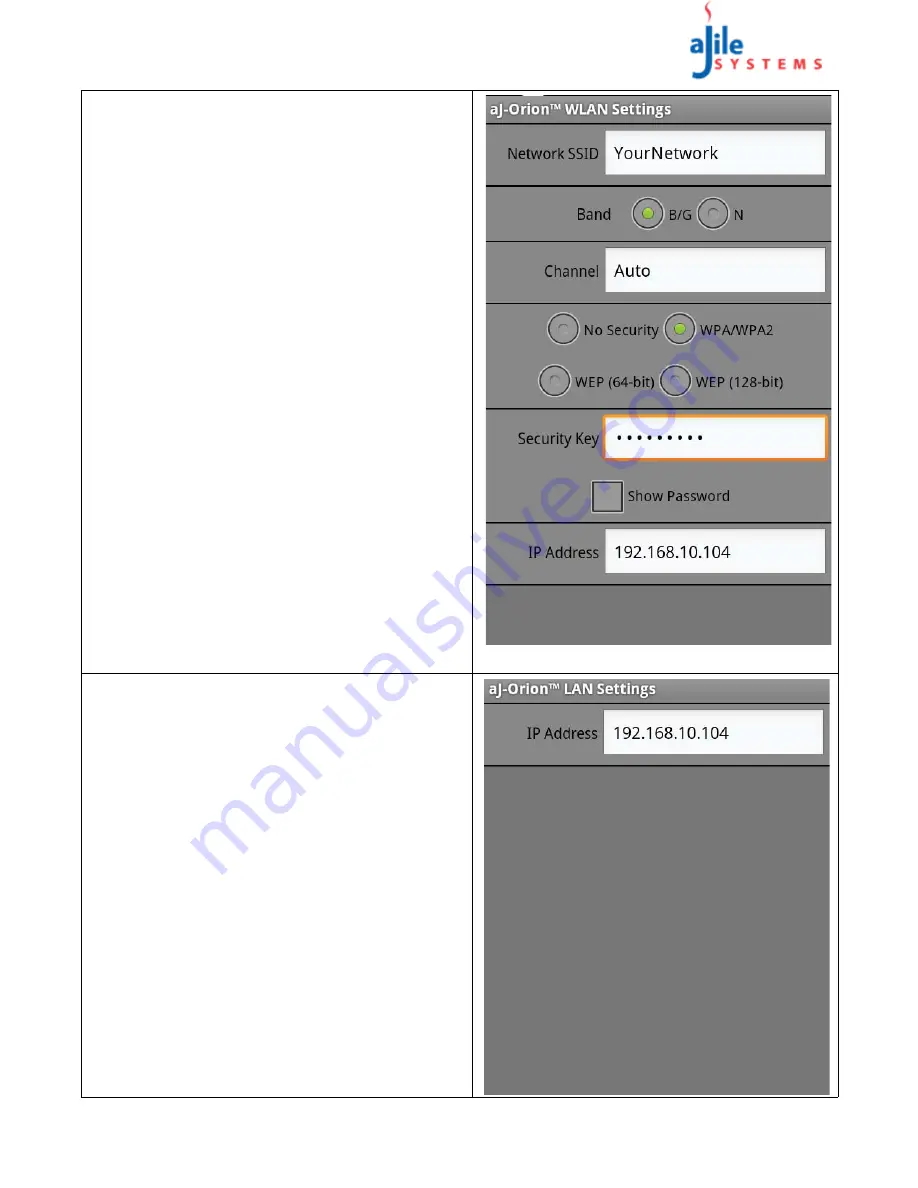
If “
WLAN
” network connection is selected then the
current WLAN configuration fields are displayed as
shown at the right.
The smart phone’s current WLAN configuration
settings can be retrieved via opening the application
menu and selecting the “
Import Settings
” option.
Note that if the Wi-Fi network has security
enabled, the “
Security Key
” field must be entered
manually
.
NOTE: Only AES encryption is supported.
8
The “
IP Address
” field is automatically filled in with
an available static IP address that can be modified as
needed.
Note that the router may need to be
configured to allow port forwarding to this address
(see Section A.2.2. Streaming video port
forwarding)
.
9
The configuration settings can be verified via opening
the application menu and selecting the “
Verify
Settings
” option. The phone will temporarily disable
its current WLAN connection and attempt to establish
connection with the access point using the specified
WLAN configuration settings.
NOTE: This optional step may take several minutes
for the phone to change connections. After the
settings have been tested, the original WLAN
configuration will be restored.
Proceed to step 11 to setup the aJ-Orion device.
10
If “
LAN
” network connection is selected then the
current LAN configuration fields are displayed as
shown at the right.
The “
IP Address
” field is automatically filled in with
an available static IP address that can be modified as
needed.
Note that the router may need to be
configured to allow port forwarding to this address
(see Section A.2.2. Streaming video port
forwarding)
.


