


Step 1:
Find the
Internet Protocol (TCP/IP) Properties
from the
My
Network Places
and check the
Properties of Local Area Network
Connection
. And click the “
General
” icon and assign one
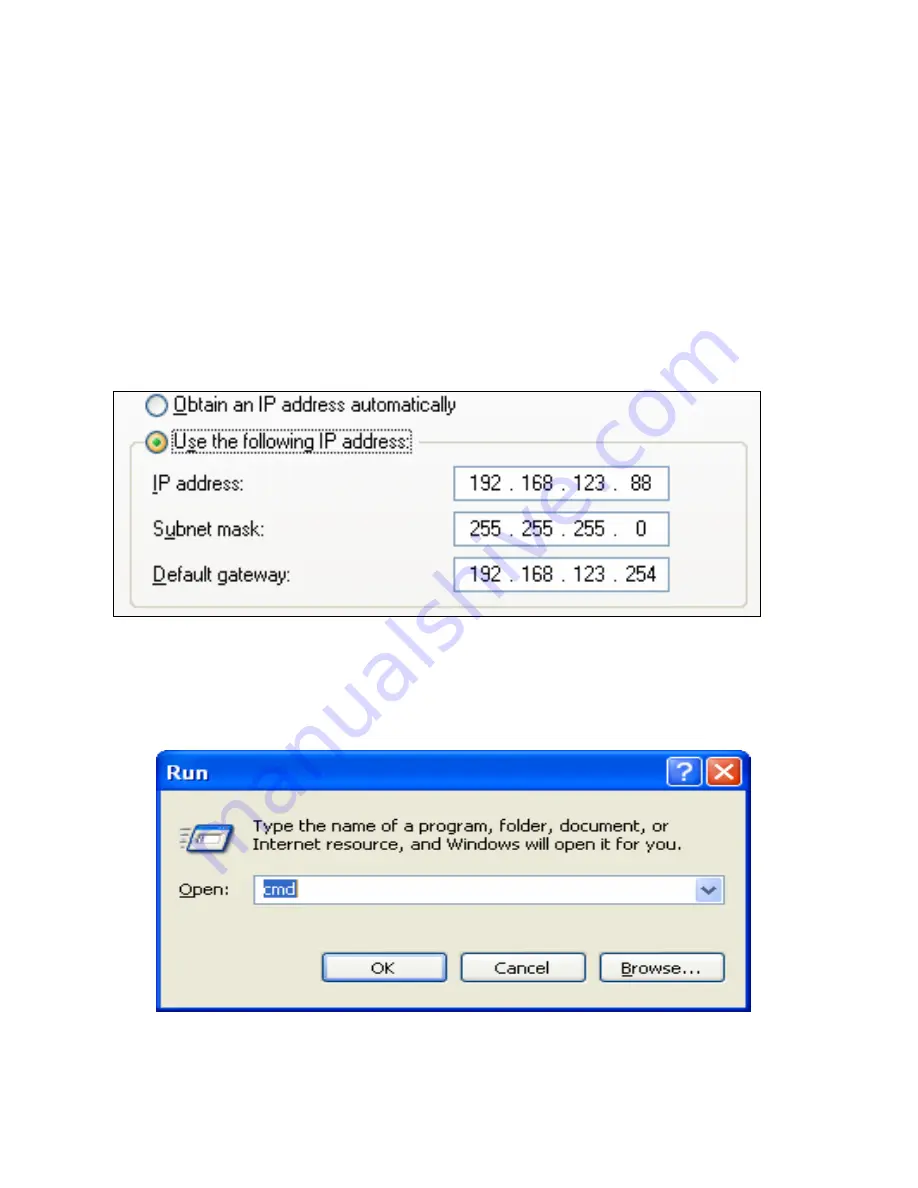
IP address
which
can be from 192.168.123.1 to 192.168.123.253. Here we use the
192.168.123.88 as the IP address. The
Subnet mask
must be
255.255.255.0, and the
Default gateway
must be 192.168.123.254. Then
click
“OK”
button to complete TCP/IP setup.
Step2:
Open the DOS command from the
Start Menu->Run,
and type
“cmd”
then click
OK
.
AirLive WMU-6000FS User’s Manual
21
Содержание WMU-6000FS
Страница 1: ...1 User s Manual Portable Wireless AP Storage WMU 6000FS ...
Страница 62: ...5 Select Custom then click Settings AirLive WMU 6000FS User s Manual 62 ...
Страница 64: ...AirLive WMU 6000FS User s Manual 64 7 Apply your settings ...
Страница 66: ...2 Click New Forward AirLive WMU 6000FS User s Manual 66 ...
Страница 67: ...AirLive WMU 6000FS User s Manual 67 omments then forward 3 Enter the Pinter Name C ...
Страница 71: ...7 3 Apple OS 1 First go to Printer center Printer list and add printer AirLive WMU 6000FS User s Manual 71 ...
Страница 83: ...Figure 2 Enable IEEE 802 1X access control AirLive WMU 6000FS User s Manual 83 ...
Страница 85: ...Figure 4 Certificate information on PC1 Figure 5 Authenticating AirLive WMU 6000FS User s Manual 85 ...