AirLive SNMP-FSH2602MG User’s Manual
4
2
Installation of the Switch
This chapter provides the detailed instructions for installation of the switch. For concise
installation instruction, the previous chapter’s “Quick Setup” section provides all the
important information including IP address, password, and LED table for user’s reference.
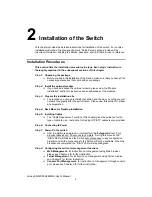
Installation Procedures
This section lists the installation procedures in steps. Each step’s instruction is
thoroughly explained in the subsequent sections of this chapter.
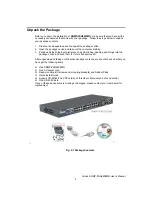
Step 1:
Unpacking the package
Before you begin the installation of the
Switch, make sure that you have all the
necessary accessories that come with your package
Step 2: Install the optional module
If you have purchased the optional module, please view the “Module
Installation” section for instruction and specifications of the modules.
Step 3:
Prepare the installation site
The location you choose to install your switch and the way you configure your
network may greatly affect its performance. Please view this section for proper
site preparation
Step 4: Rack Mount or Desktop Installation
Step 5:
Installing Cables
The “Cable Requirement” section of this chapter gives the guidance for the
type of cable to use. Instruction for making UTP/STP cables is also provided.
Step 6:
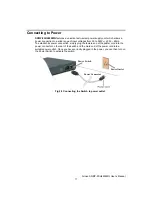
Connecting to Power
Step 7:
Power-On the switch
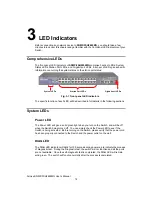
After the Switch is powered on, it will perform “
self-diagnostic
” test. This
process takes about 100 seconds to complete. During this process, the
“DIAG” LED will blink and the Switch will not response to any configuration
program and all the connections to the Switch will not be available. When the
processed is completed, the “DIAG” LED will stay solid green.
Step 8:
Configuring the switch for management functions
Web Management
: for instruction on management using Web browser,
please see Chapter 4 for further instruction.
Telnet Management
: for instruction on management using Telnet, please
see Chapter 5 for further instruction.
Console Port Management
: for instruction on management through console
port, please see Chapter 5 for further instruction.
Содержание SNMP-FSH2602MG
Страница 34: ...AirLive SNMP FSH2602MG User s Manual 22 ...
Страница 83: ...AirLive SNMP FSH2602MG User s Manual 71 In the Edit Delete a VLAN Group page the result of sorted by VID ...
Страница 132: ...AirLive SNMP FSH2602MG User s Manual 120 Result 1 PC 0 can access both PC 01 and PC 02 ...
Страница 133: ...AirLive SNMP FSH2602MG User s Manual 121 2 PC 0 can only access PC 02 only PC 01 will not reply ...

