Aigo P8131 Скачать руководство пользователя страница 17


Caution:  
 
1. ensure the correct input connection and channel selecion;  
2. make sure that the system time is set correctly, for system time settings reffer to 5.9.3;  
3. make sure that there is no power interruption during the recording, standby mode is not available after the 
recording has been scheduled.  

 
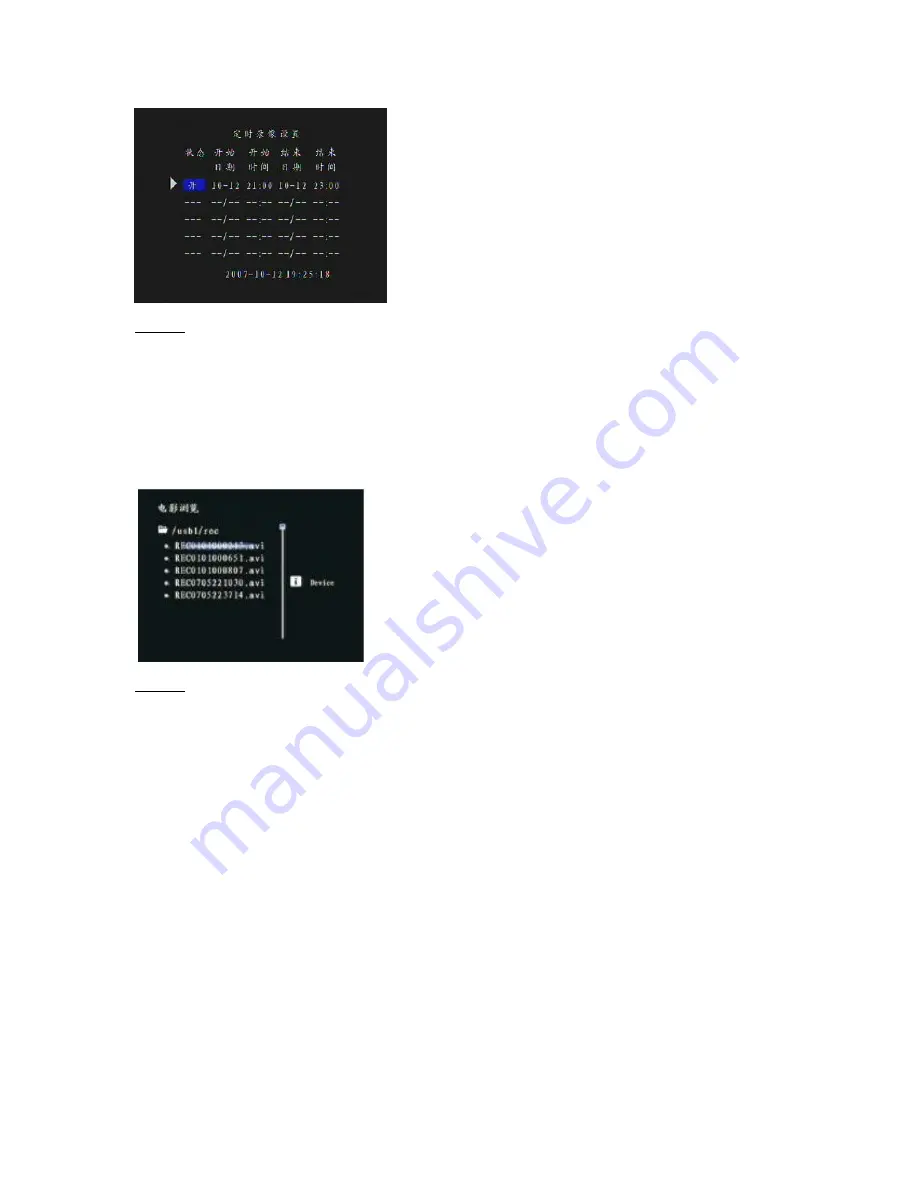
5.5.6 Playback of Recording  
     In the main Recording Menu locate the "Recorded Programms" folder and press Play (17) to enter the 
Recording interface. The interface is shown below:  


Caution:  
 
Recorded files stored in the selected drive directory REC folder set in recording settings. Select a local disk 
and locatethe recorded file in Local Disk 1 \ REC folder.


5.6 Using the Time Shift function 
 

PVR P8131 support Time Shift recording, the longest shift period allowed is 30 minutes.  
Time Shift recording allows to suspend TV program while watching television through PVR P8131. You can 
return later any time to watch the suspended programm at your convinience. This allows you to watch TV 
the same way you watch DVD, suspending the TV programs as you wish.  
Note: When you return to the regular television broadcast within 30 minutes you return to view the 
programme at the point in time before you activated the Time Shift. If you left the Time Shift active for more 
then 30 minutes and for example paused the broadcast at 9:00 and resumed watching at 9:40, the 
broadcast you return to will be a 9:10 programm broadcast.   

 
5.6.1 Setting up the Time Shift 
 

First of all use the TV or digital TV set-top boxe AV output to connect to PVR P8131 AV input.  
In the main Menu locate "Time Shift TV" and press Play (17) button to access the Time Shift TV features.  
Access to Time Shift feature interface is shown on the diagram below:  
 

Содержание P8131

Страница 1: ...eries inserted 4 Quick Start In this part we will explain how to use the mani functions of PVR 8131 4 1 Power up Press the Power button on the bottom right corner of the front panel for about one seco...

Страница 2: ...fault settings separates the built in hard drive into two FAT32 partitions if the product capacity is 250 GB the display will show two separate hard drives Local Hard Drive 1 about 117 G and Local Har...

Страница 3: ...urn to the Music browser interface This is the Music Playback interface 4 7 Image Playback Entered the Photo section using the browser and locate the images you would like to play back when the cursor...

Страница 4: ...recording the upper right corner shows Video This is the Instant Recording interface Press Exit 19 to stop video recording and save the video file 4 8 2 Regular Recording Caution before using the adv...

Страница 5: ...nd paste it into the current document level directory Set as background music set the current file or folder as a background audio for image playback Only allows to set background music for image file...

Страница 6: ...press Play 17 to confirm When prompted Are you sure that you want to delete this directory and subdirectories choose Yes and press Play 17 to confirm Caution be carefull when deleting files folders y...

Страница 7: ...During playback press the volume volume key 9 10 on the remote control to increase decrease the volume between level O and level 30 the default volume setting is 24 When you press the volume volume bu...

Страница 8: ...he Chapter sign will be displayed in the top right corner for 10 seconds 5 2 7 Changing channels During playback press the Channel 22 button on Remote Control to switch channels Every time the button...

Страница 9: ...utton on the Remote Copntrol to view the current file information Every time you press the Information 2 button the information message will pop up and remain on the screen for five seconds The follow...

Страница 10: ...o keep fast forwarding rewinding the fle To increase the fast forward and rewind by 2 x 4 x 8 x and 16 x press the button repeately to cycle between different speeds To return back to playback during...

Страница 11: ...layback modes available The interface is shown below 5 3 6 Mute volume During playback press the Mute 4 button to mute the volume When you press the mute 4 button the audio track is muted and the mute...

Страница 12: ...return to manual playback mode Overview mode the screen will display 9 images at a time with three images located in three rows 5 4 3 Zooming in During manual playback press Zoom 8 button to enlarge...

Страница 13: ...n and confirm During image playback press the Background Music 3 button to enable disable background music The interface and operation are shown below Caution 1 Background music can only be used with...

Страница 14: ...select Instant Recording and press Play 17 button to start the instant video recording The interface is shown below 5 5 3 Video settings Select video settings and press Play 17 button to enter the vi...

Страница 15: ...ot to save the settings Choose yes to save and exit Choose no to exit without saving the changes The interface is shown below 5 5 4 Video Recording Select Video Recording and press Play 17 button to s...

Страница 16: ...interface select Scheduled Recording and press Play 17 button to access the recording interface Scheduled Recording function can be set to five hours In Recording interface the recorder provides addit...

Страница 17: ...owed is 30 minutes Time Shift recording allows to suspend TV program while watching television through PVR P8131 You can return later any time to watch the suspended programm at your convinience This...

Страница 18: ...will automatically disappear Caution It takes 15 seconds for the system to enter the Time Shift mode The interface is shown below Time Shift interface after 10 seconds of playback 5 6 3 Suspending TV...

Страница 19: ...can can connect to the recorder to copy data Follow the steps 1 Connect power cable 2 Connect USB cable cable to PVR P8131 and connect it to PC 3 Press the Power button 4 After the Computer link mess...

Страница 20: ...nly responds to USB menu operation when in main Menu and in File Browser 6 Depending on fragmentation of data on USB device and size of the content it takes 3 15 seconds to access the data 5 8 Using S...

Страница 21: ...languages Use the left right 15 16 buttons to change the current selection press Exit 19 to exit the language settings menu and confirm the pop up message to save your selection The interface is show...

Страница 22: ...firm the pop up message to save your selection The interface is shown below 5 9 5 Display settings Here you can change the display settings for the video output of your connected display Recorder supp...

Страница 23: ...your selection 5 9 7 1 Firmware upgrade PVR P8131 supports firmware upgrades you can download the latest firmware from manufacturer s website and use it to enhance the recorder Follow the steps to pe...

Страница 24: ...PVR P8131 support format function to format the built in hard drive formatted and both partitions Follow the steps to format the hard drive 1 Choose the hard drive you wish to format press Play 17 and...

Страница 25: ...ilm while other video files requires 700 MB or more also allowing for RMVB embedded Subtitles unlike other video formats which require to download the subtitles as plug in text documents and sometimes...

Страница 26: ...e open the Settings menu in System folder select Format the hard drive press confirm button and the recorder will be formatted It is not ecommended to use Wndows or any other third party software to f...

Отзывы: