


150mm+-2
105
mm+-2
105
mm+-2
26
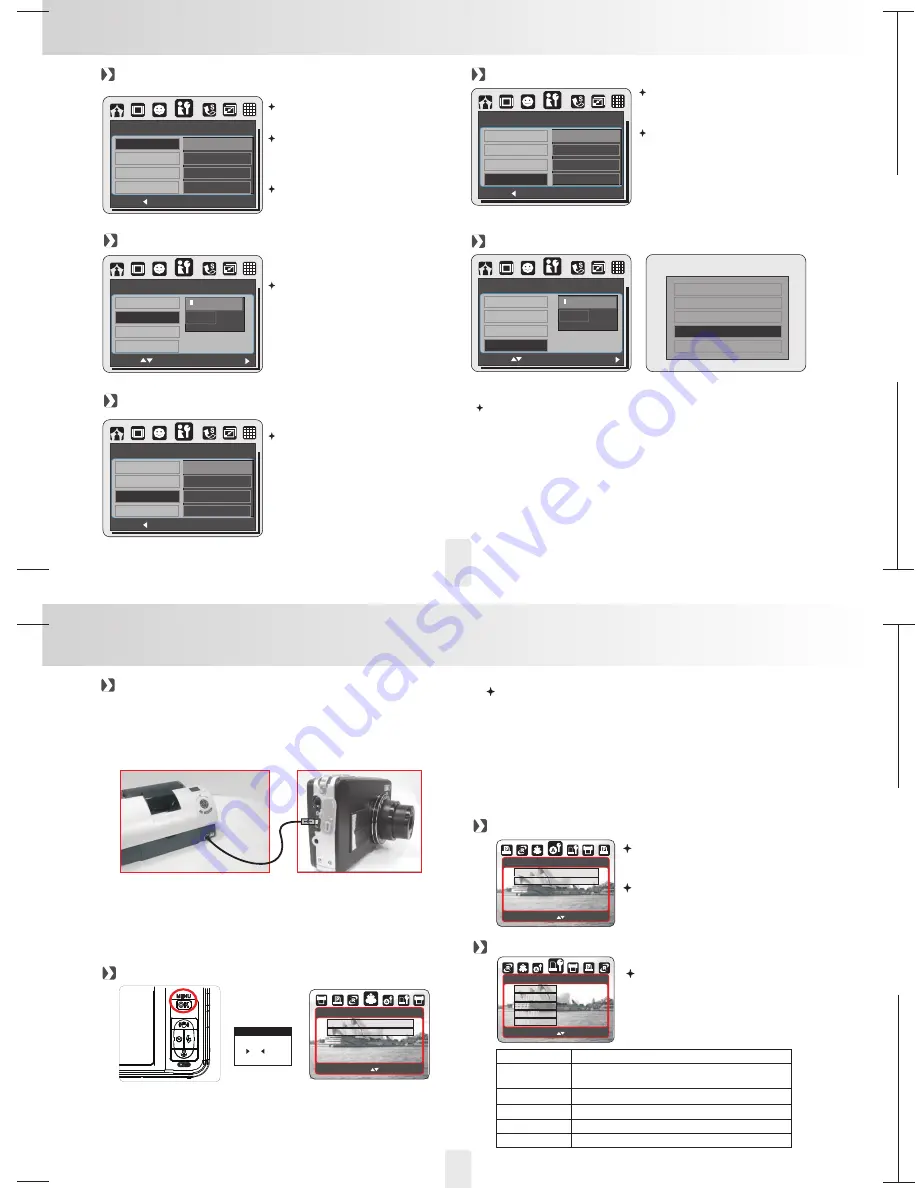
SETUP Setting
FILE (Default: SERIES)
SETUP
BACK:
SET:OK
FILE
SERIES
RESET ALL
RESET
USB
VIDEO
This setting allows you to name the
files.
If RESET is selected, the next file
name will be set from 0001 even after
formatting, deleting all, or inserting a
new memory card.
If SERIES is selected, the file name
will directly follow the latest stored file
name instead.
USB (Default:COMPUTER)
NTSC:
PAL:
U.S.A. Canada, Japan, South,
Korea Taiwan, Mexico.,
Australia, Austria, Belgium, China,
Denmark, Finland, Gemany,U.K.,
Nolland,Italy, Kuwait, Malaysia,
NewZealand, Singapore, Spain,
Sweden, Switaerland, Thailand,
Norway.
RESET ALL (Default:No)
With the connection of the printer for
PictBridge function, you have to
select the option of printer for
correct driver support.
SETUP
FILE
RESET ALL
USB
VIDEO
NO
YES
This option provides the function of
recalling all default values except the
Date, Time, Language, and Video Out.
VIDEO
SETUP
BACK:
SET:OK
FILE
COMPUTER
RESET ALL
PRINTER
USB
VIDEO
SETUP
BACK:
SET:OK
FILE
NTSC
RESET ALL
PAL
USB
VIDEO
FORMAT(Default:No)
Note:
All the data stored in the memory card or flash memory will be
deleted after the formatting.
This function allows you to format the memory card or the
built-in flash memory.
SETUP
RESET ALL
USB
VIDEO
FORMAT
MOVE :
CHANGE:
AUTO SET
MOVE:
AUTOSET
NO
YES
1.Select [ONE PIC] or [ALL PICS]. A screen where you can set
the number of copies to print will appear as shown above.
2. Press the Up/Down Button to select the number of prints.
Maximum 30 prints.
3. Use the Left/Right Button to select another picture and select
the number of prints for another picture.
4. After setting the number of prints, press the Menu/OK Button
to save.
5. Press the Shutter Button to return to the menu without setting
the number of prints.
Setting the Number of Copies to Print
[YES]: All values in the [CUSTOM
SET] are automatically changed.
[NO]: [CUSTOM SET] values are
kept.
CUSTOM SET
MOVE:
CUSTOM SET
SIZE
AUTO
LAYOUT
AUTO
TYPE
AUTO
QUALITY
AUTO
DATE
AUTO
You can select the Paper Size,
Print Format, Paper Type, Print
Quality, Date Print, and File Name
Print menus for printed pictures.
Sets the size of the printing paper
Sets the number of pictures to be printed
on a sheet of paper
Sets the type of the printing paper
Sets the quality of the picture to be printed
Sets whether to print the date
Sets whether to print the file name
SIZE
LAYOUT
QUALITY
DATE
FILE NAME
TYPE
PICTBRIDGE MODE
1. Have both the camera and the printer powered on.
2. Press the Menu/OK Button to go to SETUP Mode.
3. Go to USB and select PRINTER for printer connection.
4. Use the supplied USB cable to connect the camera to the
PictBridge-supported printer as shown above.
Select pictures to print
[ONE PIC]: The PictBridge function will be applied only
to the picture currently displayed.
[ALL PICS]: The PictBridge function will be applied to
all pictures.
MOVE:
IMAGES
ONE PIC
ALL
If the printer you have supports the interface of PictBridge,
then you can have your camera connected with the printer
by the supplied USB cable to have the stored images print
out directly.
PictBridge Mode
27
1. OK / MENU
2.
or
3. OK / MENU
Operation Steps
NO
YES
MOVE:
CHANGE:
ALL IMAGES WILL
BE ERASED!
FORMAT
CANCEL
CONFIRM:OK


