


150mm+-2
105
mm+-2
105
mm+-2
23
22
Playback Mode
MOVE :
DELETE
ONE
ALL
EXIT:MENU
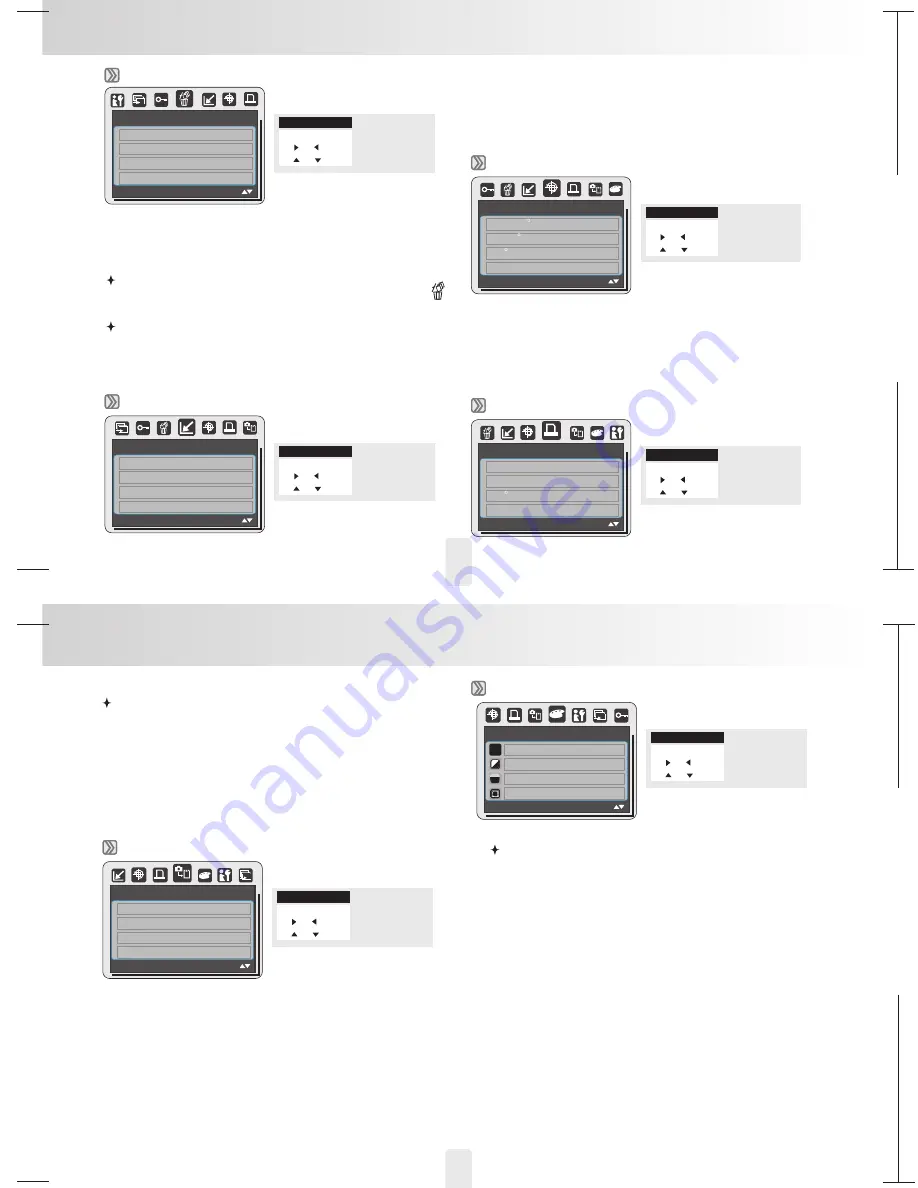
Delete
P
You can delete the selected image(s) or all images with this function.
Please press OK/Menu Button and choose "DELETE" and following the
steps below.
Delete Single Image
1. Select the image you'd like to delete and press the Delete Button (
).
2. Select "YES" to proceed or select "NO" to cancel the request.
Delete All Image(s)
1. Choose "ALL" and press the OK/Menu Button.
2. Choose "YES" to confirm the deleting request or choose "NO"
to cancel the request. Press the OK/Menu Button again to proceed.
Operation Steps
1. OK / MENU
2.
or
3.
or
Resize
MOVE :
RESIZE
2560x1920
2048x1536
1600x1200
1024x768
EXIT:MENU
Operation Steps
1. OK / MENU
2.
or
3.
or
P
This function allows you to resize a still image.
1.Choose the image you would like to resize.
2.Press OK/Menu Button and choose "RESIZE"..
3.Choose the image size you prefer and press OK/Menu Button
to confirm.
4.The resized image will be stored as a new image.
Rotate
MOVE :
ROTATE
RIGHT 90
LEFT90
180
HORIZONTAL
EXIT:MENU
Operation Steps
1. OK / MENU
2.
or
3.
or
P
With this setting you can rotate the image RIGHT 90 ,
LEFT 90 , 180 , HORIZONTAL and VERTICAL.
1.Choose the image you would like to rotate.
2.Press OK/Menu Button and choose "ROTATE".
3.Choose the rotation you prefer and press OK/Menu Button.
4.The image after rotation will be stored as a new image.
o
o
o
DPOF
MOVE :
DPOF
STANDARD
00PICS
INDX
NO
PRINT SIZE
DEFAULT
CANCEL
STANDARD
EXIT:MENU
Operation Steps
1. OK / MENU
2.
or
3.
or
P
This function can only be used when a memory card is inserted.
This option allows you to put the print quantity (MAX. 30 pcs) on your
memory card.
[ONE PIC] - specifies the number of copies for a selected
[ALL PICS] - specifies the number of copies for all pict
You cannot see the "PRINT" function on the TFT LCD Monitor if a
memory card is not inserted.
Note:
image and you
can press LEFT/RIGHT Button to go to next image.
ures apart from
movie clips and voice recording files.
COPY TO CARD
MOVE :
COPY TO CARD
NO
YES
EXIT:MENU
Operation Steps
1. OK / MENU
2.
or
3.
or
P
This function allows you to copy the images stored in the internal
flash memory into the memory card.
EFFECT
MOVE :
EFFECT
EXIT:MENU
Operation Steps
1. OK / MENU
2.
or
3.
or
P
NOR
NORMAL
B & W
SEPIA
NEGATIVE
This function allows you to set an image with special effect.
1.Choose the image you would like to set with a special effect.
2.Press OK/Menu Button and choose "EFFECT"..
3.Choose the special effect you prefer and press OK/Menu Button.
4.The image with the special effect will be stored as a new image.
Playback Mode


