


Chapter 5: Playback
48
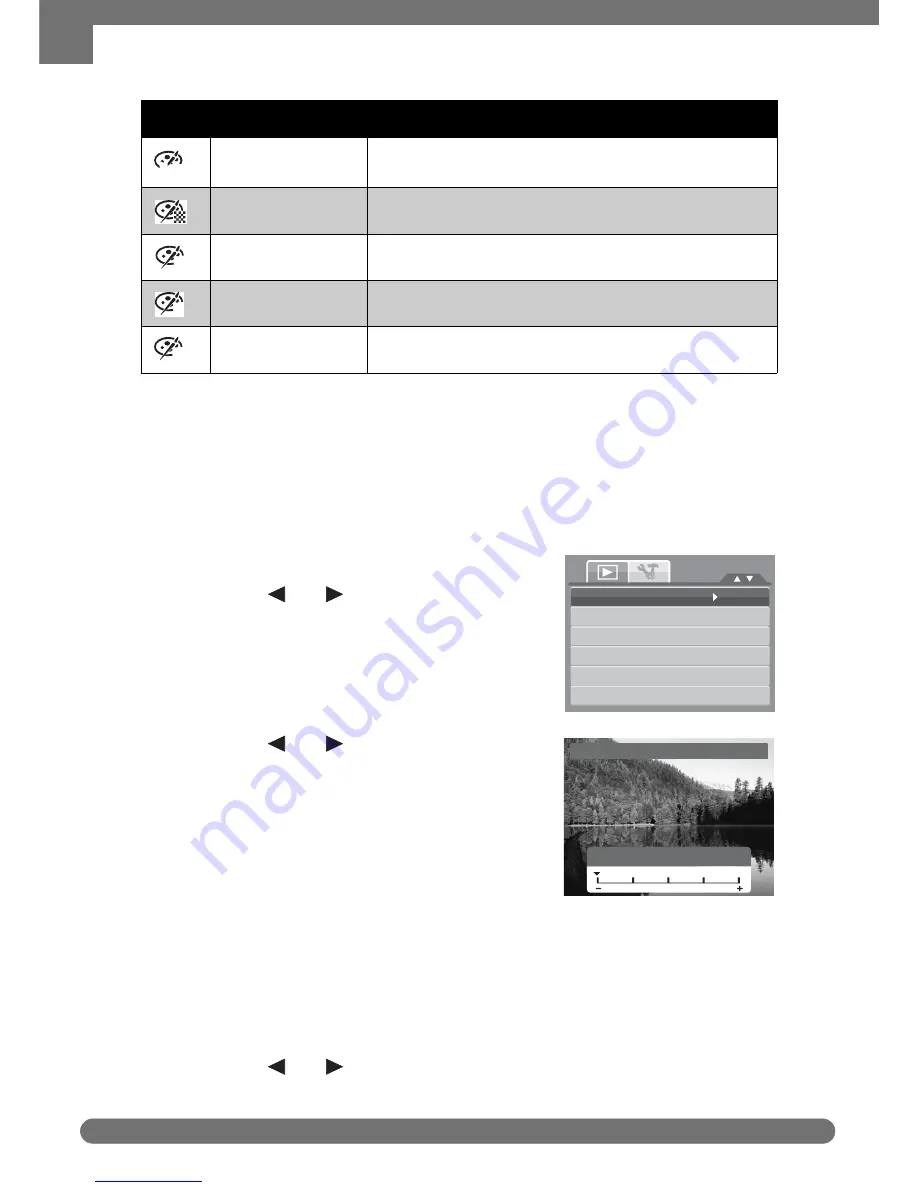
Playback Menu
6. Press the SET button to save the new file.
Z-Lighting
The Z-Lighting function allows you to manually adjust the exposure to compensate
for inadequate lighting conditions. This function is only applicable for still images.
The edited image is saved as a new file.
To adjust Z-Lighting:
1. Set the camera to Playback mode.
2. Press the
keys to scroll and select
an image to adjust lighting.
3. Press the MENU button to launch the
Playback menu.
4. Select Z-Lighting. The Z-Lighting menu
appears on the screen.
5. Press the
keys to increase/
decrease the value. As you adjust the
settings, the LCD monitor synchronously
displays the image applying the new settings.
• The available settings are: 0.0, 1.0, 2.0,
3.0, and 4.0.
6. Press the SET button to save and apply
changes.
Rotate
The Rotate function lets you change the orientation of a saved photo. This function
in only available for still images. Rotated images are saved as a new file.
To Rotate an image:
1. Set the camera to Playback mode.
2. Press the
keys to scroll and select an image to rotate.
Negative
Image appears to be the opposite of the original
image.
Mosaic
Image is saved with mosaic tiles.
Vivid Red
Image is saved with reddish tint.
Vivid Green
Image is saved with greenish tint.
Vivid Blue
Image is saved with bluish tint.
Icon
Item
Description
Neg.
R
G
B
Z
-
Lighting
Rotate
Trim
Resi
z
e
Startup
Image
DPOF
or
Z
-
Lighting
0.0EV
or
or
Get user manuals:


