Copyright
No part of this publication may be reproduced, stored in a retrieval system, or
transmitted in any form or by any means, electronic, mechanical, photo-static, recording
or otherwise, without the prior written consent of the manufacturer.
Trademarks
All products and trade names used in this document are trademarks or registered
trademarks of their respective holders.
Changes
The material in this document is for information purposes only and is subject to change
without notice.
Warning
1. A shielded-type power cord is required in order to meet FCC emission limits and also
to prevent interference to the nearby radio and television reception. It is essential
that only the supplied power cord be used.
2. Use only shielded cables to connect I/O devices to this equipment.
3. You are cautioned that changes or modifications not expressly approved by the
party responsible for compliance could void your authority to operate the equipment.
Disclaimer
AIC® shall not be liable for technical or editorial errors or omissions contained herein.
The information provided is provided "as is" without warranty of any kind. To the extent
permitted by law, neither AIC® or its affiliates, subcontractors or suppliers will be liable
for incidental, special or consequential damages including downtime cost; lost profits;
damages relating to the procurement of substitute products or services; or damages
for loss of data, or software restoration. The information in this document is subject to
change without notice.
Instruction Symbols
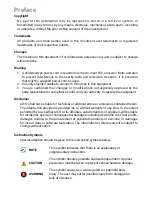
Special attention should be given to the instruction symbols below.
NOTE
This symbol indicates that there is an explanatory or
supplementary instruction.
CAUTION
This symbol denotes possible hardware impairment. Upmost
precaution must be taken to prevent serious harware damage.
WARNING
This symbol serves as a warning alert for potential body
injury. The user may suffer possible injury from disregard or
lack of attention.
Preface
Содержание RSC-2ETS
Страница 1: ...UM_RSC 2ETS_v1 3_030921 RSC 2ETS Rackmount Chassis User s Manual...
Страница 21: ...13 Chapter 2 Hardware Setup Lift up and remove the blackplane to the a little bit up from hook then can get out...
Страница 23: ...15 Chapter 2 Hardware Setup Release and detach the inner rail from the slide P U S H 1 2 6 Slide Rail...
Страница 25: ...17 Chapter 2 Hardware Setup Attach outer rail to the rack L O C K P U S H A L I G N 3...
Страница 35: ...27 Chapter 3 Hardware Specifications 3 1 6 Drive Slot Map...


