INSTALLAZIONE
4
INSTALLATION
REF
4-5
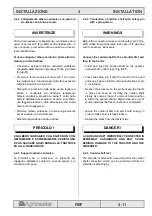
4.1.2 Collegamento tre punti
Assicurarsi che la trinciatrice sia posizionata su di un
terreno piano.
Personale richiesto: 1 OPERATORE
Collegare i tre punti di fissaggio della trinciatrice alla
trattrice nel modo seguente:
• Collegare i punti d’attacco (Fig.
4-3
) ai bracci del
sollevatore della trattrice (Fig.
4-4
).
• Collegare il terzo punto (Fig.
4-3
) alla trattrice (Fig.
4-5
).
Assicurarsi che i collegamenti dei tre punti alla
trattrice siano eseguiti correttamente. In particolar
modo le spine, dopo essere state inserite, devono
essere bloccate dalle copiglie di sicurezza (Fig. 4-4
e 4-5).
• Mettere in tensione il braccio terzo punto avvitan-
dolo (Fig.
4-6
).
• Non utilizzare la trinciatrice collegata come indicato
in Fig.
4-7
.
ATTENZIONE
4.1.2 Three-point-hitch
Make sure the shredder is positioned on a flat ground.
Required staff: 1 OPERATOR
Connect the three linkage points as follows:
• Connect the connection points (Fig.
4-3
) to the trac-
tor lift arms (Fig.
4-4
).
• Connect the third point (Fig.
4-3
) to the tractor (Fig.
4-5
).
Make sure that the three points are properly con-
nected to the tractor. It is essential that the pins,
once they have been installed, are secured by
means of the cotter pins (Fig. 4-4 and 4-5).
• Screw in and tighten the 3rd point arm (Fig.
4-6
).
• Do not connect the shredder as shown in Fig.
4-7
.
CAUTION
Содержание REF 160
Страница 10: ......
Страница 16: ...CARATTERISTICHE 2 DESCRIPTION 2 2 REF Fig 2 1 Trinciatrice REF Shredder REF ...
Страница 22: ......
Страница 24: ...SOLLEVAMENTO 3 LIFTING 3 2 REF Fig 3 1 Sollevamento Lifting ...
Страница 26: ......
Страница 38: ......
Страница 42: ...SISTEMI DI SICUREZZA 5 SAFETY SYSTEMS 5 4 REF Fig 5 4 Componenti di sicurezza Safety devices 1 3 2 ...
Страница 44: ......
Страница 46: ...USO 6 USE 6 2 REF Fig 6 1 Regolazione ruote Wheels 2 1 Fig 6 1 Regolazione ruote Wheels adjustment ...
Страница 62: ......
Страница 64: ......
Страница 66: ......
Страница 68: ......


