


78
Chapter 5: Troubleshooting
To test the cables
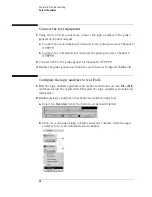
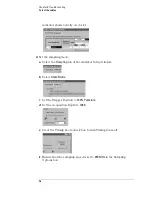
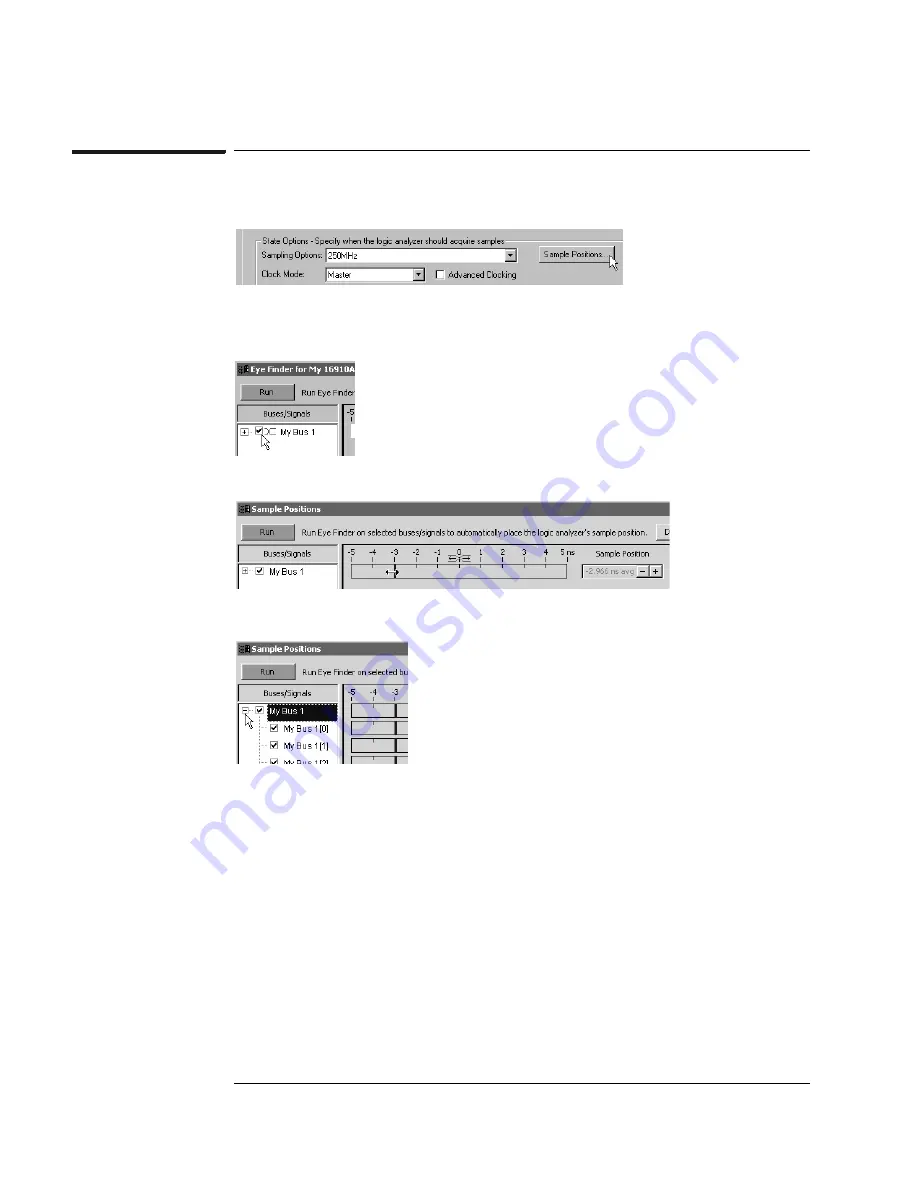
Adjust sampling positions using Eye Finder
1
Select the
Sample Positions
button. The Eye Finder window will appear.
2
In the “Buses/Signals” section of the Eye Finder window, ensure that the
check box next to “My Bus 1” is checked.
3
Drag the blue bar for “My Bus 1” to approximately -3 ns.
4
Select the plus sign to expand bus “My Bus 1”.
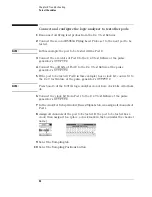
5
Select the
Run
button in the Eye Finder window.
6
Ensure that an eye appears for each bit. Depending on your test setup, the
eye position may vary. Ensure that all blue bars in the individual channel
rows (excluding the top row) are to the left of the orange transition
Содержание 16900 Series
Страница 3: ...3 Chapter The 16910A Logic Analyzer The 16911A Logic Analyzer...
Страница 8: ...8 Contents...
Страница 14: ...14 Chapter 1 General Information...
Страница 15: ...15 2 Preparing for Use This chapter gives you instructions for preparing the logic analyzer module for use...
Страница 18: ...18 Chapter 2 Preparing for Use...
Страница 61: ...61 4 Calibrating This chapter gives you instructions for calibrating the logic analyzer...
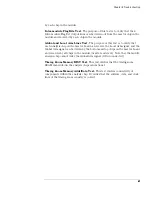
Страница 63: ...63 5 Troubleshooting This chapter helps you troubleshoot the module to find defective assemblies...
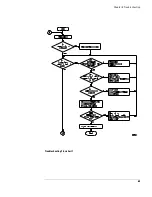
Страница 65: ...65 Chapter 5 Troubleshooting Troubleshooting Flowchart 1...
Страница 66: ...66 Chapter 5 Troubleshooting Troubleshooting Flowchart 2...
Страница 82: ...82 Chapter 5 Troubleshooting To test the cables 18 Return to the troubleshooting flow chart...
Страница 94: ...94 Chapter 7 Replaceable Parts 16910A Exploded View Exploded view of the 16910A logic analyzer...
Страница 95: ...95 Chapter 7 Replaceable Parts 16911A Exploded View Exploded view of the 16911A logic analyzer...
Страница 96: ...96 Chapter 7 Replaceable Parts...
Страница 97: ...97 8 Theory of Operation This chapter presents the theory of operation for the logic analyzer card...
Страница 102: ...102 Index...


