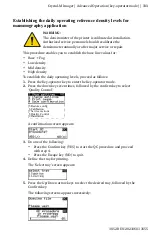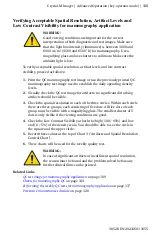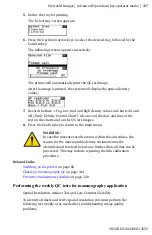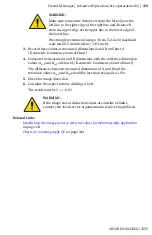
Note
:
Be careful not to touch the print head resistor line with
your fingers
10.
Clean the print head resistor line.
Gently pass over the resistor line a few times with a lint free cloth, slightly
moistened with Isopropyl alcohol or Ethanol. Do this only in one direction,
i.e. from left to right, without lifting the cloth.
Note
:
Do not apply any pressure on the print head because
this pressure may cause damage on the interconnections
underneath the print head.
11.
Close the print head unit, the hold-down bracket and finally the top cover.
After you have cleaned the print head resistor line and you have closed the
top cover, you will return automatically to the Select calibration menu (see
step 3).
Note
:
If residue dust is present as part of the cleaning
procedure it will disappear after a few prints.
12.
Press the Escape key to return to the Key-operator main menu.
Crystal-M Imager | Preventive maintenance schedule |
125
3852B EN 20210601 1655
Содержание 5367/300
Страница 1: ...Crystal M Imager 5367 300 User Manual 3852B EN 20210601 1655 ...
Страница 12: ...12 Crystal M Imager Crystal M Imager 3852B EN 20210601 1655 ...
Страница 57: ... The display Crystal M Imager Introduction 57 3852B EN 20210601 1655 ...
Страница 89: ...WARNING Never reuse a jammed film Crystal M Imager Basic Operation operator mode 89 3852B EN 20210601 1655 ...
Страница 128: ...5 Press the OK button on the touchscreen 128 Crystal M Imager Preventive maintenance schedule 3852B EN 20210601 1655 ...
Страница 134: ... Cables transducers and accessories 134 Crystal M Imager Remarks for HF emission and immunity 3852B EN 20210601 1655 ...
Страница 152: ...4 18 2832E EN 20151008 5 Remove plastic bag 152 Crystal M Imager Plug Play Installation Manual 3852B EN 20210601 1655 ...
Страница 161: ...Crystal M Imager Plug Play Installation Manual 161 3852B EN 20210601 1655 ...

