Ø32
Ø32
Ø32
Ø32
Ø32
Ø32
Ø32
Via Cerchia di S. Egidio, 760
47521 Cesena (FC) Italy
AERTECNICA S.P.A.
Tel. +39 0547 637311
Fax +39 0547 631388
www.aertecnica.com
8001175/1
A
K
S
H
R
BATTERY REPLACEMENT
The battery must be replaced when the light intensity of the LED
(B) is low and the transmission range is significantly reduced.
1 - Open the cover using a screw-driver by undoing the 4
screws indicated by the arrows.
2 - Replace the battery inside (L)
and close the cover.
Lithium battery
3V (CR2032)
B
L
INSTRUCTIONS FOR THE CM188T-CM183T WIRELESS TUBE
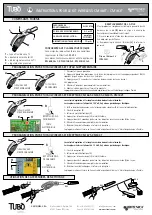
PROGRAMMING BETWEEN WIRELESS TUBE AND ADDITIONAL WIRELESS TUBE
PROGRAMMING BETWEEN WIRELESS TUBE AND CM186T-CM189T-CM181T-CM182T RECEIVER
PROGRAMMING BETWEEN WIRELESS TUBE AND CM187T-CM184T RECEIVER
SUPPLIED COMPONENTS
EN
A
B
T
C
1 - Remove the dust container
2 - press the start button (A1) on the wireless tube once it is programmed for 25 seconds to turn the
central unit off.
3 - press the start button (A2) on the tube to be programmed within 5 seconds
4 - wait 5 seconds to to complete the memorisation process
5 - refit the dust container and close the hooks.
The programming has been completed. The central vacuum unit will switch on and will switch off on
each flexible hose.
A
A
A
S
H
K
R
HOW TO USE THE CLEANING ACCESSORIES
OPERATING FREQUENCY
433.92 Mhz
ACTUAL RADIO POWER
0.3mW
TYPE OF MODULATION
amplitude
(ON OFF)
ABSORPTION DURING
TRANSMISSION
10mA
COMPLIANCE WITH DIRECTIVE 99/05/EC
The remote control is compliant with the essential
requirements provided by Directive 99/05/EC.
The following Technical Standards have been applied:
EN 60335-1, EN 301489-3, EN 300220-3
T -
Wireless flexible tube
A -
start/stop button
B -
wireless signal LED
C -
pressure regulator
TUBE
TO BE PROGRAMMED
TUBE
ONCE PROGRAMMED
RECEIVER
ONCE PROGRAMMED
RECEIVER
ONCE PROGRAMMED
TUBE
TO BE PROGRAMMED
TUBE
TO BE PROGRAMMED
ELECTRONIC
CARD
ELECTRONIC
CARD
1- check that the connection between the receiver plug line and the central vacuum unit is correct.
2- open the receiver
(R).
3 - remove the electronic card
(S).
4 - press the red button
(H)
, the LED will switch on
(K)
.
5 - press the start button
(A)
of the wireless tube within 5 seconds.
6 - wait 5 seconds to to complete the memorisation process
7 - reinsert the electronic card and close the receiver
(R).
The programming has been completed. The central vacuum unit will switch on and will switch off on each flexible hose.
The central vacuum unit and the wireless receiver must remain connected to the power supply.
The wireless receiver is powered by 12 volts - no electrical hazard risk exists.
The central vacuum unit and the wireless receiver must remain connected to the power supply.
The wireless receiver is powered by 12 volts - no electrical hazard risk exists.
1- check that the connection between the receiver plug line and the central vacuum unit is correct.
2- open the receiver
(R).
3 - remove the electronic card
(S).
4 - press the button
(H)
, the LED will switch on
(K)
.
5 - press the start button
(A)
of the wireless tube within 5 seconds.
6 - wait 5 seconds to to complete the memorisation process
7 - reinsert the electronic card and close the receiver
(R).
The programming has been completed. The central vacuum unit will switch on and will switch off on each flexible hose.


