


103
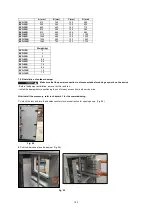
7.7.2 Installation of DX coil
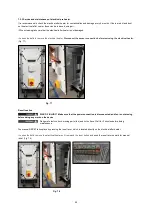
RISK OF INJURY! Make sure that the power connection is disconnected, and fan is not moving
before doing any work on the device
-
DX coil inlet - outlet pipes should be insulated.
-
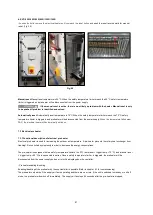
Refer to the electrical diagrams for DX coil signal connections.
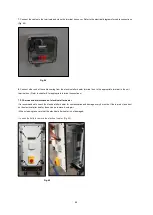
After install the accessory, refer to chapter 4.1 for the commissioning.
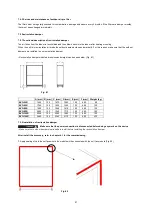
Assembly area
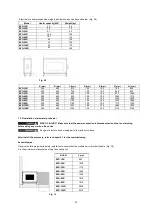
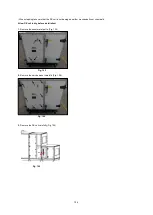
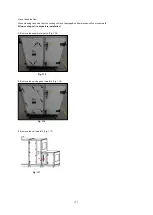
Observe the following criteria during installation to ensure that the module service is comfortable. (Fig. 95)
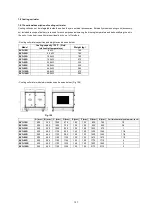
A is the minimum distance for servicing the cooling coil.
1.
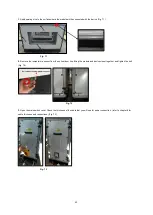
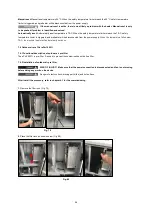
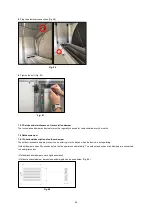
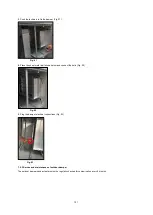
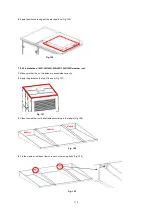
Apply sealing strip to the surface where the module will be connected with the device (Fig. 96)
Fig. 95
MODEL
A (mm)
EVO-15R
960
EVO-20R
1060
EVO-30R
1170
EVO-50R
1440
EVO-60R
1560
EVO-80R
1810
EVO-95R
1910
EVO-120R
2060
EVO-150R
2310
Fig. 96
Содержание EVO-R
Страница 1: ...EVO R COMPACT AIR HANDLING UNIT WITH ROTARY HEAT RECOVERY ...
Страница 129: ...129 Fig 170 Fig 171 ...
Страница 130: ...130 Fig 171 ...
Страница 132: ...132 Fig 173 Fig 174 ...
Страница 133: ...133 Fig 174 ...
Страница 135: ...135 Fig 176 Fig 177 ...
Страница 136: ...136 Fig 177 ...
Страница 138: ...138 Fig 179 Fig 180 ...
Страница 139: ...139 Fig 180 ...
Страница 141: ...141 Fig 182 Fig 183 ...
Страница 142: ...142 Fig 183 ...
Страница 144: ...144 Fig 185 Fig 186 ...
Страница 145: ...145 Fig 186 ...
Страница 147: ...147 Fig 188 Fig 189 ...
Страница 148: ...148 Fig 189 ...
Страница 150: ...150 Fig 191 Fig 192 ...
Страница 151: ...151 Fig 192 ...
Страница 153: ...153 Fig 194 Fig 195 ...
Страница 154: ...154 Fig 195 ...
Страница 155: ...155 ...


