


ENGINE
4-46
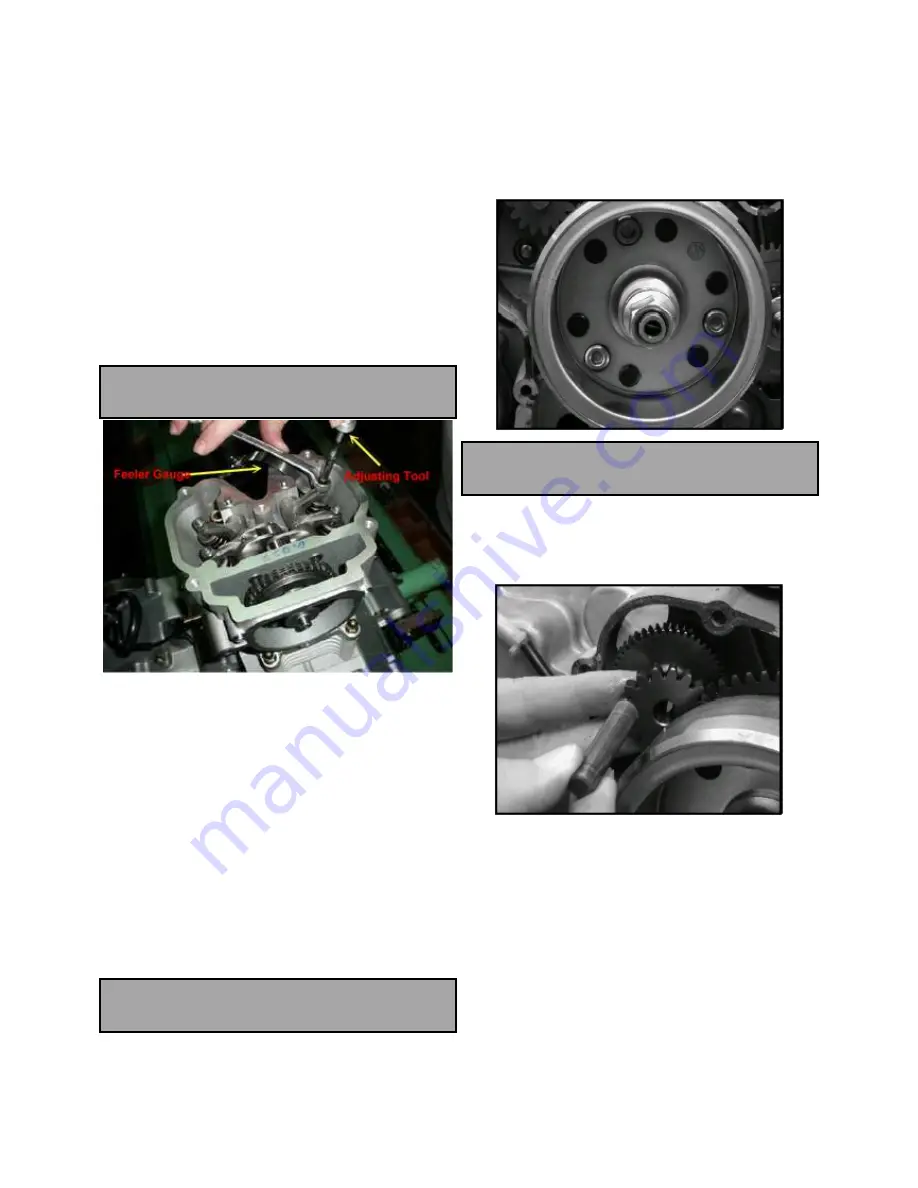
INTAKE VALVE CLEARANCE ADJUSTMENT
1. Verify cam lobes are pointed down.
2. Insert a 0.1mm feeler gauge between end of intake valve
stem and adjuster screw.
3. When clearance is correct, hold adjuster screw and tighten
locknut securely.
4. Re-check the valve clearance.
5. Repeat adjustment procedure if necessary until clearance is
correct with locknut secured.
VALVE CLEARANCE
0.12 mm
EXHAUST VALVE CLEARANCE
ADJUSTMENT
1. Verify cam lobes are pointed down.
2. Insert a 0.1mm feeler gauge between end of exhaust valve
stem and adjuster screw.
3. Loosen locknut and turn adjuster screw until there is a slight
drag on feeler gauge.
4. When clearance is correct, hold adjuster screw and tighten
locknut securely.
5. Re-check the valve clearance.
6. Repeat adjustment procedure if necessary until clearance is
correct with locknut secured.
VALVE CLEARANCE
0.12 mm
FLYWHEEL INSTALLATION
1. Install flywheel key, flywheel washer, and nut.
Torque flywheel nut to specification.
FLYWHEEL NUT TORQUE:
100 Nm
STARTER DRIVE ASSEMBLY
1. Be sure the washer is positioned on the back of the drive
gear.
2. Apply Starter Drive Grease to the drive bushings in the
cases and all moving surfaces of the starter drive gears and
install.
3. Install stator housing and torque bolts to specification.
Содержание AT56-69E
Страница 6: ...GENERAL INFORMATION 1 3 COBRA 400 Model AT56 69E Model Number RF3RA56XXCTXXXXXX Engine Model V69C ...
Страница 35: ...MAINTENANCE 2 25 ...
Страница 45: ...CVT SYSTEM 3 4 CVT EXPLODED VIEW ...
Страница 56: ...ENGINE 4 3 ENGINE ILLUSTRATION ENGINE EXPLODED VIEW ...
Страница 57: ...ENGINE 4 4 ...
Страница 58: ...ENGINE 4 5 COOLING SYSTEM EXPLODED VIEW ...
Страница 59: ...ENGINE 4 6 OIL FLOW DIAGRAM ...
Страница 125: ...FUEL AND CARBURETOR 6 15 FUEL TANK SYSTEM ...
Страница 135: ...BODY SUSPENSION STEERING 7 6 SUSPENSION ...
Страница 142: ...BODY SUSPENSION STEERING 7 13 STEERING ...
Страница 151: ...BRAKES 8 6 FRONT BRAKE EXPLODED VIEW MASTER CYLINDER ...
Страница 196: ...ELECTRICAL 9 31 WIRE DIAGRAM ...