6
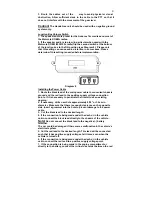
3. Plug the connector end of the
PTT into the Junction Box and
dress the surplus cord out of the way so that it is not visually or
physically obstructive.
Caution!
Make sure there is sufficient slack in the cable to allow the
free movement of the gear lever without stretching the PTT cable.
The Microphone
Selecting the correct position for the microphone is vital for the
successful performance of the hands-free unit.
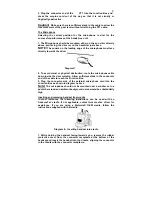
1. The Microphone should be mounted either on the sun visor directly
above, and facing, the driver or on the headliner just above.
NOTE!
The square on the leading edge of the microphone must face
directly towards the driver
Diagram 7
2. To avoid visual or physical obstruction, route the microphone cable
down inside the door molding. Allow sufficient slack in the connector
end of the cable to reach the Junction Box.
3. Plug the connector side of the external microphone cord into the
Junction Box as shown in diagram 3 above
Note!
The microphone should not be mounted near a window or in a
spot where road and ambient background noise would be substantially
high
Inserting and removing handset from cradle
In most instances the following instructions can be used with an
AdvanceTec cradle. If not applicable, contact AdvanceTec direct for
assistance. If you are using a Motorola® OEM cradle, follow the
instructions supplied with that cradle.
Diagram 8 – Inserting handset into cradle
1. While holding the handset facing towards you, remove the rubber
protective cover from the connector receptacle at the bottom of the
handset and insert the handset into the Cradle, aligning the connector
in the Cradle with the connector receptacle.


