


www.adeept.com
62
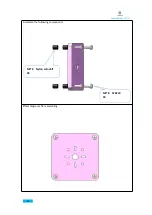
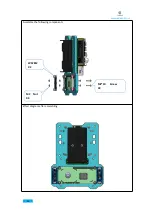
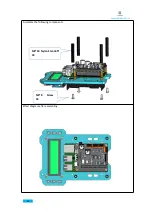
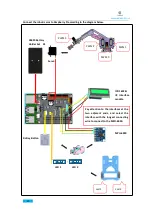
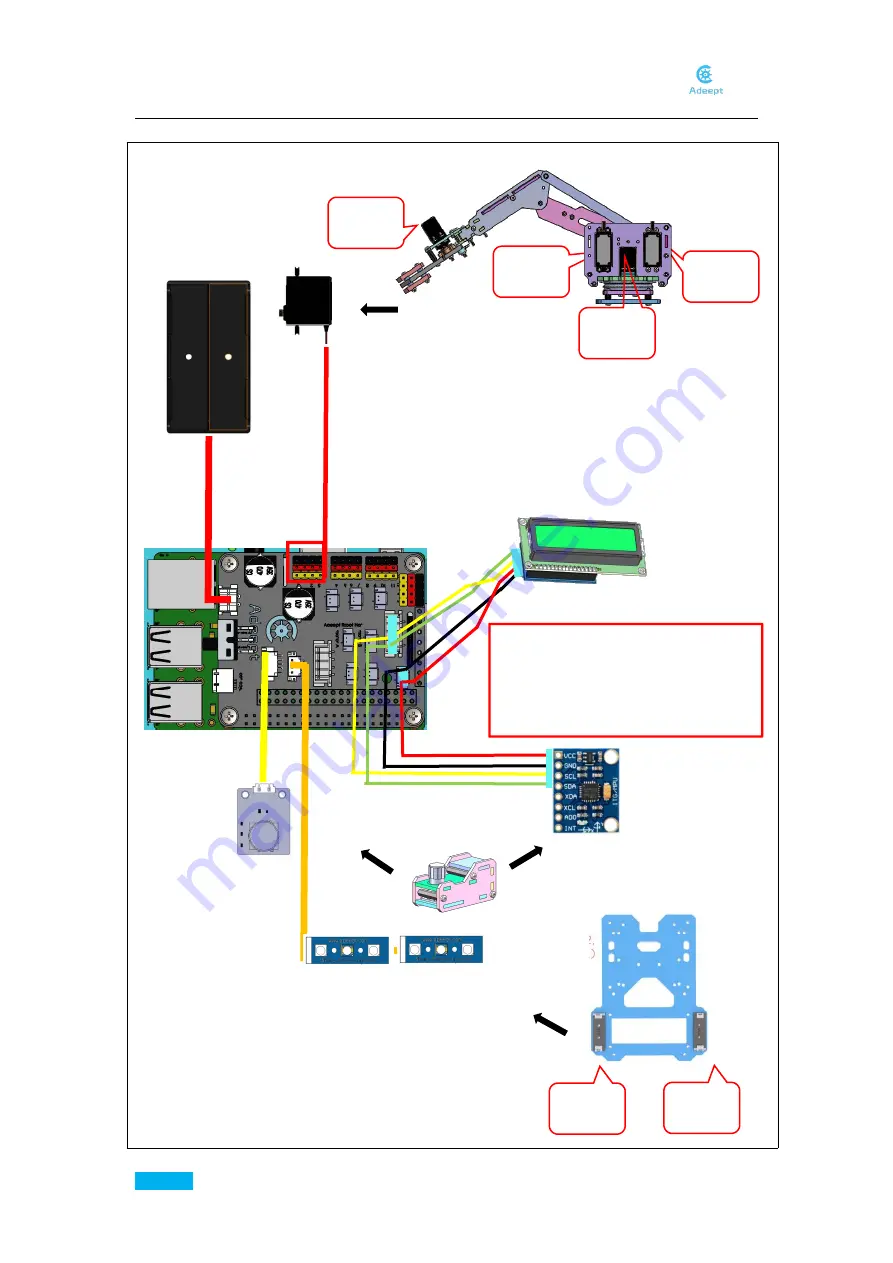
Connect the robotic arm to Raspberry Pi according to the diagram below.
LED 1
LED 2
18650 Battery
Holder Set X1
Rotray Batton
Led 2
Servo
MPU-6050
PWM 3
PWM 2
PWM 1
Led 1
ICD 1602 &
IIC interface
module
PWM 0
Pay attention to the interfaces at the
two adjacent ends, and select the
interface with the longest connecting
wire to connect to the MPU-6050.
Содержание RaspArm
Страница 1: ...www adeept com 1...
Страница 14: ...www adeept com 11 If a warning window prompts click Yes...
Страница 25: ...www adeept com 22 2 Connect the battery holder and Raspberry Pi Note that the switch is OFF...
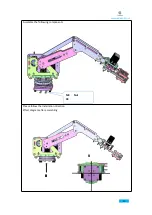
Страница 38: ...www adeept com 35 Assemble the following components Effect diagram after assembling M3 25 Screw X3 M3 Nut X3...
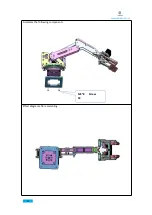
Страница 40: ...www adeept com 37 Assemble the following components Effect diagram after assembling M3 25 Screw X2 M3 Nut X2...
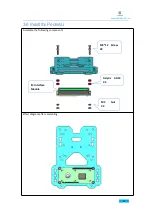
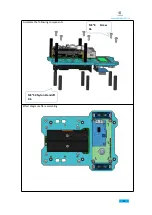
Страница 49: ...www adeept com 46 Assemble the following components Effect diagram after assembling M3 35 Screw X6 M3 Nut X6...
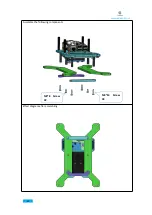
Страница 51: ...www adeept com 48 Assemble the following components Effect diagram after assembling M3 Nut X4 M3 16 Screw X4...
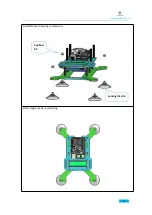
Страница 55: ...www adeept com 52 Assemble the following components Effect diagram after assembling M3 8 Screw X4...
Страница 58: ...www adeept com 55 Assemble the following components Effect diagram after assembling M2 5 8 Screw X4...
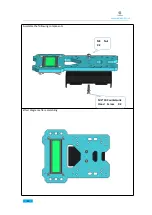
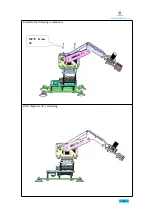
Страница 60: ...www adeept com 57 Assemble the following components Effect diagram after assembling...
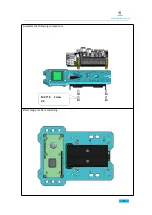
Страница 64: ...www adeept com 61 Assemble the following components Effect diagram after assembling Cap Nut X4 Sucking Disc X4...
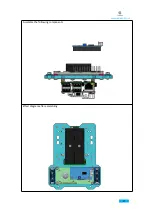
Страница 66: ...www adeept com 63 Assemble the following components Effect diagram after assembling M3 8 Screw X4...
Страница 70: ...www adeept com 67...