


www.adeept.com
25
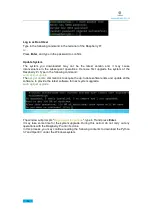
3.Turn on the power and debug the servo.
Before switching on, you need to insert the configured SD card into the Raspberry Pi. For details,
please refer to the second part chapter of the document. Otherwise, the servo will not rotate to
the middle position after booting. If SD card is not inserted, the servo needs to be rotated to the
middle position manually.
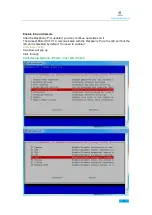
In the next installation, the servos need to be connected to the robot HAT. And the Raspberry Pi will
automatically adjust the servo to the correct angle.
After debugging, remove the servo and battery holder, and take the 18650 batteries out of the
Holder Set. Do not rotate the rotation axis before the servo fixed to the rocker arm. Otherwise,
you need to re-debug the servo.
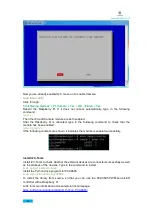
Turn the switch here to “ON” (power on), the servo will automatically rotate to the
initial position. Wait a few seconds till the servo stop, and then turn the switch to
“OFF” (power off).
Содержание RaspArm
Страница 1: ...www adeept com 1...
Страница 14: ...www adeept com 11 If a warning window prompts click Yes...
Страница 25: ...www adeept com 22 2 Connect the battery holder and Raspberry Pi Note that the switch is OFF...
Страница 38: ...www adeept com 35 Assemble the following components Effect diagram after assembling M3 25 Screw X3 M3 Nut X3...
Страница 40: ...www adeept com 37 Assemble the following components Effect diagram after assembling M3 25 Screw X2 M3 Nut X2...
Страница 49: ...www adeept com 46 Assemble the following components Effect diagram after assembling M3 35 Screw X6 M3 Nut X6...
Страница 51: ...www adeept com 48 Assemble the following components Effect diagram after assembling M3 Nut X4 M3 16 Screw X4...
Страница 55: ...www adeept com 52 Assemble the following components Effect diagram after assembling M3 8 Screw X4...
Страница 58: ...www adeept com 55 Assemble the following components Effect diagram after assembling M2 5 8 Screw X4...
Страница 60: ...www adeept com 57 Assemble the following components Effect diagram after assembling...
Страница 64: ...www adeept com 61 Assemble the following components Effect diagram after assembling Cap Nut X4 Sucking Disc X4...
Страница 66: ...www adeept com 63 Assemble the following components Effect diagram after assembling M3 8 Screw X4...
Страница 70: ...www adeept com 67...