


www.adeept.com
23
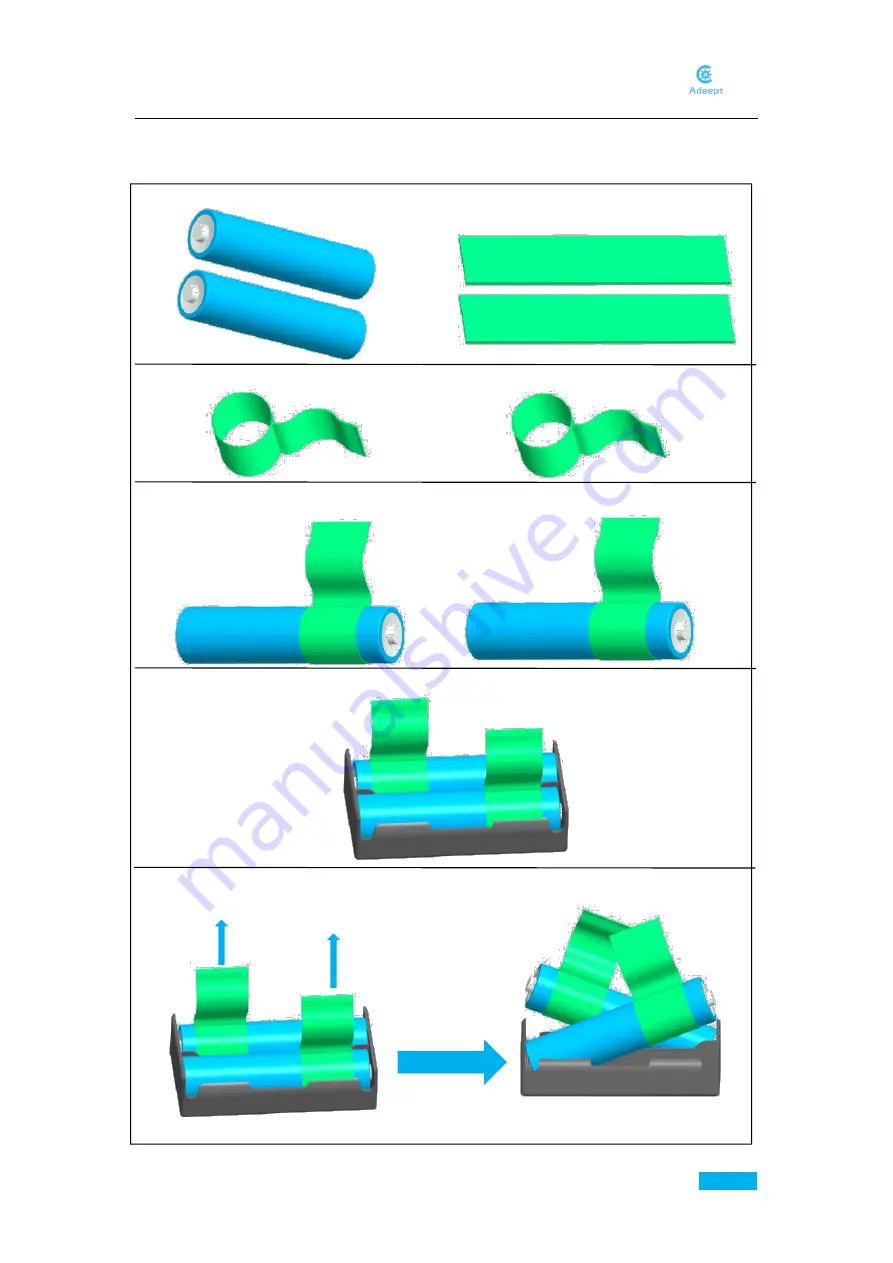
Take out 2 ribbons and 2 batteries.
To remove the batteries, just pull the ribbon and take them out.
Install the batteries into the holder based on the pole.
Insert the batteries into the rings-ribbon closer to the anode.
Roll one end of the ribbon to let through a battery and fix.
3.3.Install and Remove Batteries
Содержание RaspArm
Страница 1: ...www adeept com 1...
Страница 14: ...www adeept com 11 If a warning window prompts click Yes...
Страница 25: ...www adeept com 22 2 Connect the battery holder and Raspberry Pi Note that the switch is OFF...
Страница 38: ...www adeept com 35 Assemble the following components Effect diagram after assembling M3 25 Screw X3 M3 Nut X3...
Страница 40: ...www adeept com 37 Assemble the following components Effect diagram after assembling M3 25 Screw X2 M3 Nut X2...
Страница 49: ...www adeept com 46 Assemble the following components Effect diagram after assembling M3 35 Screw X6 M3 Nut X6...
Страница 51: ...www adeept com 48 Assemble the following components Effect diagram after assembling M3 Nut X4 M3 16 Screw X4...
Страница 55: ...www adeept com 52 Assemble the following components Effect diagram after assembling M3 8 Screw X4...
Страница 58: ...www adeept com 55 Assemble the following components Effect diagram after assembling M2 5 8 Screw X4...
Страница 60: ...www adeept com 57 Assemble the following components Effect diagram after assembling...
Страница 64: ...www adeept com 61 Assemble the following components Effect diagram after assembling Cap Nut X4 Sucking Disc X4...
Страница 66: ...www adeept com 63 Assemble the following components Effect diagram after assembling M3 8 Screw X4...
Страница 70: ...www adeept com 67...