CBE25
Manuale tecnico – Technical manual
Code
MT-CBE25-02021080-R00
Page 08/16
Nel caso in cui si usino valvole on-off proporzionali o servocomandi a tre punti si avrà
una regolazione proporzionale la cui qualità dipende da quanto corrette sono le
impostazioni sopra riportate.
Nel caso in cui si usino valvole on-off semplici non si potrà avere una regolazione
proporzionale, il loro pilotaggio sarà del tipo sempre acceso o sempre spento con
isteresi impostabile sul parametro
P18
. In questo caso i parametri banda proporzionale
e tempo integrale non vengono usati. Il ventilatore viene pilotato in modo
proporzionale solo quando è impostato con velocità automatiche.
Se la valvola è di tipo proporzionale la stessa regolazione
P+I
piloterà le velocità del
ventilatore, mentre se la valvola non è proporzionale le velocità del ventilatore
verranno pilotate secondo una regolazione
P
e quindi il solo parametro “banda
proporzionale” determinerà quanto reattivo deve essere il ventilatore alle variazioni
della temperatura ambiente.
La distanza tra i tre stadi di velocità del ventilatore è calcolata dividendo per tre la
banda proporzionale e arrotondando per difetto. Per esempio se la banda
proporzionale è 2°C, la distanza stadi sarà 0,6°C.
When PWM valves or floating servo-actuators are used the quality of the final
proportional regulation is directly associated to how accurately is performed the
system tuning.
When simple on-off valves are used no proportional action can be obtained: the
relevant driving will always be either full-on or full-off, with a differential value set on
parameter
P18
. In this situation both parameters “proportional band“ and “integral
time“ are not used.
The fan is driven in a proportional way only in case the regulator has been set with
automatic speed control. When the valve is proportional type, the
P + I
regulation will
provide the correct fan speed, meanwhile in case the valve is not proportional type ,
the fan speed will be selected according to a purely proportional (
P
) rule, therefore
only the “proportional band“ parameter will be used to decide how reactive will need
to be the fan against variations in the room temperature.
The distance between the three speed stages is calculated dividing by three the
proportional band and rounding down. For example if the proportional band is 2°C,
the distance between stages will be 0.6°C.
VALVOLE PILOTABILI
Il termostato è in grado di pilotare diversi tipi di valvole:
ON-OFF:
se NC apre il flusso d’acqua quando viene alimentata; se NA il flusso
d’acqua è normalmente aperto e viene chiuso quando viene alimentata.
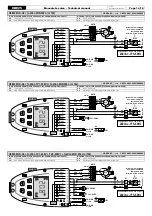
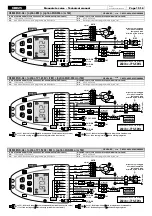
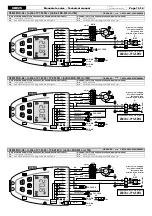
Schema di collegamento
CBE25-A002,
CBE25-A003 e CB25-A005.
ON-OFF proporzionale:
come sopra, in più il termostato regola il flusso d’acqua in
modo proporzionale pilotando la valvola a impulsi via via più larghi tanto più calore è
necessario per la regolazione (PWM).
Servocomando flottante a 3-punti:
valvola servocomando motorizzata con due
segnali di comando uno di apertura e l’altro di chiusura. Questo tipo di valvola è
caratterizzato da un tempo nominale di apertura indicato dal costruttore che va
impostato sui parametri
C03 e C04
.
Il termostato piloterà questa valvola a impulsi con risoluzione di un secondo in modo
da portare lo stelo nella posizione necessaria per la regolazione, eseguendo così una
modulazione proporzionale. Schema di collegamento
CBE25-A007,
CBE25-A008 e CB25-A006.
Quando il termostato è configurato per pilotare una valvola a 3-punti,
all’applicazione dell’alimentazione prima di iniziare la regolazione, eseguirà un ciclo
di risincronizzazione della posizione della valvola che consiste nel chiudere la valvola
per un tempo pari al 150% del tempo nominale impostato. Il ciclo di risincronizzazione
in corso viene segnalato sul display dall’accensione dell’icona
Questo ciclo verrà ripetuto periodicamente in modo da recuperare eventuali errori di
posizionamento che si possono accumulare nel tempo.
VALVE TYPES
This regulator can drive the following type of valves:
ON-OFF:
if Normally Closed (NC) it enables the water flow when power is applied; if
Normally Open (NO) water is normally flowing when the valve is unpowered and is
stopped when powered. Wiring diagram
CBE25-A002,
CBE25-A003 and CB25-A005.
PWM:
same as above; moreover the regulator controls the water flow in a
proportional way by driving the valve with power pulses whose duration in time is a
function of how much heat the room is requiring (PWM).
3-point floating servocontrol:
this is a kind of motor valve featuring one “open“ wire
and one “close“ wire, plus a common wire. This type of valve is characterized by a
nominal opening time (defined by the manufacturer) whose value must be set into
parameters
C03
and
C04
.
The regulator will drive this valve through power pulses with one second resolution in a
way that its stem will reach the position needed for the regulation, thus performing a
proportional modulation. Wiring diagram
CBE25-A007,
CBE25-A008 and CB25-A006.
When the thermostat is configured to control a 3 point valve, upon power-up, before
starting the room temperature regulation, it will perform a valve position
resynchronisation cycle. This consists of closing the valve for a time equal to 150% of
the nominal set time. The resynchronisation cycle in progress is shown on the display
by the icon.
This cycle will be periodically repeated in order to recover possible positioning errors
which might be accumulated during time.
CONFIGURAZIONE INSTALLATORE
La configurazione installatore permette di definire il funzionamento del termostato per
adattarlo ai diversi tipi di ambienti e ai diversi tipi di impianti. Per accedere alla
configurazione tenere contemporaneamente premuti i pulsanti e per alcuni
secondi finché sul display non appare la scritta “
COn
” (configurazione).
Da questo momento, premendo il pulsante , si scorre tra i vari parametri identificati
con
P
e dal numero del parametro, da
P01
a
P24
. La fine della configurazione viene
indicata con la scritta “
End
”, quindi ripremendo ulteriormente il pulsante la
configurazione viene salvata e il termostato passa al normale funzionamento.
Premendo il pulsante in qualsiasi momento si può uscire dal menù di configurazione
senza salvare le modifiche. Durante lo scorrimento dei parametri, premendo il
pulsante o o , viene visualizzato il suo valore attuale.
Per modificare il valore, quando quest’ultimo è visualizzato, premere i pulsanti o
Per impedire l’accesso alla configurazione da parte di utenti non autorizzati è
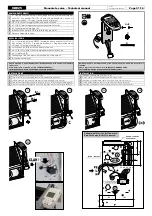
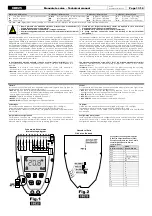
possibile rimuovere il ponticello interno (
JP5
) indicato in Fig.1; in questo modo
tentando di accedere alla configurazione comparirà sul display l’icona
lampeggiante.
La configurazione installatore è composta da due liste di parametri:
parametri principali da
P01
a
P24
(tabella 1).
parametri estesi da
C01
a
C19
(tabella 2)
I parametri estesi
C01
-
C19
permettono una configurazione avanzata del termostato.
Per accedere ai parametri estesi, quando il display visualizza “
COn
“ all’entrata della
configurazione oppure quando il display visualizza “
End
“ all’uscita, premere il pulsante
INSTALLER CONFIGURATION
Installer configuration defines the thermostat operation and allows to adapt it to the
different types of plants and systems. To access the configuration menu,
simultaneously press the e buttons for a few seconds until “
COn
”
(configuration) appears on the display.
Once entered in configuration menu, pressing scrolls through the various
parameters, identified with
P
and the parameter number, from
P01
to
P24
. The
configuration end is displayed with “
End
”. Press again to save the configuration
and return to normal operation.
Press the button, at any time, to exit from the configuration menu without saving
the changes.
When scrolling the parameters pressing button or or displays its current
value. To change the value, when it is displayed, press button or
To prevent unauthorised access to the configuration remove the internal jumper (
JP5
)
shown in Fig. 1.
Any attempt to access the configuration will display the flashing icon.
The installer configuration consists of two lists of parameters:
main parameters
P01
to
P24
(table 1)
extended parameters
C01
to
C19
(table 2)
The extended parameters
C01
-
C19
allow an advanced thermostat configuration.
When the display shows “
COn
“ at configuration start or “
End
“ at configuration end,
press the button to access the extended parameters.
RESET CONFIGURAZIONE INSTALLATORE
Per effettuare il reset della configurazione installatore, in modo da portare tutti i
parametri ai valori di default impostati in fabbrica, accedere alla configurazione
tenendo premuti i pulsanti e fino a quando il display visualizza “
Con
”,
successivamente tenere premuti contemporaneamente i due tasti e per
alcuni secondi fino a che la schermata torna alla visualizzazione normale.
INSTALLER CONFIGURATION RESET
In order to reset the installer configuration, so that all parameters are reset to the
factory default values, enter the configuration mode by holding down the keys
and until the display shows “
Con
”, then hold down the two keys and for
a few seconds, until the display returns to the usual screen.
DESCRIZIONE PARAMETRI DI CONFIGURAZIONE PRINCIPALI
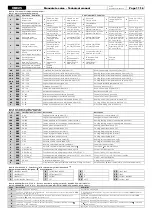
I parametri principali della configurazione installatore sono illustrati nella tabella 1 e di
seguito spiegati.
DESCRIPTION OF MAIN CONFIGURATION PARAMETERS
The main installer configuration parameters are shown in table 1 and explained below.
P01
: Selezione del tipo di impianto.
Sistema a 2 tubi: se configurato per un impianto a 2 tubi, il termostato pilota
solamente una valvola sull’uscita della valvola caldo, sia in modo riscaldamento che
raffrescamento, in quanto la stessa valvola gestirà sia l’acqua calda che fredda.
Schema di collegamento
CBE25-A002 e
CBE25-A007
Nel caso di un impianto a 2 tubi senza valvola e quindi senza collegamenti sull’uscita
valvola, è necessario scegliere la regolazione del ventilatore sul parametro
P03
e
P04
per avere una regolazione.
Sistema a 4 tubi: se configurato per un impianto a 4 tubi, il termostato pilota le due
uscite per le valvole in modo da attivare il flusso dell’acqua calda o dell’acqua
fredda a seconda del bisogno dell’ambiente da controllare.
Schema di collegamento
CBE25-A003 e
CBE25-A008.
Sistema con resistenza: il termostato è configurato per gestire un impianto avente una
resistenza elettrica per riscaldare l’ambiente, vedere il paragrafo “Sistema con
resistenza” per maggiori informazioni.
Sistema con resistenza di integrazione: il termostato è configurato per gestire un
impianto con resistenza di integrazione, vedere il paragrafo “Sistema con resistenza di
integrazione” per maggiori informazioni.
Sistema pompa di calore: il termostato è configurato per gestire un impianto pompa
di calore, vedere il paragrafo “Sistema pompa di calore” per maggiori informazioni.
P01
: System type selection.
2 pipes system: when configured for a two-pipes system the controller drives one valve
only, wired at the “heating“ valve terminals, both when heating and when cooling, as
the same valve is going to control either hot or cool water flow.
See wiring diagram
CBE25-A002 and
CBE25-A007.
In case of a two-pipes system without valve, and therefore with no wirings at the valve
output terminals, make sure to set parameters
P03
and
P04
to “fan control“ in order to
get an effective regulation.
4 pipes system: when configured for a four-pipes system the controller drives both
valves outputs in order to activate either the hot water or the cooling one according
to the actual requirements of the controlled environment.
See wiring diagram
CBE25-A003 and
CBE25-A008.
Electric heater system: the regulator is configured to control a system equipped with
an electric heater: see the section “Electric heater system” for more details.
Integrating electric heater system: the regulator is configured to control a system
equipped with an electric heater: see the section “Integrating electric heater system“
for more details.
Heat pump system: the regulator is configured to control a system equipped with a
heat pump: see the section “Heat pump system“ for more details.
P02
: Modalità con cui il termostato deve passare dal modo raffrescamento (estate) al
modo riscaldamento (inverno) e viceversa.
La modalità può essere manuale o automatica:
Manuale: L’utente imposta manualmente il modo raffrescamento o riscaldamento.
Automatica: Il termostato decide automaticamente se passare al modo
raffrescamento o riscaldamento. La funzione automatica è diversa a seconda del
tipo di impianto definito nel parametro
P01
.
Se il sistema è a 4 tubi o con resistenza o sistema pompa di calore il termostato
funziona con zona neutra e quindi attiva il riscaldamento o il raffreddamento a
seconda della temperatura di setpoint impostata.
P02
: This parameter sets the way how the controller switches from the cooling mode
(summer) to the heating mode (winter) and vice versa.
The switching can be either manual or automatic:
Manual: The user manually sets the heating or the cooling mode.
Automatic: The controller automatically switches from the heating to the cooling
mode or vice-versa. This automatic operation is different according to the system type
as set with parameter
P01
.
In case of a 4-pipes system, an electric heater or heat pump system he thermostat
operates with a neutral zone. Therefore it activates heating or cooling according to
the set point temperature.
Содержание CBE25
Страница 18: ......


