www.acti.com
NVR 2.2 SP3 (V2.2.57) User’s Manual
92
Tips to setup:
Before you start, make sure you have your camera groups configured correctly.
Please also add the cameras to their proper camera groups. Prepare the map images so that
each camera group is shown in full on a single map.
Add Map
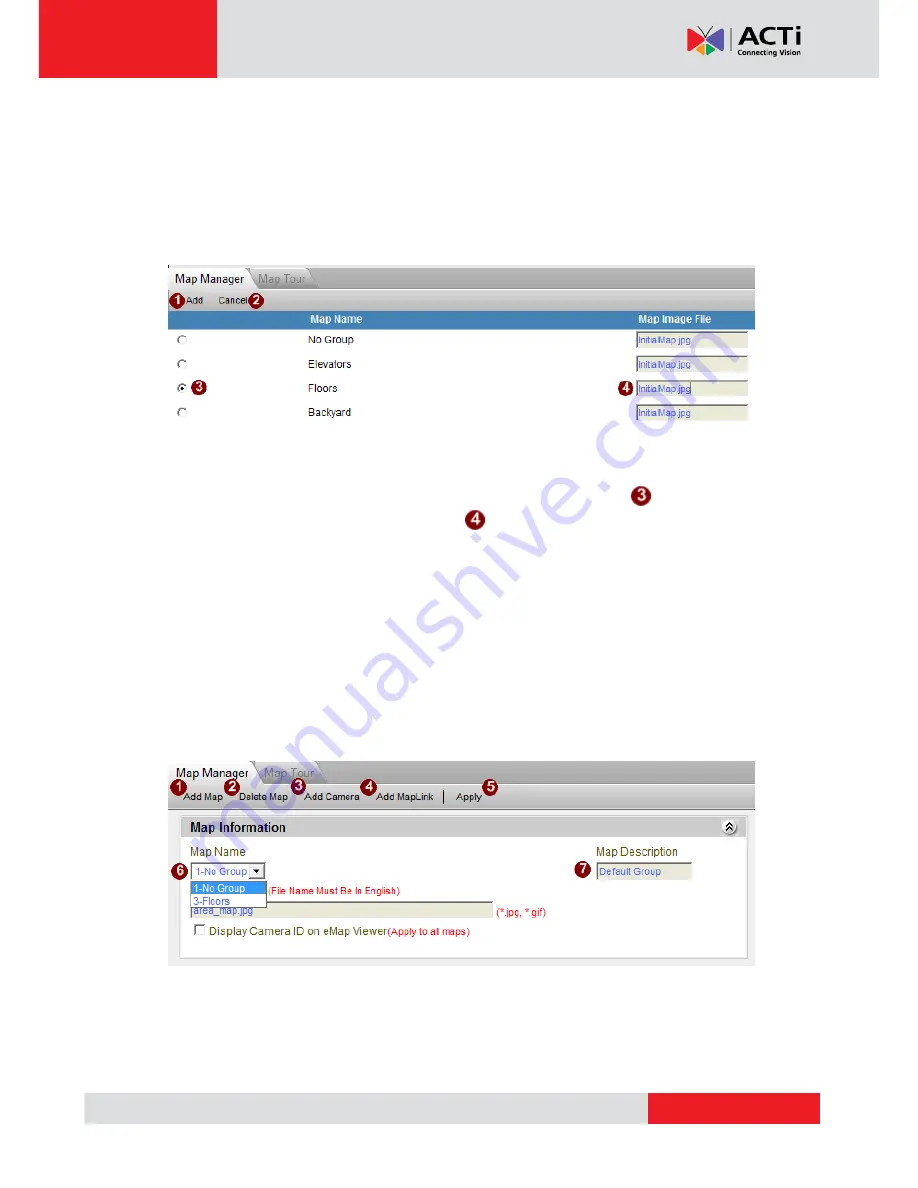
Once you have clicked [Add Map], you will see the list of camera groups.
Fig. 62 Map Setup - Adding Map Image File
1. Pick a camera group, for example
“Floors” by clicking the radio button.
2. Click on the map image file field to the right to select the map you need. Before you
change, it will show
“initialMap.jpg”.
3. A browse window will pop up for you to select the map image on your local hard drive.
4. Once the needed map image has been selected, press the [Add] button. The Map
Information page will appear together with the map image you had just chosen.
Only alphabets, numbers, dashes, underscores or spaces can be used in file name.
You can press [Cancel] button to stop adding new maps.
Edit Map
Fig. 63 Map Setup - Selecting Map
You may select one of the maps you have already added to the system and edit settings in this
screen. You may add cameras and arrange their icons / mini previews on the map here.


