Preparations
(continued)
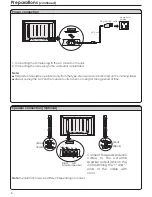
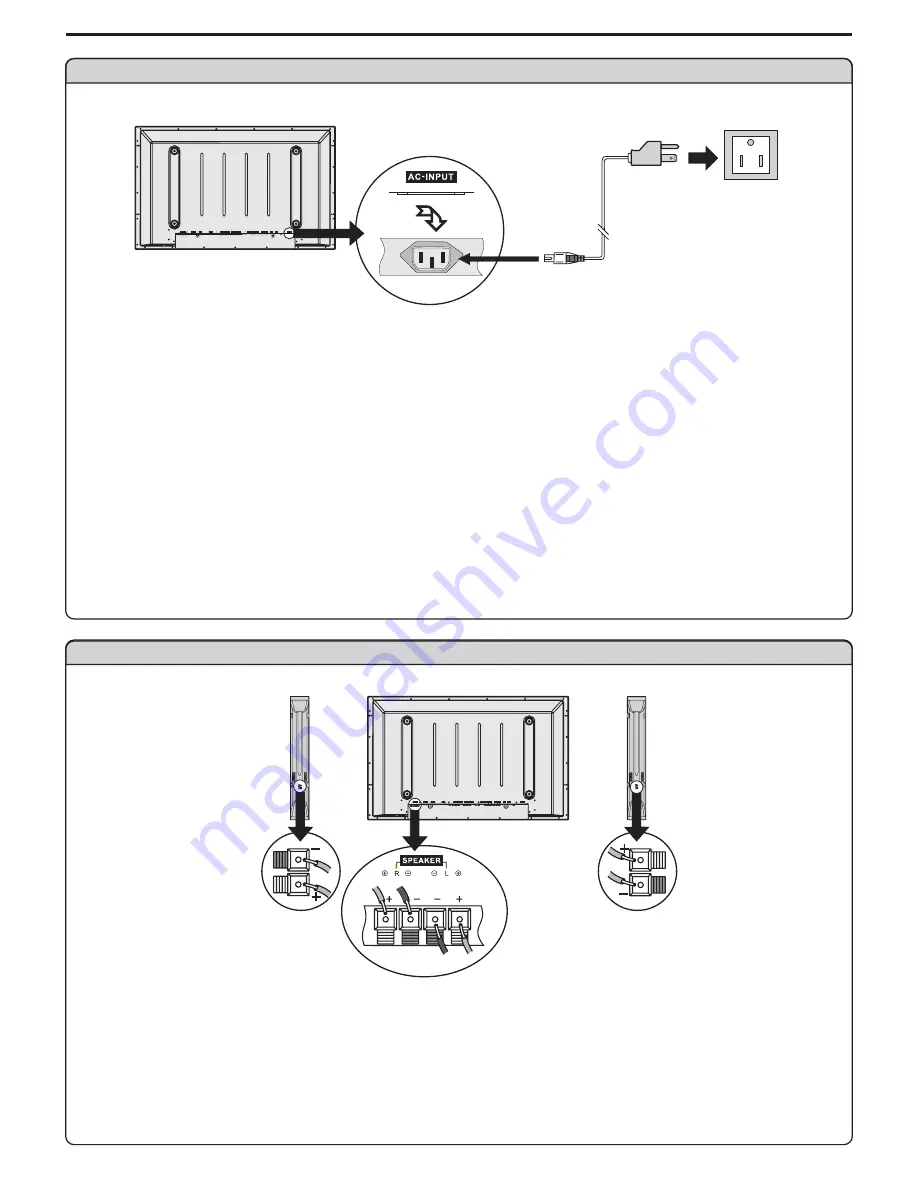
Speaker connection (Optional)
Note
: the illustration may be different depending on model.
Connect the speaker audio
cable to the external
speaker output jack on the
unit matching the "+" and "-"
ends of the cable with
color.
SVHS
HEADPHONE
RF
R
L
PIC
AUDIO
PIC
AUDIO
SPEAKER
DVI
AV OUTPUT
AV INPUT
CONTROL
COMPONENT INPUT 1
COMPONENT INPUT 2
D-SUB
AUDIO
AUDIO
C /P
r
r
C /P
r
r
C /P
b
b
C /P
b
b
Y
Y
VIDEO
VIDEO
AC- INPUT
R
L
AUDIO
R
L
AUDIO
ラメマ
£º£
£º£
£º£
£º£
ÓÒÏ
Power connection
SVHS
HEADPHONE
RF
R
L
PIC
AUDIO
PIC
AUDIO
SPEAKER
DVI
AV OUTPUT
AV OUTPUT
AV INPUT
AV INPUT
CONTROL
COMPONENT INPUT 1
COMPONENT INPUT 1
COMPONENT INPUT 2
COMPONENT INPUT 2
D-SUB
D-SUB
AUDIO
AUDIO
C /P
r
r
C /P
r
r
C /P
r
r
C /P
r
r
C /P
b
b
C /P
b
b
C /P
b
b
C /P
b
b
Y
Y
VIDEO
VIDEO
AC- INPUT
R
L
AUDIO
R
L
AUDIO
1. Connecting the female plug to the AC socket on the unit.
2. Connecting the male plug to the wall outlet as illustrated.
Note:
<
<
This product should be operated only from the type of power source indicated on the marking label.
Always unplug the AC cord from power outlet when not using for a long period of time.
Plug into AC outlet.
AC cord
Household
power
6
(Black)
(Red)
(Black)
(Red)
Right
speaker
Left
speaker
£º£
£º£
£º£
£º£


