


– 31 –
10. In the
Retrospect Button Backup: Sources window
, click
OK
.
11. In the
Backup: Retrospect Button Backup
window, click
Destinations
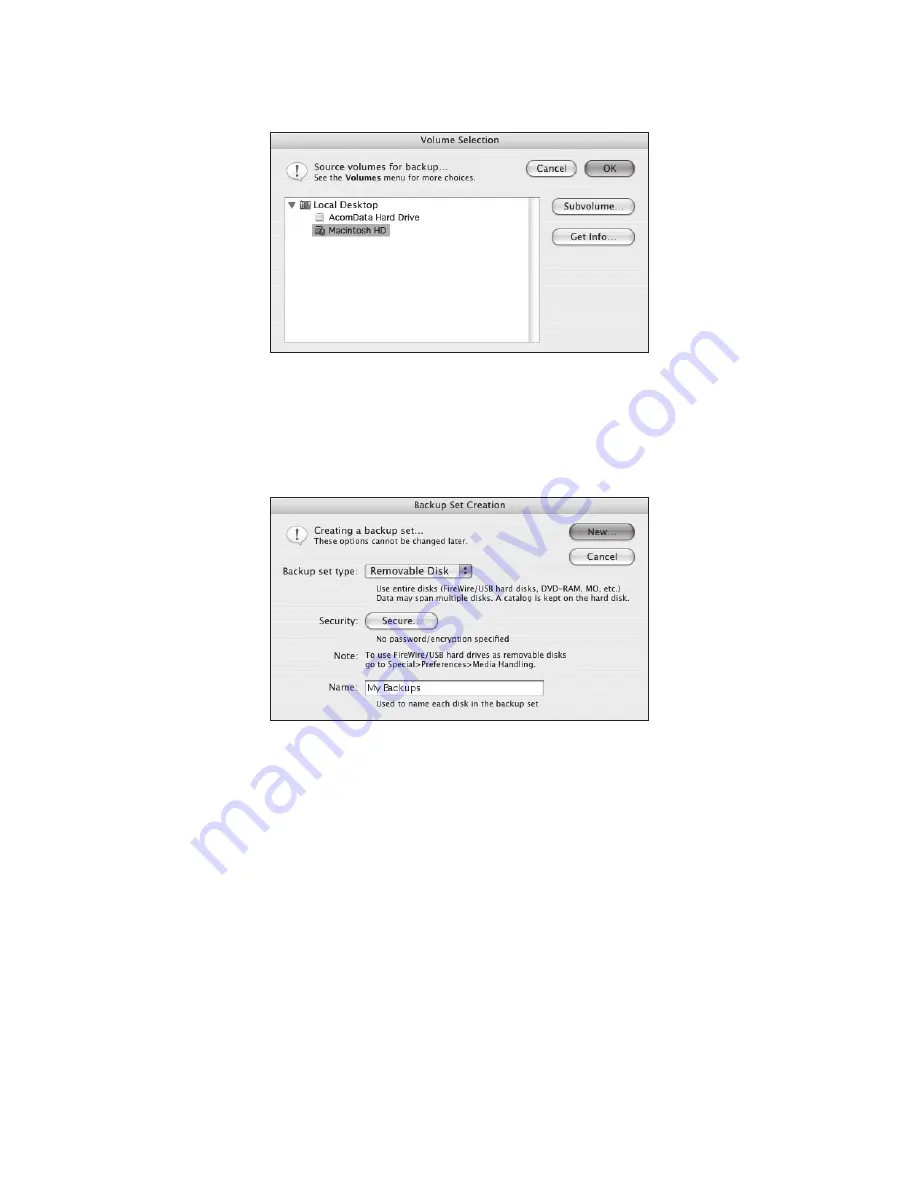
12. In the
Backup Set Creation
window (Figure 42), select
Removable Disk
from the
Backup set type
pull-down menu.
13. If you wish to set up a password that will be required every time you perform a
backup, click the
Secure…
button and follow the instructions. When you’re done,
you will be taken back to the
Backup Set Creation
window.
14. In the
Name
field, type in a name for this Backup Set.
The default name is “Backup
Set A.” You can use the default name or create your own. The name you use will later
on be assigned to the AcomData Drive. For example, if you name the Backup Set “My
Backups”, the name of your AcomData Drive will be “1-My Backups.” The “1” indicates
that the Drive is the first disk in the Backup Set. If you were to add additional disks to
this Backup Set they would be named “2-My Backups”, “3-My Backups” etc
.
15. Click
New…
You will then see the
Choose a folder
widow, asking you to select a
location where Retrospect Express will save the catalog file for your Backup Set. The
catalog file is the file that Retrospect Express uses to keep track of the files in the
FIGURE 41
FIGURE 42
Содержание HD250UFAPE5
Страница 1: ...PUSHBUTTON BACKUP USER S GUIDE ...


