


– 15 –
3. On the
Scripts
screen, click
New
. A window will appear giving you the option to set
up the script using EasyScript. Click
No
.
4. You will be asked what kind of script you wish to create. Choose
Backup
and click
OK
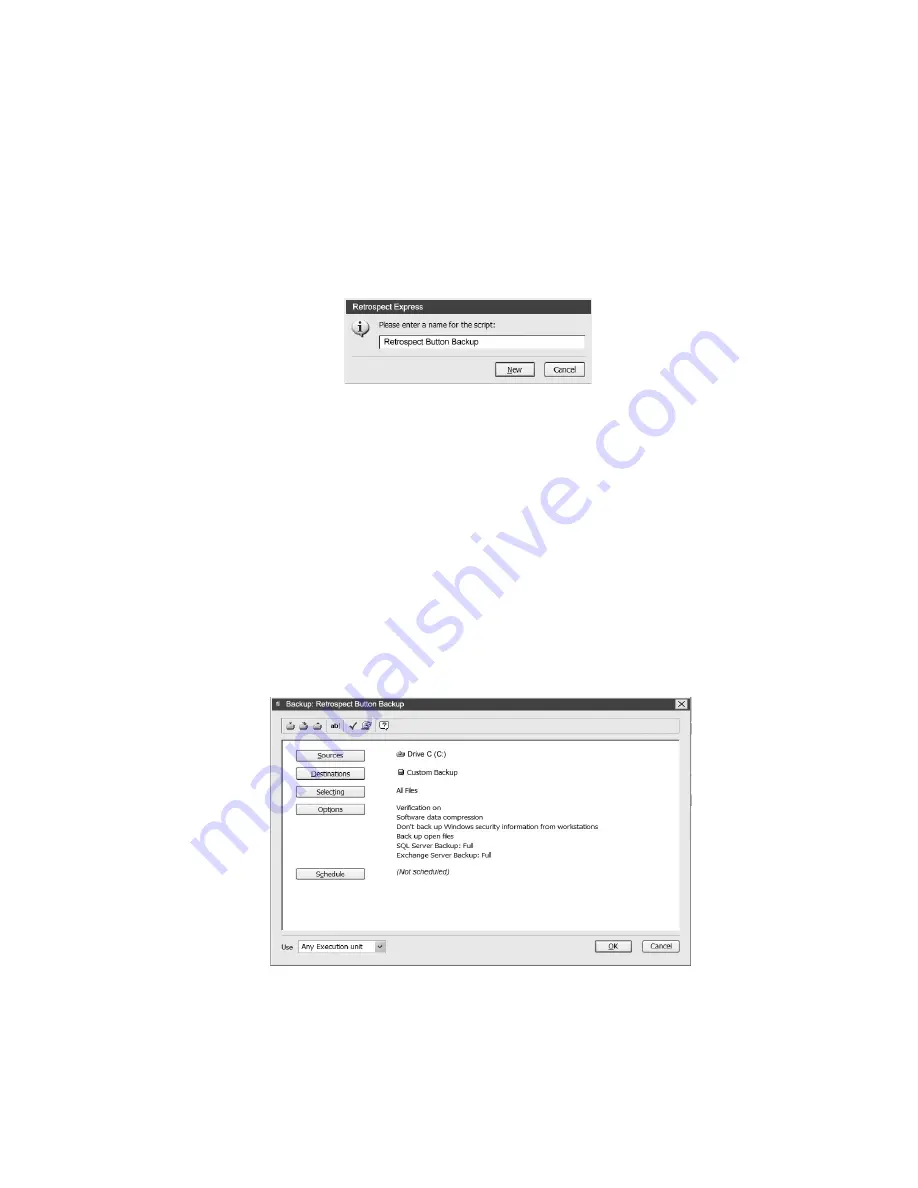
. In the text field (Figure 14), type in the exact name:
Retrospect Button Backup
.
You must type the name correctly or PushButton™ Backup will not recognize this
script. Click
New
.
5. In the
Backup: Retrospect Button Backup
window (Figure 15), click
Sources
to specify
drives or folders. After you finish specifying drives and folders, click
OK
. You might
find the following suggestions helpful:
• To specify multiple drives on your computer, in the Volume Selection window hold the
Control key while you click the drive names.
• To specify folders, in the Volume Selection window highlight a drive and click
Subvolume to view and choose a folder within that drive. Then, in the Defining
Subvolume window, click Define. In the Volume Selection window, click one of the
defined folders to select it, or hold the Control key while you click to select multiple fold-
ers.
• To remove a drive or folder, select it in the Volume Selection window and click Forget
in the toolbar.
FIGURE 14
FIGURE 15
Содержание HD250UFAPE5
Страница 1: ...PUSHBUTTON BACKUP USER S GUIDE ...


