


5A
Only for remote control
:
Connecting with CA-8/CA-9 RTX to control the unit for Stand by, Function and
Mode function.
Mains input
:
Connect to power supply.
Mains output
:
Connect to supply power to the next unit.
DMX input/output
:
For DMX512 link, use 3/5-pin XLR cable to link the unit together.
3.2 Main Function
To select any of the given functions, press the
MENU
button up to when the
required one is showing on the display. Select the function by
ENTER
button and
the display will blink. Use
DOWN
and
UP
button to change the mode. Once the
required mode has been selected, press the
ENTER
button to setup, to go back to
the functions without any change press the
MENU
button again. Hold and press
the
MENU
button about one second or wait for one minute to exit the menu mode.
The main functions are showing below:
18A
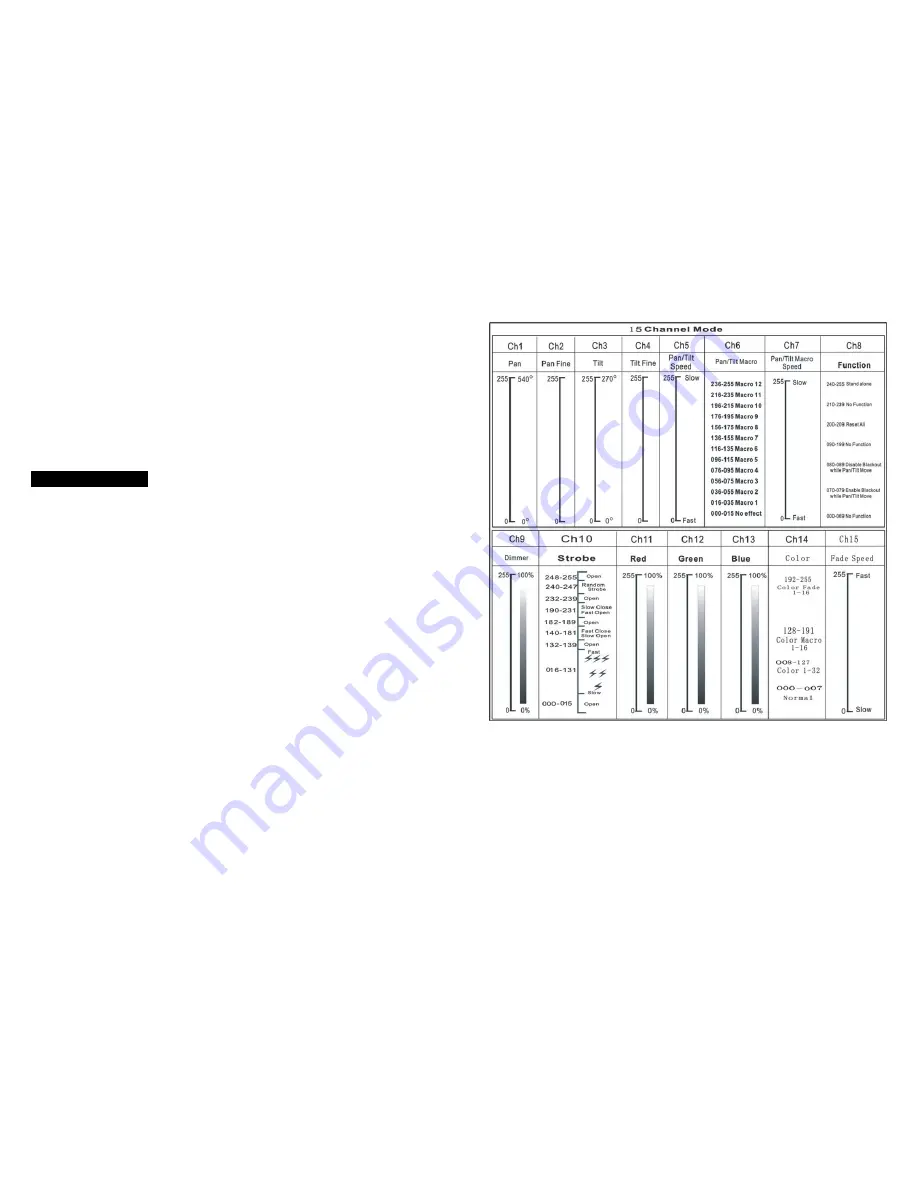
15 channel mode:


