background image

24

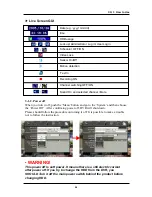
Live Screen GUI

Sound On and selected channel / Mute

/

Recording ON

Motion detection

Sensor On/Off

Video Loss

Scheduler  OFF/ON

/

Lock up/ Administrator  Log in/ User Log in

/       /

HDD usage

time

Date (e.g.: yyyy/ mm/dd)

Text In

/

Channel switching OFF/ON

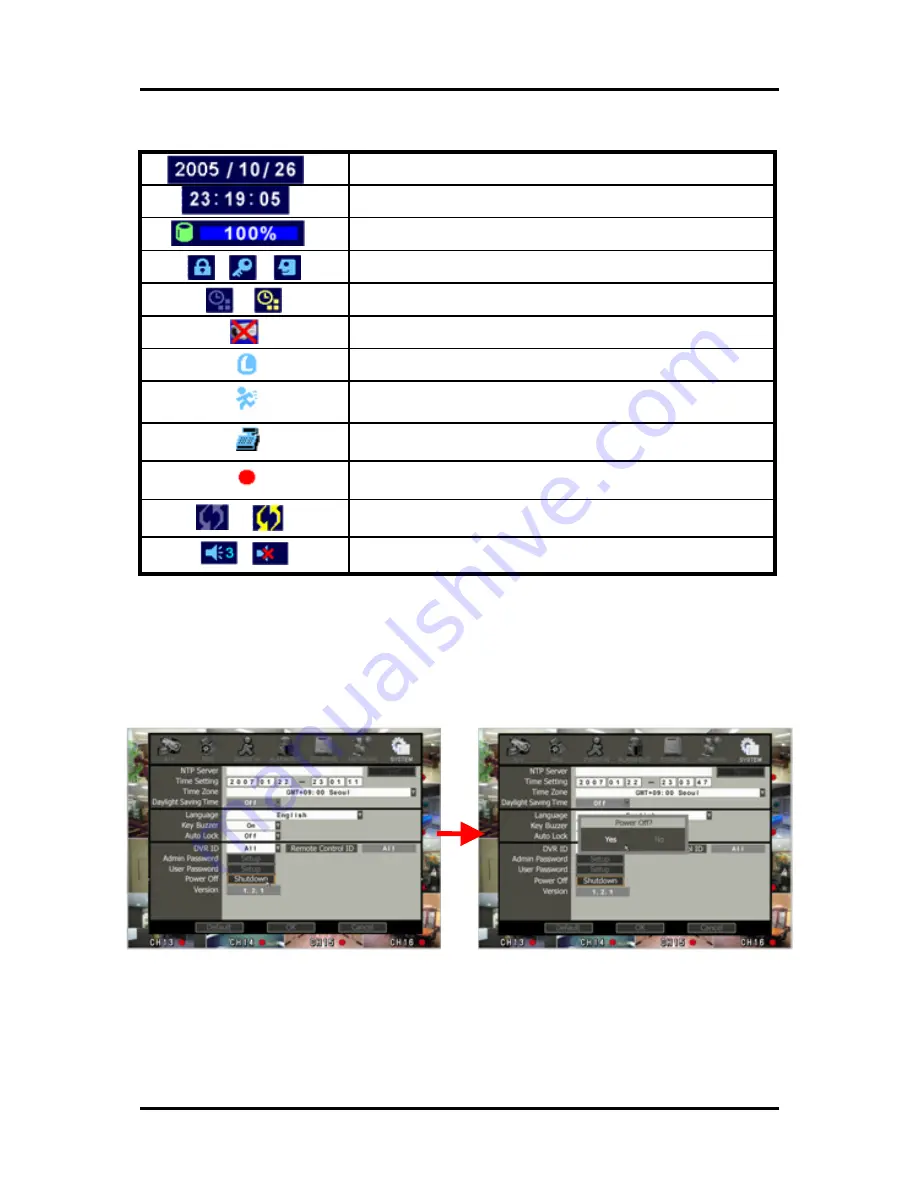
3-1-2. Power off 

When you turn it off, push the ‘Menu’ button and go to the ‘System’ and then choose 
the ‘Power Off’ . After confirming power off, DVR will shut down. 
Please should follow the procedure on turning it off. It is possible to make a trouble 
not to follow the instruction.

WARNING!

This power off is soft power. It means there is a still electric current 
after power off. If you try to change the HDD from the DVR, you 
SHOULD Turn it off the main power switch behind the product before 
changing HDD. 

CH 3   How to Use

Содержание ACM-TPG08

Страница 1: ......

Страница 2: ...understanding Users should read this user s manual carefully for proper use 3 Contents in this manual may be changed according to the specification change and feature improvement without any notifica...

Страница 3: ...on 16 2 2 1 Power Connection 16 2 2 2 Connecting External Device 16 CH 3 How to Use 3 1 LIVE Screen 22 3 1 1 INFORMATION Feature 23 3 1 2 Power off 24 3 1 3 Display mode change 25 3 1 4 PTZ Pan Tilt a...

Страница 4: ...ation 54 CH 5 Client Program 56 5 1 Installing Client Program 56 5 2 How to use Client Program 60 5 2 1 Initial Screen 61 5 2 2 Connecting the DVR 63 5 2 3 Initial Screen after connection 64 5 2 4 WAT...

Страница 5: ...r This 12V adapter supplies power to the product Power Cable This connect the adapter and the power source Program CD This contains the User s manual and Client Program for DVR Remote Controller This...

Страница 6: ...the digital signal and saves on HDD Adapter This 12V adapter supplies power to the product Power Cable This connect the adapter and the power source Program CD This contains the User s manual and Cli...

Страница 7: ...tional Spot Out BNC 1CH Loop Out Loop Through 4CH Audio Input RCA 4CH Audio Output RCA 1CH Sensor Input Terminal Block 4CH Contact TTL Sensor Output Terminal Block 4CH Dry Contact LAN Communication RJ...

Страница 8: ...CH Spot Out BNC 1CH Loop Out Loop Through 8CH 16CH Audio Input RCA 4CH Audio Output RCA 1CH Sensor Input Terminal Block 8CH Contact TTL 16CH Contact TTL Sensor Output Terminal Block 8CH Dry Contact 4C...

Страница 9: ...ternet network you can search or monitor recorded images remotely by installing exclusive client program on PC 7 Backup You can backup with USB CD RW and DVD RW 8 Audio recording You can record four s...

Страница 10: ...ocal recording and viewing setup regardless with recording setup 16 Web browser support You can monitor and playback the video and control the PTZ camera by internet explorer 17 Built in S M A R T You...

Страница 11: ...ack No 6 7 STILL Instant Replay Pause Step No 7 8 INFO Information No 8 9 LOCK System Lock Protect File No 9 0 PTZ PTZ No 0 1 4 1 4CH Front Panel 1 Control Buttons 2 3 Menu and Arrow Keys Status Lamps...

Страница 12: ...at the same time 11 Sensor out This terminal blocks connect external electric devices to the product Warning Lamp and others 12 RS485 port For control the pan and tile cameras Make sure that the polar...

Страница 13: ...change to the pan tilt and zoom control mode from the live mode 4 MENU It will move to the setup screen from the live mode 5 DISPLAY It will change the screen splitting sequentially from 1 4 6 9 13 a...

Страница 14: ...ch as composite spot S VIDEO and analog RGB VGA 5 AUDIO IN RCA audio in terminals You can record four channels at the same time AUDIO OUT RCA audio out terminal 6 RS485 port For control the pan and ti...

Страница 15: ...tric shock Do not unplug by pulling cord If cord is damaged it may cause fire or electric shock Do not plug or unplug with wet hands May cause electric shock Keep the power cord untwisted May cause fi...

Страница 16: ...manual may cause harmful interference to radio communications Operation of this equipment in a residential area is likely to cause harmful interference in which case the user will be required to corr...

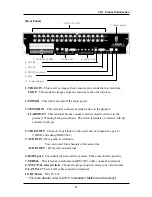
Страница 17: ...power of the product is off Read through user s manual for the device you are connecting carefully 1 How to Connect External Video Audio Device VIDEO AUDIO IN OUT OUT IN MONITOR Rear Connect cameras...

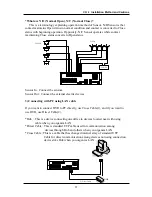
Страница 18: ...NSOR 3 Connecting with PC using LAN cable If you want to connect DVR to PC directly use Cross Cable 1 and if you want to use HUB use Direct Cable 2 Hub This is a device connecting one office to device...

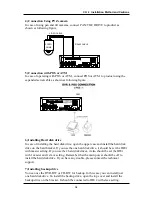
Страница 19: ...he hard disk drive open the upper case and install the hard disk drive on the hard bracket If you use the one hard disk drive it should be set the IDE1 with master setting If you use the 2 hard disk d...

Страница 20: ...h needs the camera input VIDEO AUDIO IN OUT OUT IN MONITOR Rear CAMERA MIC 2 How to connect external sensor Sensor terminal is composed of 16 input channels and 12 output 4 relays 8 TTLs c hannels As...

Страница 21: ...ice connecting one office to devices located near with using cable when you organize LAN Direct Cable This is standard UTP cable used for communication among devices through Hub and others when you or...

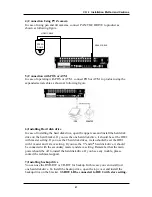
Страница 22: ...hard disk drive it should be set the IDE1 with master setting If you use the 2 hard disk drives it also should be set the IDE1 with 1 master and 1 slave setting If you use the 3rd and 4th hard disk d...

Страница 23: ...to operate with whole function you should log in with Admin mode On logging the Password check window appears Type the right password to unlock the system The factory default password is just blank S...

Страница 24: ...ate and time System Lock Setting HDD usage Video Loss Check Sensor ON OFF Motion Detection Check Recording Stat us and Schedule Feature Usage As you push INFO button once more GUI disappear OSD disapp...

Страница 25: ...push the Menu button and go to the System and then choose the Power Off After confirming power off DVR will shut down Please should follow the procedure on turning it off It is possible to make a trou...

Страница 26: ...buttons From 1 to 10 push the related button and over 10 use the 10 and 1 6 buttons sequentially As you push the Display button the screen changes sequentially from 1 4 6 8 9 13 and 16 splitting mode...

Страница 27: ...t You can toggle between the PTZ window and Preset window using Enter button Direct Call 1 6 You can go directly to the position 1 to 6 Call 7 You can go the other position using this button Set 8 You...

Страница 28: ...27 8 Setup If you push the MENU button on PTZ window the camera setup window will appear CH 3 How to Use...

Страница 29: ...Zoom ctrl O O O O O Iris ctrl O O O O O Patrol ctrl O O O X X Autopan on off X O O O O AutoPan P1 P2 X O X Hardware O O Pan speed ctrl O O X X O Tilt speed ctrl O O X X O Autopan speed X O X X O CH 3...

Страница 30: ...real time playing 3 Play recorded images in real time If you push PLAY Button again while playing playing screen stops and List window is appeared 4 Play images faster Every time you push it is chang...

Страница 31: ...sh it is changed to 2 4 8 16 64 times faster If you push PLAY Button it returns to normal playback 2 Play recorded images If you push PLAY Button again while playing playing screen stops and List wind...

Страница 32: ...using calendar 2 Log List This shows a list of files and events Sensor Motion Detection System and Text in log 3 Text in Search You can search the transaction data and corresponding video recorded th...

Страница 33: ...figure2 Sky blue bar means that there is a recorded file at that time Use the arrow key to go to the wanted time If you push the Zoom In button you can zoom in the time bar for the fine searching Aft...

Страница 34: ...ky blue figure1 In this search mode you can search the File and Event List which include event record and system log And also you can choose the specific log such as file sensor motion detection video...

Страница 35: ...enu button to exit the virtual keyboard and push Start button to search You can see the date list including the keyword and time range Using the up down arrow key choose the wanted date and push Enter...

Страница 36: ...oose the Time Search you will see following window If you input searching time with using number button relative file or the closest file is directly played If you push the Exit button on playing it g...

Страница 37: ...utomatically Or you can push the Backup button upon playing Next procedure is the same and the time sets for 10 minutes automatically There are two format on backup file AVI and DB The AVI format is a...

Страница 38: ...ant by using direction buttons 3 2 7 INFORMATION Feature in Play Mode When you play a recorded file file information for currently playing file is displayed If you push INFO 8 button again and again G...

Страница 39: ...t During live viewing you can go directly to the playback screen If you push the PLAY button or any other buttons related playback upon live viewing the DVR goes to the PLAY with the present time scre...

Страница 40: ...setting all menus If you close by pushing EXIT Button without pushing ENTER changed setting is not saved If you have 4 or 8 ch you can see some taps are disable Thai is on the case of 8 ch the tap 9...

Страница 41: ...eously use the ALL button It will effects on every channel 4 Monitor You can choose the monitor between VGA and composite The screen size will be optimized with the selected monitor 5 Deinterlacer act...

Страница 42: ...ecording mode setting Resolution There are three kinds of resolutions Among 360X240 CIF 720X240 2CIF 720X480 D1 OR 360X288 720X288 720X576 in PAL you can set individually FPS Set recording frame rate...

Страница 43: ...settings However if there is an event it starts recording by Event Recording settings during Time sec This function is very useful when you want to operate with the mixture mode Event Dur sec to set...

Страница 44: ...necessary time period In Scheduler window days and channels are displayed and recording information for each channel is displayed at bottom of window In recording Schedule recording setting is most pr...

Страница 45: ...set this feature it is converted to record mode automatically if there is an Event generation although you don t use Record Button at front side You can also set each channel individually 1 Motion Det...

Страница 46: ...the area On Off This will activate or deactivate the motion detection of the selected area All On Off This will activate or deactivate the motion detection of the whole area 2 Text Insert In case of u...

Страница 47: ...No use text in V Enabling the Text in P Enabling the text in with popup 5 Summary regarding as Event Recording In REC Menu MD recording Sensor detection recording MD Sensor detection recording and no...

Страница 48: ...e output is dry contact So you can connect directly the other electronic devices using this ports From 5 to 12 the output is TTL So you can use this signal to control the other devices 2 Buzzer This w...

Страница 49: ...disk drives 4 Mirroring If you install two hard disk drives you can set the second drive as a backup drive by mirroring If you choose On you will be asked to format the second drive After conforming...

Страница 50: ...MART Self Test Type You can choose between brief and detail Temperature The upper tolerance of the hard disk drive Buzzer If you choose On the internal buzzer will beep when the hard disk drive has a...

Страница 51: ...o On IP is allocated automatically If you set it to Off you have to input IP DHCP is a protocol that allows managers to manage and allocate IP address centrally 2 Port There are 4 kinds of ports for t...

Страница 52: ...4 Status This shows the information how many connections and what is the action of each connection Connected IP This displays all the connected IP Watch This displays how many connection for live vie...

Страница 53: ...s sets product time Input time by pushing number buttons after moving cursor with direction buttons Be careful to move to backward The overlapped data will be deleted with warning message 3 Time Zone...

Страница 54: ...ol on the remote controller You may check the ID by pushing the remote control key The ID should be the same between the DVR and remote control 9 Admin Password This sets Admin Password Move cursor ov...

Страница 55: ...initialize the mouse using the pushing the Exit button twice on the live mode On the live screen click the right button The menu screen will appear If you move the cursor to wanted menu the sub menu w...

Страница 56: ...en quad screen 6 splitting screen 9 splitting screen 8 splitting screen 13 splitting screen 16 splitting screen 4 Operation upon Play with the mouse If you move the cursor below upon play mode the pla...

Страница 57: ...effective for playing recorded file and recording performance Since VGA is effective for several areas including errors and performances in regard to operation characteristics you have to use verified...

Страница 58: ...57 Open CD ROM Drive and Run Setup exe and then Appear Setup Menu Click Next CH 5 Client Program...

Страница 59: ...58 Ask designate Folder to Install the program Recommend Basic setup c program files Digital Video Recorder DVR client Click Next Showing Progress of Copy of Files CH 5 Client Program...

Страница 60: ...59 Click Next When Finishing Installation click Finish Finish Program Installation CH 5 Client Program...

Страница 61: ...ou execute Client Program you will see following password screen After entering the right password default is none you can remotely see Live Image on DVR through Client Program and you can search play...

Страница 62: ...displays the live and playback images WATCH Live screen SEARCH Playback Screen SETUP Setup of connected DVR CONNECT This connects or disconnects from the selected DVR 5 2 1 Initial Screen CH 5 Client...

Страница 63: ...ting this all the DVR which connect to your LAN display on the box Control This changes to control window after connecting Add You can add new IP Address Edit You can edit IP Addresses and other conne...

Страница 64: ...e of the DVR IP Address You can set the IP address of DVR Port You can set the port number of DVR Num Channel You can choose the number of channels of the DVR ID Please type the ID Password Type the p...

Страница 65: ...Choose the DVR on the Site list and click the button You can see the live screen of the selected DVR If you choose Favorite tap you can connect many DVR at the same time and also you can make your ow...

Страница 66: ...ection Display mode selection PTZ control You can control the PTZ camera Status it displays the network speed and frame rate etc Capture Image Used for getting snap shot You can save with JPG or BMP R...

Страница 67: ...2 4 8 16 32 64 times faster Stop playback Fast forward 1 2 4 8 16 32 64 times faster Normal playback 5 2 5 SEARCH Playback If you choose SEARCH tap after connection you can go to the play mode If you...

Страница 68: ...know the time you can go directly at that time using this If there is no file on that time it will automatically move to the closest time Update all the information This will change the playback opti...

Страница 69: ...ppears and you can move it to where you want to move to Zoom Out Reduce expanded screen every time you click it is reduced 1 2 times smaller Save Image Save image as picture file If you select where y...

Страница 70: ...and End time And push the Start It will start to send the file to the PC and all the information of file will be displayed After sending the file choose the filename and folder This can control the va...

Страница 71: ...g file and they red means the event recording On the screen if you click the mouse left button that channel will be full screen mode If you want to go back the previous screen click the mouse left but...

Страница 72: ...e change to other person you may choose dialog setup 5 2 6 SETUP Remote setup of DVR You can set the preferences of the DVR remotely Click the SETUP button to set up the DVR remotely and setup screen...

Страница 73: ...you choose the Interactive on Global Setting you can set directly the DVR as you are in front of DVR CH 5 Client Program The example of the interactive setup The screen shot upon pushing MENU The scr...

Страница 74: ...73 This updates the preference of DVR This is the Save and Exit the changes CH 5 Client Program 2 Dialog Setup If you choose the Dialog on Global Setting the following screen appears...

Страница 75: ...You can set the recording type audio resolution FPS and quality individually 2 Scheduler Setup If you check the Scheduler the Scheduler setup screen appear You can change the weekly scheduler through...

Страница 76: ...75 3 Rec Group You can change the contents of the groups in here 4 Event You can set the event input such as sensors and motion detection in here CH 5 Client Program...

Страница 77: ...the alarm output regarding the event inputs including video loss in here After changing the preferences of the DVR click the OK to preserve the changing 5 Text In This is setup for ATM cash register a...

Страница 78: ...er Please execute this Net Downloader Program to upgrade the firmware of the DVR After typing the IP and password of the DVR click the Connect button You can check the model name and the current versi...

Страница 79: ...update file and then push the start button You can see the below download window on the DVR screen WARNING If you turn off the power during download all memory will be deleted Be careful not to turn i...

Страница 80: ...pe the USER ID admin or user and the password of the DVR You can see the live picture to click the connect button After typing the ID and password push the connect button then you can see the live scr...

Страница 81: ...een DVR and camera normal Isn t another user using same IP Isn t it too bright or too dark Isn t camera installed too far away Is it set to True Color Are PC specifications and VGA Card specifications...

Страница 82: ...om external condition other than the product B If malfunction is cased because user tried to reassemble the product C If malfunction is caused by natural disasters such as fire water disaster thunder...

Страница 83: ...ix A How to Connect POS Appendix A 2 Set the preference of the POS on the DVR If your POS is in the device list in the text in setup of DVR you just simply choose that device If not you should choose...

Страница 84: ...on from the POS setting screen 4 Execute the client software and connect the DVR Go to the Setup and you can see the below screen Enter the values of the POS in the field 4 If your setting is correct...

Отзывы: