background image

24 

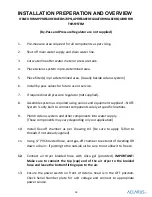
Filter Preparation


– Optional Media Bed Filters 

Backwashing the filters: 

WARNING: Complete following before allowing water to the home: cartridge 
filters must be flushed before using to remove preservatives. Drain flush water 
because it is not safe for consumption. Filters may come pre-washed 

– check 

with your filter supplier. 


1.  For auto backwash filters(s) connect to appropriate power source. 
2.  Remove all aerators/screens from fixtures, including taps. Do not use toilets during 

this process. Small particulates of media can plug fixtures. 

3.  Review manual for the specific setup directions for your model and filter brand 

installed. 

4.  Once filter is installed, setup, and in service, immediately perform a backwash on 

each filter. 


NOTES:  


only backwash one filter at a time and wait for filter to complete cycle before 
initiating second filter backwash (if required) 

– follow instructions that come 

with the filter for manual backwash. 


Aclarus System will be running during filter backwash to clean the filter media 
with ozonated water if set up properly. 

 
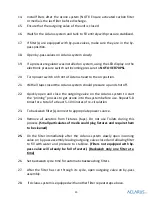
5.  After the filter has finished cycling, open the outgoing valve on the bypass 

assembly. 


NOTE: If Aclarus system is equipped with more than one filter, repeat steps 1 to 4 
for each filter. 

 
6.  Once all filters are finished backwashing run the tap closest to the Aclarus system 

for three to five minutes to flush any small particulates may have come through.  

7.  Replace aerators/screens in fixtures (taps). 
8.  Open all valves slowly for water supply to enter the existing infrastructure and 

ensure existing plumbing fills slowly to minimize water-hammer effect. 


Содержание AOWT-7

Страница 1: ...ACLARUS OZONE WATER TREATMENT SYSTEM OPERATORS MANUAL Manual Version 1 3 0513 Model AOWT 7 Installation Troubleshooting Maintenance Guide...

Страница 2: ...ual in full and contact Aclarus for any questions Contains information to install and maintain the system diagnostic information helpful hints to ensure you have continuous and trouble free operation...

Страница 3: ...te and System Installation 21 Site Preparation 21 Plumbing the System 22 Filling the System 23 Filter Preparation Optional Media Bed Filters 24 Testing the System 25 Chapter Three System Maintenance 2...

Страница 4: ...one Injector 40 Servicing and Replacing the Ozone Mixing Pump 41 Replacing the Pump 42 Servicing the Ozone Generator 43 Troubleshooting the Ozone Generator 44 Servicing System Transformers 45 Chapter...

Страница 5: ...not responsible for damage to person or property due to misuse improper maintenance fluctuations in water quality Maintenance Duties NOTE Failure to comply with these instructions will damage your Acl...

Страница 6: ...t responsible for damage to property or health from use of this system It s use is done so at the owners risk Servicing Information Should service be required during or after the warranty period or sh...

Страница 7: ...m Premature fouling of the system is not covered by the warranty Always wash hands thoroughly with soap and water after performing any servicing procedures on the System ONLY OEM parts supplied by the...

Страница 8: ...Package Component List NOTE Please verify all ordered components are included with delivery Main system Electrical Assembly Ozone Generator Power Supply Associated Enclosure and Electronics Documenta...

Страница 9: ...9 System Components...

Страница 10: ...10 NOTE System components and tank may not be exactly as shown...

Страница 11: ...When Main Power Switch Is On And Flow Switch Activated System Will Operate Until Flow Switch Deactivated Periodic System Cycling Can Be Incorporated Based On System Operational Requirements Special Fe...

Страница 12: ...Specifications Power Requirements 110 120 Vac 60 Hz 15 Amp Standard Optional 220 240 Vac 60 Hz 15 Amp Power Connections Standard 115 Vac 15 Amp And 220 Vac 15 Amp Male Plugs Electrical Certification...

Страница 13: ...IC COMPONENTS Wiring Legend Diagram Quantity per System Part Description 1 2 10 plate ozone generator 2 1 High voltage coil 3 1 Cooling fan 4 1 ON OFF switch 5 2 15 amp ceramic slow blow fuse 6 1 Powe...

Страница 14: ...ent supplied NOTE System is only built to connect components solely at specific locations 9 Plumb Aclarus system and other components into water supply These components may vary depending on your appl...

Страница 15: ...outgoing valve on the Aclarus system to start the priming process to get ozone into the system before use Repeat 5 8 times for a total of at least 5 10 minutes of re circulation 23 To backwash filter...

Страница 16: ...system to flush out any small particulates of media that might have come through Run for a few minutes Repeat with other taps in house 30 Replace aerators in fixtures taps 31 Aclarus system should st...

Страница 17: ...st be filled the filters backwashed and samples taken to ensure water quality If line or pump pressure can exceed 65 psi 4 5 bar a pressure regulator is required The pressure regulator and bypass are...

Страница 18: ...bon prior to discharge shown Inlet Outlet Drain A B C A Fill Water Column here by unscrewing top and adding water B Sight Line for Water Column Ensure it is always at halfway up sight line C Check Sil...

Страница 19: ...rs Sediment then Activated Carbon Silica air dryer To ozone generator Gas Off Installed With Line to Drain Window Hose From Ozone to Mazzei Plumbing Assembly Flow Switch Connection TO OZONE HEAD Outle...

Страница 20: ...use a backflow preventer check valve in line Installation Materials In addition to the system supplied by Aclarus the following materials are or may be required for installation Pressure regulator if...

Страница 21: ...system before use and after system has not run for more than 1 day Prime by turning tap closest to the system is best 6 8 times on and off to turn system on circulate ozone before running water throug...

Страница 22: ...the Activated Carbon after the ozone system 4 Plumb Aclarus system and other components into water supply See Components Layout Page 9 Components may vary depending on the application 5 Complete the f...

Страница 23: ...m is full open part way and quickly close the ball valve controlling the outgoing water Open and close it 6 10 times to start ozone circulation prior to discharge NOTE system will run 20 60 seconds af...

Страница 24: ...a backwash on each filter NOTES only backwash one filter at a time and wait for filter to complete cycle before initiating second filter backwash if required follow instructions that come with the fi...

Страница 25: ...oper operation 4 Collect water samples See Water Sampling Instructions from the lab to be submitted to and submit samples to an accredited laboratory for analysis 5 Record all site specific informatio...

Страница 26: ...stem monthly with thorough visual inspection Ensure there are no obvious leaks or problems with the systems operation Immediately report any major concerns Always prime the system after it has not run...

Страница 27: ...ystem will stop drawing ozone into the water and instead will begin drawing the surrounding air into the water This will prevent the water from being properly treated and can eventually cause the ozon...

Страница 28: ...steps 1 Replace the saturated column with the alternate column so that the system can continue functioning while the gel in the saturated column dries 2 Unscrew the cap at the top of the saturated co...

Страница 29: ...Power Light Indicates power supply to the unit and ON OFF switch is on 3 Main Power Fuse 20 amp ceramic slow blow fuse and fuse body holder Push and turn to replace fuse 4 Ozone Power Light Indicates...

Страница 30: ...with a 1 amp fast blow fuse Turn system power to ON and open a tap to activate system flow switch If both lights are lit system is functioning properly If Ozone Power light stays off refer to call a...

Страница 31: ...the system by opening the downstream tap closest to the system Close tap after water flow out of the tap stops 3 Use the filter wrench provided with the cartridge filters to loosen the filter housing...

Страница 32: ...a preservative which is not safe for consumption and must be thoroughly flushed away prior to supplying potable water through the filters Ensure the proper filter flush process is performed prior to...

Страница 33: ...ition of the transformer s and generators c Look for obvious loose wires and repair as needed d Look for any discolouring or if there is a burning smell 2 Look at the water level in the Water Column i...

Страница 34: ...tap spout Check if filters are clogged and need replacement Water tastes smells or appears different than normal NOTE DO NOT DRINK UNTIL CORRECTED Power to system is off generator is not working or f...

Страница 35: ...e flow switch Excess air in water lines or fixture The float in the Gas Off Chamber may be stuck and the grey contact tank on system is full of air Gently tap on the tank and Gas Off Chamber until all...

Страница 36: ...ttached to the Mazzei and check for suction on Mazzei where hose was removed system operating Main power light on front of Aclarus Control Panel is not on Aclarus system has become disconnected from t...

Страница 37: ...ns on performing maintenance on the Mazzei and pump Unusual odour or smell of ozone around the system The line venting the gas off chamber is leaking or not vented properly 1 Make sure line is vented...

Страница 38: ...20L or water to be drained 5 Slowly open the discharge valve at the discharge of the tank and ensure that the water volume in the gas off chamber disappears if applicable 6 Allow the system to drain...

Страница 39: ...orrectly and must be replaced Replacing the flow switch 1 Screw flow switch into a spare unconnected 3 4 threaded PVC T connector not provided 2 Ensure there is clearance around the flow switch paddle...

Страница 40: ...are still under regular pressure There is the potential for water to damage electronics and components in ozone production The water column allows for Mazzei failure and redirects the released water...

Страница 41: ...g and ball back into Mazzei and replace grey seal Ensure ball is seated in seal properly 12 Replace Inlet cover and replace Mazzei into Aclarus system NOTE Ensure Mazzei flow indicator points in the r...

Страница 42: ...replacement pump onto frame and bolt down 9 Reconnect the wires use diagram you made in step 4a to the electrical box on pump and replace cover 10 Plumb pump by tightening unions before and after pum...

Страница 43: ...g Moisture in the generator can cause arcing which damages the generator No air draw through the system can cause generator to overheat Failure of the coil can cause improper energy delivery to genera...

Страница 44: ...roperly If light does NOT turn on there may be a problem with the transformers and or ozone generators Complete the following NOTE Only Aclarus authorized personnel can perform this function Turn Acla...

Страница 45: ...at less than 0 5 amp draw The increase supplies proper voltage to the corona discharge generator for ozone production There are several sources for transformer failure Over draw by ozone generator as...

Страница 46: ...the equipment is delivered and continues for 24 months c Any repairs under this warranty must be conducted by an authorized Company service representative d Excluded from the warranty are problems du...

Страница 47: ...47 Appendix Component Specification Sheets Pumps Specifications...

Страница 48: ...48...

Страница 49: ...49...

Страница 50: ...50 Flow Switch Specifications...

Страница 51: ...51...

Страница 52: ...52 Mazzei Specifications...

Страница 53: ...53 Gas Off 1 Specifications...

Отзывы: