74
Chapter 3
4.
See “Removing the CPU and VGA Heatsink Module” on page 71.
5.
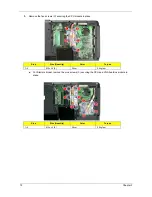
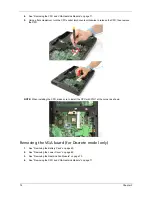
Using a flat screwdriver, turn the CPU socket latch counter-clockwise to release the CPU, then remove
the CPU.
NOTE: When installing the CPU, make sure to install the CPU with PIN 1 at the corner as shown.
Removing the VGA board (for Discrete model only)
1.
See “Removing the Battery Pack” on page 60.
2.
See “Removing the Lower Cover” on page 62.
3.
See “Removing the Heatsink Fan Module” on page 70.
4.
See “Removing the CPU and VGA Heatsink Module” on page 71.
Содержание Extensa 5420G
Страница 6: ...VI ...
Страница 10: ...X Table of Contents ...
Страница 65: ...Chapter 2 55 ...
Страница 66: ...56 Chapter 2 ...
Страница 111: ...Chapter 3 101 14 Remove the internal microphone from the back cover 15 Remove the Web camera from the back cover ...
Страница 112: ...102 Chapter 3 ...
Страница 126: ...116 Chapter 4 F5h Boot to Mini DOS F6h Clear Huge Segment F7h Boot to Full DOS Code Beeps ...
Страница 138: ...128 Chapter 5 ...
Страница 172: ...Appendix A 162 ...
Страница 178: ...168 Appendix C ...


