3 System upgrades
62
Installing a memory module
Warning! Memory of the identical size, speed, and organization
must be installed in the same colored DIMM slots.
1
Observe the pre-installation instructions on page 26.
2
Remove the side panel described on page 28.
3
Lay the server on its side (components showing).
4
Locate the DIMM slot on the mainboard.
5
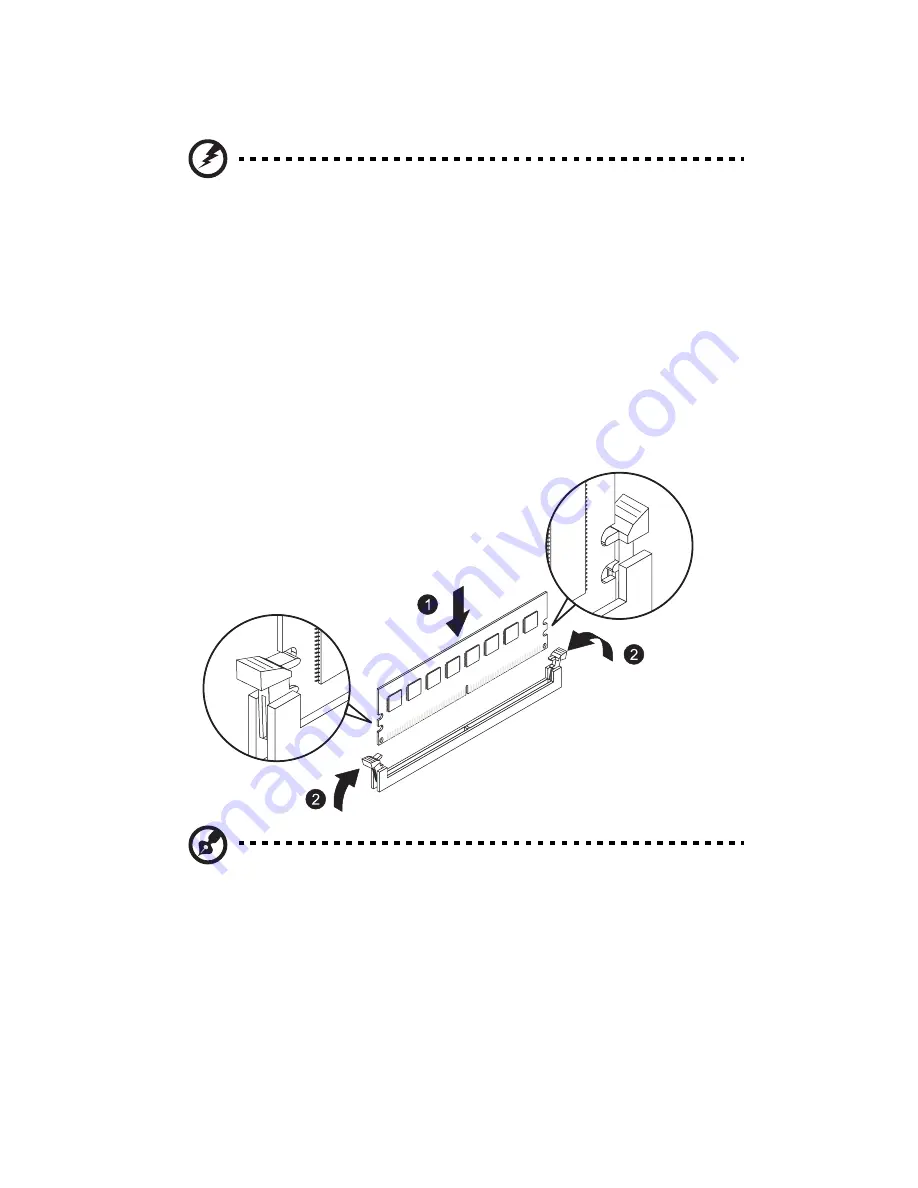
Install the memory module.
(a) Align then insert the DIMM into the socket (1).
(b) Push the DIMM to the socket until the retaining clips snap
inward (2).
Note: The DIMM slot is slotted to ensure proper installation. If you
insert a DIMM but it does not fit easily into the socket, you may
have inserted it incorrectly. Reverse the orientation of the DIMM
and insert it again.
6
Observe the post-installation instructions described on page 27.
The system automatically detects the amount of memory installed.
Run the BIOS setup to view the new value for total system memory
and make a note of it.
Содержание AT350 F1 Series
Страница 1: ...AT350 F1 Series User Guide ...
Страница 12: ...xii ...
Страница 13: ...1 System tour ...
Страница 15: ...3 External and internal structure Front panel With 3 5 inch HDD bays ...
Страница 29: ...2 System setup ...
Страница 37: ...3 System upgrades ...
Страница 79: ...4 System BIOS ...
Страница 117: ...5 System troubleshooting ...
Страница 127: ...Appendix A Server management tools ...
Страница 138: ...Appendix A Server management tools 126 ...
Страница 139: ...Appendix B Rack mount configuration ...
Страница 147: ...135 5 Extend the middle sliding piece of each mounting rail forward until you hear an audible click ...
Страница 150: ...Appendix B Rack mount configuration 138 ...
Страница 151: ...Appendix C Acer Smart Console ...
Страница 179: ...167 Exit Yes At the prompt click Yes to exit from remote redirection No Click No to return to the current session ...
Страница 180: ...Appendix C Acer Smart Console 168 ...
Страница 184: ...172 ...


