


3 Windows Home Server Console
42
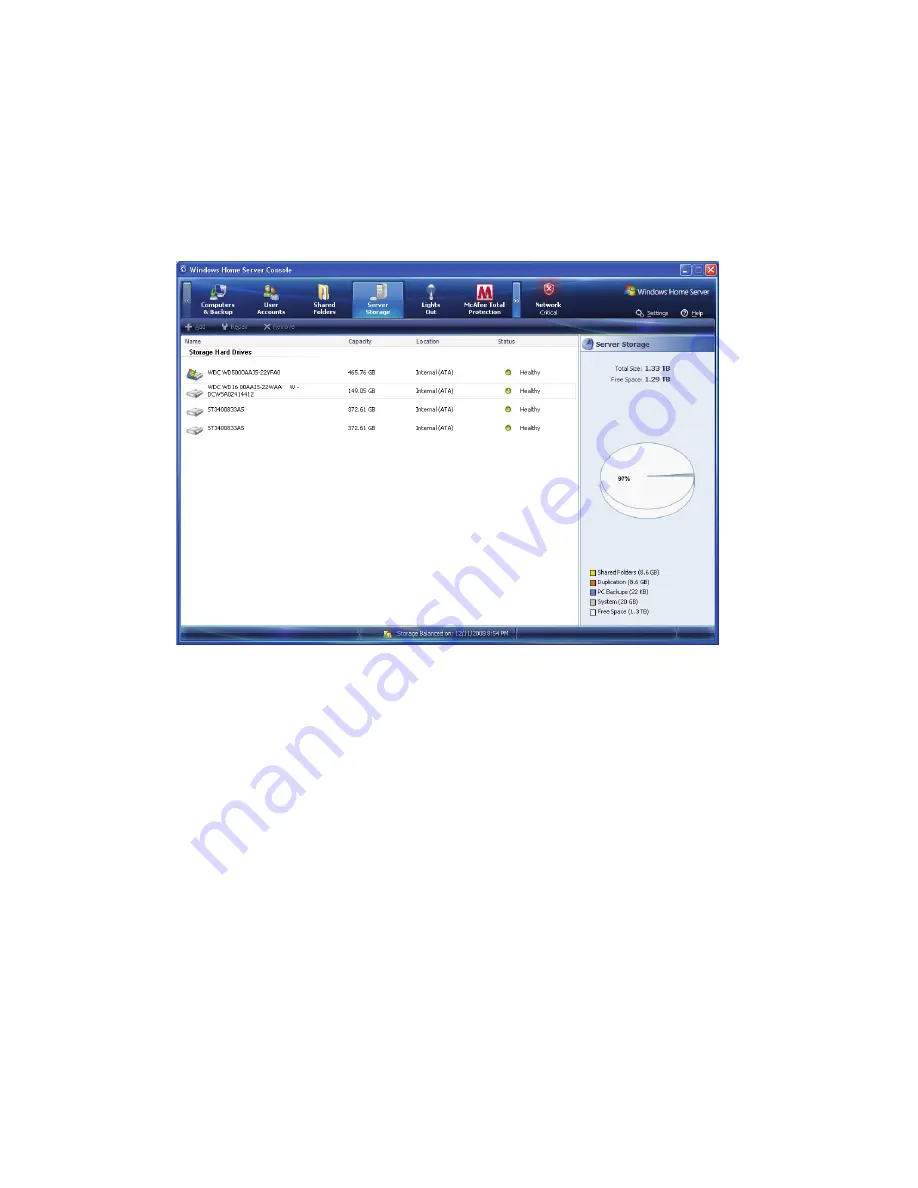
Server Storage
The Server Storage tab on the Windows Home Server Console displays
all the hard drives installed on your home server. You can use Server
Storage to view, add, repair, and remove hard drives from the home
server.
The options on the Server Storage tab allow you to:
•
Add - You can add hard drives of various sizes to the home server
and set the hard drives for the following usage:
•
Server storage - This option gives you more space to store
home computer backups and more space for your shared
folders.
•
Server Backup - This option allows you to back up all your
home server shared folders. If you use an external hard drive
for your home server backups, you can store the hard drive in
a separate location. When you select this option, your home
server appears in the Computers & Backup tab. You can use
Back up Now to back up your shared folders to the hard drive.
•
Repair - Fix errors on an unhealthy hard drive.
•
Remove - Delete a hard drive from the home server.
For more information, see Server Storage in the Windows Home Server
Console Help.
Содержание Aspire EasyStore Series
Страница 1: ...Aspire easyStore Series User Guide ...
Страница 12: ...xii ...
Страница 24: ...1 Introduction 10 ...
Страница 50: ...2 Setting up the system 36 ...
Страница 76: ...3 Windows Home Server Console 62 ...
Страница 108: ...4 Managing the server 94 3 Select a language 4 Click OK The Welcome window appears ...
Страница 109: ...95 5 Click Next 6 Click Finish ...
Страница 116: ...4 Managing the server 102 8 Enter your name then click Next 9 Enter your email address then click Next ...
Страница 120: ...4 Managing the server 106 ...
Страница 130: ...5 Configuring the hard disk drive 116 ...
Страница 141: ...127 2 Click Software Update The Welcome window displays 3 Click Next ...
Страница 143: ...129 6 Select the options you want installed on your hard drive then click Next 7 Click Install 8 Click Finish ...


