background image

Chapter 1

15

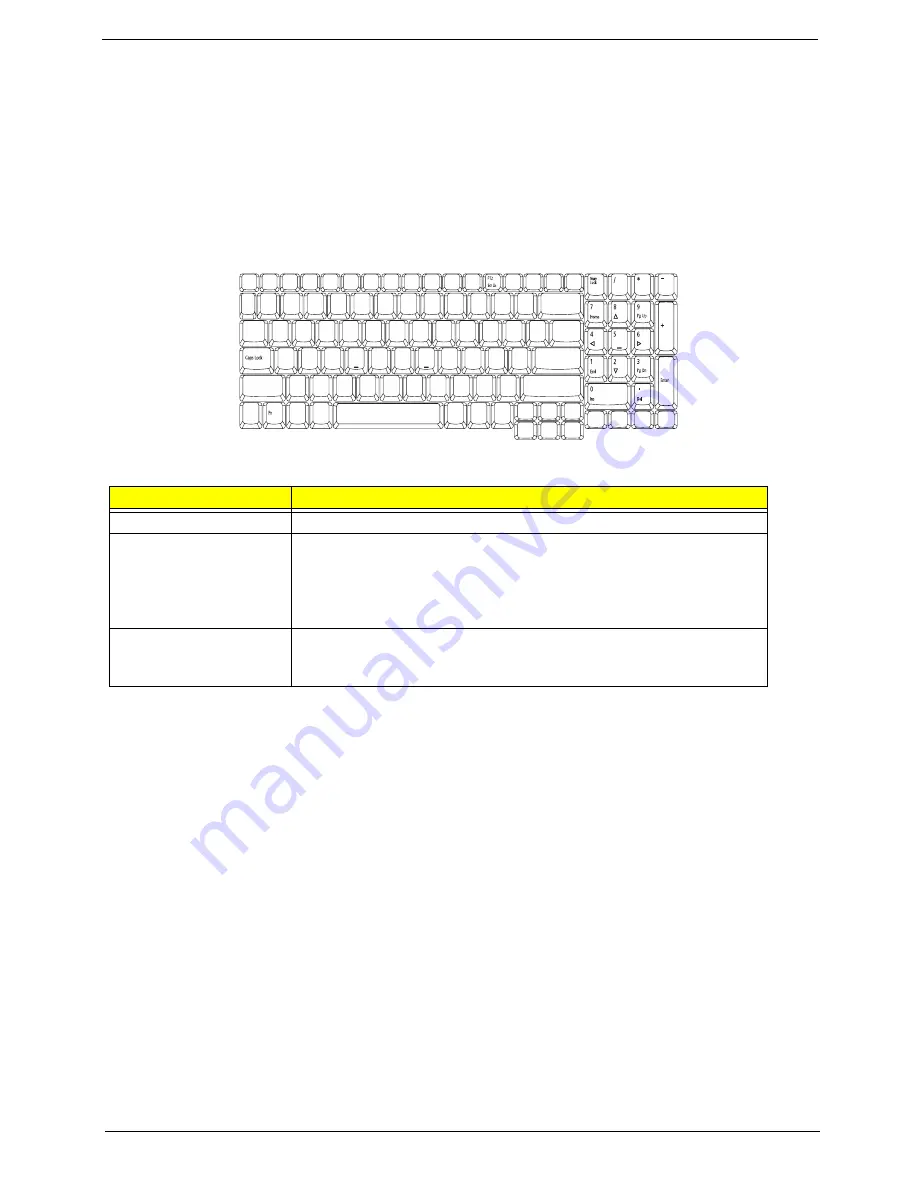
Using the Keyboard

The full-sized keyboard includes an embedded numeric keypad, separate cursor, lock, Windows, function and 

special keys.

Lock Keys and Embedded Numeric Keypad

The keyboard has three lock keys which you can toggle on and off.

Windows keys

The keyboard has two keys that perform Windows-specific functions.

Lock Key

Description

Caps Lock

When Caps Lock is on, all alphabetic characters are typed in uppercase.

Num Lock
<Fn> + <F11>

When Num Lock is on, the separate keypad is in numeric 
mode. The keys function as a calculator (complete with the 
arithmetic ope, -, *, and /). Use this mode when you 
need to do a lot of numeric data entry.

Scroll Lock
<Fn> + <F12>

When Scroll Lock is on, the screen moves one line up or down when you 
press the up or down arrow keys respectively. scroll Lock does not work 
with some applications.

y

y

y

gg

Содержание Aspire 9920G Series

Страница 1: ...a b g network connection Wi Fi CERTIFIED solution supporting Acer SignalUp wireless technology System Memory DDR II 533 677 SDRAM memory interface design 2 memory slots 2GB maximum gmemory for one Slotg Total 4GB using two soDIMM modules Display and GraphicsT 20 1 1680X1050 WSXGA 300 nit Acer CrystalBriteTM high brightness TFT LCD 16 ms Typical on off 5 ms Average gregy to grey response time Suppo...

Страница 2: ...DVD CD RW combo drive 5 in 1 card reader supporting Secure Digital SD MultiMediaCard MMC Memory Stick MS Memory Stick PRO MS PRO xD Picture Card xD Communication Acer Video Conference featuring Integrated Acer Crystal Eye webcam supporting Acer PrimaLite technology Acer PureZone technology Optional Acer Xpress VoIP phone WLAN Intel Wireless WiFi Link 4965AGN dual band quad mode 802 11a b g Draft N...

Страница 3: ...ment standards Stand by and Hibernation power saving modes support 71W 4800mAh 8 cell Li Ion battery pack Acer 2QuicChargeTM technology 80 charge in 1 hour 2 hour rapid charge system off 2 5 hggour charge in useg 3 pin 135 W AC adapter Security Kensington lock slot BIOS user and supervisor passwords Dimensions and Weight 490 W X 380 D X 60 H mm 19 3 x 14 9 x 2 4 inches 7 8kg with TV tuner 2nd HDD ...

Страница 4: ... desktop 2 2Select Tasks Scans 3 Select Run Scan to scan your system 4 When the scan is complete review the results of the scan You can schegdule customized virus scans that tun unattended on specific dates and times or at periodic intervals If you are using gthe computer when the scheduled scan begins it runs in the background so that you do not have to stop working For more information please re...

Страница 5: ...Chapter 1 5 Block Diagram ...

Страница 6: ...icators Light Emitting Diodes LEDs that light up to show the status of the computer s functions and components 7 3D sonic speakers Left and right speakers deliver stereo audio output 8 Click buttons left center and right The left and right buttons work like the left and right mouse buttons the center button serves as a four way scroll button 9 Palmrest Comfortable support area for your hands when ...

Страница 7: ...ion 4 Wireless communication button indicator Enables disables the wireless function Indicates the status of wireless LAN communication 5 Infrared port Interfaces with infrared devices e g infrared printer and IR aware computer 6 Microphone in jack Accepts input from external microphones 7 Line in jack Accepts audio line in devices e g audio CD player stereo walkman 8 Headphones speaker line out j...

Страница 8: ...d xD for selected models 5 PC Card slot Accepts one Type II PC Card 6 N A PC Card slot eject button Ejects the PC Card from the slot 7 N A Latch Locks and releases the lid Item Description 1 Acer Media Bay optical drive Internal optical drive accepts CDs or DVDs 2 Optical disk access indicator Lights up when the optical drive is active 3 Optical drive eject button Ejects the optical disk from the ...

Страница 9: ...or selected models 5 External display VGA port Connects to an external display device e g external monitor LCD projector 6 DC in jack Connects to an AC adapter 7 Kensington lock slot Connects to a Kensington compatible computers security lock 8 N A Ventilation slots Enable the computer to stay cool even after prolonged use 9 N A Parallel port Connects to parallel devices 10 N A TV in port Accepts ...

Страница 10: ...ver or obstruct the opening of the fan 2 Memory compartment Houses the computer s main memory 3 Battery lock Locks the battery in position 4 Battery latch Releases the battery for removal 5 Battery bay Houses the computer s battery pack 6 Hard disk bay Houses the computer s hard disk secured with screws 7 Sub woofer Emits low frequency sound output ...

Страница 11: ...r when the battery is charging The light shows green when the system is under AC mode Icon Item Description Num Lock Lights up when Num Lock is activated Caps Lock Lights up when Caps Lock is activated HDD Indicates when the hard disk drive is active Bluetooth Indicates the status of Bluetooth communication Wireless LAN Indicates the status of wireless LAN communication Power Lights when the compu...

Страница 12: ...powering Technology Although the mail and web browser buttons are pre set to E mail and Internet programs they can be redefined by users To set the web browser mail and programmable buttons run the Acer Launch Manager Easy launch button Default application Acer Empowering Technology user programmable Mail E mail application user programmable Web browser Internet browser user programmable P User pr...

Страница 13: ...his button mimics the cursor pressing on the right scroll bar of Windows applications Note Keep your fingers as well as the surface of the touchpad dry and clean The touchpad is sensitive to your finger movement hence the lighter the touch the better the response Tapping hard will not increase the touchpad s responsiveness Note By default vertical and horizontal scrolling is enabled on your touch ...

Страница 14: ...14 Chapter 1 Mouse settings in Windows Control Panel ...

Страница 15: ...ic functions Lock Key Description Caps Lock When Caps Lock is on all alphabetic characters are typed in uppercase Num Lock Fn F11 When Num Lock is on the separate keypad is in numeric mode The keys function as a calculator complete with the arithmetic operators and Use this mode when you need to do a lot of numeric data entry Scroll Lock Fn F12 When Scroll Lock is on the screen moves one line up o...

Страница 16: ... Sidebar gadgets L Lock your computer if you are connected to a network domain or switch users if you re not connected to a network domain M Minimizes all windows R Open the Run dialog box T Cycle through program on the taskbar U Open Ease of Access Center X Open Windows Mobility Center BREAK Display the System Properties dialog box SHIFT M Restore minimized windows to the desktop TAB Cycle throug...

Страница 17: ... Fn F4 Sleep Leads the computer to Sleep mode Fn F5 Display toggle Switches the display output between the display screen external monitor if connected and both Fn F6 Screen blank Turns off the display screen backlight to save power Press any key to return Fn F7 Touchpad toggle Turns the internal touchpad on and off Fn F8 Speaker toggle Turns the speakers on and off Fn K Volume up Increases the so...

Страница 18: ...board NOTE Some fonts and software do not support the Euro symbol Please refer to www microsoft com typography faq faq12 htm for more information The US dollar sign 1 Open a text editor or word processor 2 Either directly press the key at the bottom right of the keyboard or hold Shift and then press the 4 key at the upper center of the keyboard Note This function varies by the operating system ver...

Страница 19: ...s the Acer Video Conference technology so you transmit the best video conference quality over an instant messenger service Rotating the Acer OrbiCam The Acer OrbiCam rotates 225 degrees counterclockwise to achieve the desired angle Refer to the illustrations below Note Do NOT rotate the camera clockwise to prevent damage to the device For your convenience the camera snaps 45 degrees to match the p...

Страница 20: ...cer OrbiCam The Acer OrbiCam capture window will appear as below Changing the Acer OrbiCam Settings Resolution To change the capture resolution click the displayed resolution at the bottom right corner of the capture window then select the desired resolution Note Setting the camera resolution to 640 x 480 or larger does not change the capture window size ...

Страница 21: ...Chapter 1 21 Options Click Options to display the Window Preview and Folder tabs Use the options to change the capture window size preview settings and the folder for captured photos or videos ...

Страница 22: ...ngs Basic Settings Click the Camera Settings icon on the bottom right corner of the capture display then select Camera Settings from the pop up menu You can adjust the Video Audio and Zoom Face tracking options from this window ...

Страница 23: ...er settings and turn on off the camera indicator Zoom Face Track Settings allows you to adjust the zoom level and turn the face tracking feature on or off Capturing Photos Videos To capture a photo or a video clip rotate the Acer OrbiCam to get the desired angle then click the Take a Picture or Record a Video button The Windows Picture and Fax Viewer or the Windows Media Player automatically launc...

Страница 24: ...ing your face beyond the capture window frame Minimal head movements are tracked more efficiently Please follow the steps below to enable the Acer VisageON 1 Right click on this icon then select VisageON from the pop up menu The VisageON window will appear as below 2 Select and apply a video effect in the left section of the VisageON window Change the face tracking settings and options in the righ...

Страница 25: ...Chapter 1 25 3 Click VisageON to display a menu that allows to change the configuration of the camera face tracking and video effects settings ...

Страница 26: ...overs data flexibly reliably and completely Acer eSettings Management accesses system information and adjusts settings easily Acer ePerformance Management improves system performance by optimizing disk space memory and registry setting For more information right click on the Empowering Technology toolbar then select the Help or Tutorial function Empowering Technology Password Before using Acer eLo...

Страница 27: ...our PC Acer eNet Management automatically detects the best settings for a new location while offering you the freedom to manually adjust the settings to meet your needs Acer eNet Management can save network settings for a location to a profile and automatically switch to the appropriate profile when you move from one location to another Settings stored include network connection settings IP and DN...

Страница 28: ...1394 wired LAN and optical device if supported DC Mode Battery Mode There are four pre defined profiles Entertainment Presentation Word Processing and Battery Life You can also define up to three of your own To Create a New Power Profile 1 Change power settings as desired 2 Click Save as to save to a new power profile 3 Name the newly created profile 4 Select whether this profile is for Adapter or...

Страница 29: ...tings to Set alarms Reload factory defaults Select what actions to be taken when the cover is closed or the power button is pressed Set passwords for accessing the system after Hibernation or Stand by View information about Acer ePower Management ...

Страница 30: ...30 Chapter 1 ...

Страница 31: ...utomatically switched out when an external display is connected to the system For projectors and external devices that are not auto detected launch Acer ePresentation Management to choose an appropriate display setting Note If the restored resolution is not correct after disconnecting a projector or you need to use an external resolution that is not supported by Acer ePresentation Management adjus...

Страница 32: ...file Acer eDataSecurity Management can be integrated with TPM on computers equipped with the TPM hardware On computers equipped with the TPM hardware there will be additional Acer eDataSecurity Management system setup and administration procedures which allow the user to utilize TPM for the PSD and the File Folder encryption functions If the Use TPM option is selected during Acer eDataSecurity Man...

Страница 33: ...Chapter 1 33 ...

Страница 34: ...rom a hidden partition factory defaults Recovery from the HDD most recent user defined recovery point Recovery from CD or DVD Note If the computer did not come with a Recovery CD or System CD please use Acer eRecovery Management s System backup to optical disk feature to burn a backup image to CD or DVD To ensure the best results when recovering the system using a CD or Acer eRecovery Management d...

Страница 35: ...Chapter 1 35 Provides a simple graphical user interface for navigation Displays general system status and advanced monitoring for power users on Acer computer ...

Страница 36: ...es an express optimization method to release unused memory and disk space quickly The user can also enable advanced options for full control over the following options Disk optimization removes unneeded items and files Speed optimization improves the usability and performance of the Windows XP system Memory optimization releases unused memory and check usage ...

Страница 37: ...gs and click OK to complete the process Acer GridVista is a handy utility that offers four pre defined display settings so you can view multiple windows on the same screen To access this function please go to Start All Programs and click on Acer GridVista You may choose any one of the four display settings indicated below Double vertical Triple primary at left Triple primary at right or Quad Acer ...

Страница 38: ...cond monitor is set to the manufacturer s recommended value Launch Manager Launch Manager allows you to set the four easy launch buttons located above the keyboard You can access the Launch Manager by clicking on Start All Programs Launch Manager to start the application ...

Страница 39: ... ROM type Flash ROM BIOS ROM size 1MB BIOS package 8 PIN SOIC Supported protocols ACPI 1 0b 2 0 3 0 PCI 2 2 System HDD Password Security Control INT 13h Extensions PnP BIOS 1 0a SMBIOS 2 4 BIOS Boot Specification Compal Phoenix Intel Simple Boot Flag 1 0 Boot Block PCI Bus Power Management Interface Specification USB1 1 2 0 IEEE 1394 1 0 USB 1394 CD ROM Boot Up support PC Card standard 1995 PCMCIA...

Страница 40: ...and 0 9V Supports DIMM package 200 pin soDIMM Memory module combinations You can install memory modules in any combinations as long as they match the above specifications Memory Combinations Slot 1 Slot 2 Total Memory 0MB 128MB 128MB 0MB 256MB 256MB 0MB 512MB 512MB 0MB 1024MB 1024MB 0MB 2048MB 2048MB 128MB 128MB 256MB 128MB 256MB 384MB 128MB 512MB 640MB 128MB 1024MB 1152MB 128MB 2048MB 2176MB 256M...

Страница 41: ...ull speed data rate Protocol Bluetooth 1 1 Upgradeable to Bluetooth 1 2 when SIG specification is ratified Interface USB 2 0 Connector type USB Hard Disk Drive Interface Item Vendor Model Name HGST HTS541680J9SA00 WD WD800BEVS 22RST0 Seagate ST9120822AS Toshiba MK1237GSX HGST HTS541612J9SA00 WD WD1200BEVS 22RST0 TOSHIBA MK1637GSX SEAGATE ST9160821AS HGST HTS541616J9SA00 WD WD1600BEVS 22RST0 Capaci...

Страница 42: ... R discs 5 Reads and writes CD RW andHSRW discs 6 Reads and writes US US RW 7 Reads data in each DVD ROM and DVD Dual 8 Reads and writes in each DVD R Ver 2 0 for general DVD RW and DVD R RW Ver1 1 9 Reads and writes DVD R Dual 10 Reads and writes DVD RAM Loading mechanism Load Manual Release a Electrical Release Release Button b Release by ATAPI command c Emergency Release Power Requirement Input...

Страница 43: ...ber of USB port 4 Location One on the left side three on the right side Serial port function control Enable Disable by BIOS Setup PCMCIA Port Item Specification PCMCIA controller TI PCI 7412 Supports card type Type II Number of slots One type II Access location Left panel Supports ZV Zoomed Video port No ZV support Supports 32 bit CardBus Yes Express Card Interface Item Specification Express card ...

Страница 44: ...he USB port directly Yes Battery Item Specification Vendor model name BATTERY PACK SANYO LI ION 8 CELL2 4 4800MAH BATTRY PACK SONY LI ION 8CELL2 4 4800MAH Battery Type Li ion Pack capacity 4800 mAH Number of battery cell 8 Package configuration 4 cells in series 2 series in parallel Normal voltage 14 8V Charge voltage 16 8 0 2V LCD 20 1 inch Item Specification Vendor model name AUO M201EW02 V9 GLA...

Страница 45: ... name TDK Brightness conditions N A Input voltage V 9 21 Input current mA 2 56 max Output voltage V rms 780V 2000V for kick off Output current mA rms 6 5 max Output voltage frequency k Hz 65K Hz max AC Adaptor Item Specification Input rating 90V AC to 264V AC 47Hz to 63Hz Maximum input AC current 1 7A Inrush current 220A 115VAC 220A 230VAC Efficiency 82 min 115VAC input full load System Power Mana...

Страница 46: ...pend PCMCIA Suspend Audio Power Down Hard Disk Power Down CD ROM Power Down Super I O Low Power mode Save to Disk S4 Also called Hibernation Mode System saves all system states and data onto the disc prior to power off the whole system System Power Management ACPI mode Power Management ...

Страница 47: ...Setup Please also refer to Chapter 4 Troubleshooting when problem arises To activate the BIOS Utility press F2 during POST when Press F2 to enter Setup message is prompted on the bottom of screen Press F12 during POST to enter multi boot menu In this menu user can change boot device without entering BIOS SETUP Utility However The default parameter of F12 Boot Menu is set to disabled If you want to...

Страница 48: ...m q Press Esc while you are in any of the menu options to go to the Exit menu q In any menu you can load default settings by pressing F9 You can also press F10 to save any changes made and exit the BIOS Setup Utility NOTE You can change the value of a parameter if it is enclosed in square brackets Navigation keys for a particular menu are shown on the bottom of the screen Help for parameters are f...

Страница 49: ...the model name of HDD installed on system System BIOS version Displays system BIOS version VGA BIOS Version This field displays the VGA firmware version of the system Serial Number This field displays the serial number of this unit Asset Tag Number This field displays the asset tag number of the system Product Name This field shows product name of the system Manufacturer Name This field displays t...

Страница 50: ...isplays a summary of your computer hardware information and also includes basic setup parameters It allows the user to specify standard IBM PC AT system parameters NOTE The screen above is for your reference only Actual values may differ ...

Страница 51: ...ded Memory This field reports the memory size of the extended memory in the system Extended Memory size Total memory size 1MB VGA Memory Shows the VGA memory size VGA Memory size 64 128MB Quiet Boot Determines if Customer Logo will be displayed or not shows Summary Screen is disabled or enabled Enabled Customer Logo is displayed and Summary Screen is disabled Disabled Customer Logo is not displaye...

Страница 52: ...w describes the parameters in this screen Settings in boldface are the default and suggested parameter settings Parameter Description Option Serial port A Displays the settings of the serial port Enabled Disabled AUTO Parallel port Shows the settings of the parallel port Enabled Disabled AUTO ...

Страница 53: ...Chapter 2 53 Security The Security screen contains parameters that help safeguard and protect your computer from unauthorized use ...

Страница 54: ...e Password on boot parameter 5 When you are done press F10 to save the changes and exit the BIOS Setup Utility Removing a Password Follow these steps 1 Use the cursor up down key to highlight the Set Supervisor Password parameter and press the Enter key The Set Password box appears Parameter Description Option User Password is Shows the setting of the user password Clear or Set Supervisor Password...

Страница 55: ...key The Set Password box appears 2 Type the current password in the Enter Current Password field and press Enter 3 Type a password in the Enter New Password field Retype the password in the Confirm New Password field 4 Press Enter After setting the password the computer sets the User Password parameter to Set 5 If desired you can enable the Password on boot parameter 6 When you are done press F10 ...

Страница 56: ...56 Chapter 2 If the new password and confirm new password strings do not match the screen will display the following message ...

Страница 57: ...menu allows the user to decide the order of boot devices to load the operating system Bootable devices includes the distette drive in module bay the onboard hard disk drive wake up on LAN USB KEY and the CD ROM in module bay ...

Страница 58: ...he parameters in this screen Parameter Description Exit Saving Changes Exit System Setup and save your changes to CMOS Exit Discarding Changes Exit utility without saving setup data to CMOS Load Setup Default Load default values for all SETUP item Discard Changes Load previous values from CMOS for all SETUP items Save Changes Save Setup Data to CMOS ...

Страница 59: ... memory related drivers XMS EMS DPMI when you use the Phlash NOTE Please use the AC adaptor power supply when you run the Phlash utility If the battery pack does not contain enough power to finish BIOS flash you may not boot the system because the BIOS is not completely loaded Fellow the steps below to run the Phlash 1 Prepare a bootable diskette 2 Copy the flash utilities and BIOS code to the boo...

Страница 60: ...60 Chapter 2 ...

Страница 61: ...mat for preventing electrostatic discharge q Small Philips screw driver q Philips screwdriver q Plastic flat head screw driver q Tweezers NOTE The screws for the different components vary in size During the disassembly process group the screws with the corresponding components to avoid mismatch when putting back the components When you remove the stripe cover please be careful not to scrape the co...

Страница 62: ... Begin Before proceeding with the disassembly procedure make sure that you do the following 1 Turn off the power to the system and all peripherals 2 Unplug the AC adapter and all power and signal cables from the system 3 Remove the battery pack ...

Страница 63: ...es you a graphic representation on the entire disassembly sequence and instructs you on the components that need to be removed during servicing For example if you want to remove the system board you must first remove the keyboard then disassemble the inside assembly frame in that order ...

Страница 64: ...3 NL 86 TAVV5 001 B SCREW M2 5 6 NL 86 TAVV5 002 C SCREW M2 5 10 NL 86 TAVV5 003 D SCREW M2 5 15 NL 86 TAVV5 004 E SCREW M2 2 2 86 TAVV5 005 F SCREW M2 3 NL 86 TAVV5 006 G SCREW M2 4 86 TAVV5 007 H SCREW M3 4 NL 86 TAVV5 008 I SCREW D SUB 4 X40 1 5 NI NL 86 TAVV5 009 ...

Страница 65: ...Chapter 3 65 Removing the Battery Pack 1 Release the battery 2 Slide the battery latch then remove the battery ...

Страница 66: ...3 Then disconnect the two HDD as shown Some notebooks may have only one HDD Removing the Memory Module 4 Remove the four screws holding the CTO cover 5 Detach the CTO cover from the main unit 6 Pop out the memory module from the DIMM socket then remove it If the notebook has two memory modules then repeat this step Removing the Wireless LAN Card TV Tunder Card and System Fan 7 Remove the two screw...

Страница 67: ... 11 Disconnect the TV in cable then remove the TV tuner card 12 Remove two screws holding the support holder as shown 13 Remove four screws fastening the support holder on the rear side as shown 14 Detach the support holder from the main unit 15 Remove the three screws holding the system fan 16 Disconnect the fan cable from the main board 17 Take out the system fan from the main unit as shown ...

Страница 68: ...main board 20 Then take out the CPU heatsink from the main board 21 Use a flat screwdriver to release the CPU lock Turn counter clock wise then remove the CPU carefully 22 Remove the two screws fastening the MXM heatsink 23 Detach the MXM heatsink from the main board 24 Remove the two screws fastening the MXM card 25 Remove the MXM card carefully ...

Страница 69: ...ummy cards 26 Remove the screw fastening the optical disk drive module on the bottom 27 Use a tool to push the optical disk drive module outwards and remove the ODD module 28 Then remove the PC dummy card 29 Remove the express dummy card ...

Страница 70: ...the rear side as shown 31 Then detach the middle cover from the front side and remove it 32 Take out the LCD cable from the groove 33 Disconnect the LCD cable from the main board 34 Remove the six screws holding the LCM module 35 Detach the LCD module from the main unit ...

Страница 71: ...ect the Keyboard FFC from the main board 4 Then remove the keyboard from the main unit 5 Remove the 18 screws fastening the upper case and the lower case assembly as shown 6 Disconnect the Speaker cable from the main board 7 Disconnect the Audio board FFC from the main board 8 Disconnect the Hotkey board FFC from the main board 9 Disconnect the Touch pad FFC from the main board 10 Carefully detach...

Страница 72: ... bluetooth module fromt the lower case 12 Remove the two screws fastening the modem board and disconnect the modem board from the main board 13 Disconnect the modem cable and remove the modem board 14 Remove the three screws fastening the main board to the lower case 15 Detach the main board from the lower case assembly ...

Страница 73: ...Remove MB fom lower case 20 Tear off the mylar holding the speaker set cable carefully 21 Remove the eight screws fastening the speaker and sub woofer set 22 Then remove the speaker and sub woofer set from the lower case Disassembling the Upper Case Assembly 1 Disconnect the touchpad board to main board FFC and remove it 2 Remove the seven screws and disconnect the touchpad to touchpad board FFC ...

Страница 74: ... and the touchpad 6 Disconnect the launch board FFC from the launch board and the media board and remove the FFC 7 Remove the three screws fastening the media board to the upper case 8 Remove the media board from the upper case 9 Remove the two screws holding the audio board to the upper case 10 Tear off the audio cable from the lower case 11 Turn over the audio board as shown ...

Страница 75: ...rd 14 Carefully take out the microphone cable and the microphones from the lower case 15 Detach and disconnect the launch board cable and remove it 16 Detach the launch board insulator as shown 17 Remove the four screws fastening the launch board 18 Take out the launch board from the upper case 19 Then take out the touchpad frame from the upper case ...

Страница 76: ...76 Chapter 3 ...

Страница 77: ... from the LCD module carefully 4 Disconnect the CCD cablem from the CCD board 5 Then remove CCD module 6 Take out the LCD from the LCD panel 7 Remove the four screws fastening the right left LCD brackets 8 Detach the right left LCD brackets 9 Disconnect the LCM cable from the LCD and inverter 10 Disconnect Inverter cable from LCD panel and detach the inverter ...

Страница 78: ...78 Chapter 3 11 Remove the two screws fastening the wireless antenna set and take out the antenna set from the LCD panel ...

Страница 79: ... Remove the four screws holding the HDD hard disk drive foil two on each side 2 Carefully take out the hard disk drive from the HDD foil Disassembling the ODD Module 1 Remove the two screws holding the optical bracket 2 Then remove the optical bracket from the optical disk drive ...

Страница 80: ...80 Chapter 3 ...

Страница 81: ... which page to go to Symptoms Verified Go To Power failure The power indicator does not go on or stay on Power System Check on page 80 POST does not complete No beep or error codes are indicated Power On Self Test POST Error Message on page 84 Undetermined Problems on page 96 POST detects an error and displayed messages on screen Error Message List on page 85 Other symptoms i e LCD display problem...

Страница 82: ...orrectly seated in the connector on the system board If the keyboard cable connection is correct run the Keyboard Test If the tests detect a keyboard problem do the following one at a time to correct the problem Do not replace a non defective FRU 1 Reconnect the keyboard cables 2 Replace the keyboard 3 Replace the main board The following auxiliary input devices are supported by this computer q Nu...

Страница 83: ...nstall the charged battery pack then check that power is supplied by the battery pack If you suspect a power problem see the appropriate power supply check in the following list q Check the Power Adapter on page 82 q Check the Battery Pack on page 83 ...

Страница 84: ...e following q Replace the System board q If the problem is not corrected see Undetermined Problems on page 96 q If the voltage is not correct go to the next step NOTE An audible noise from the power adapter does not always indicate a defect 3 If the power on indicator does not light up check the power cord of the power adapter for correct continuity and installation 4 If the operational charge doe...

Страница 85: ...battery pack that has less than 50 of the total power remaining when installed in the computer If the battery status indicator does not light up remove the battery pack and let it return to room temperature Re install the battery pack If the charge indicator still does not light up replace the battery pack If the charge indicator still does not light up replace the DC DC charger board Touchpad Che...

Страница 86: ...ext possible FRU to be replaced when servicing a computer If the symptom is not listed see Undetermined Problems on page 96 The following lists the error messages that the BIOS displays on the screen and the error symptoms classified by function NOTE Most of the error messages occur during POST Some of them display information about a hardware device e g the amount of memory installed Others may i...

Страница 87: ...ault Settings in BIOS Setup Utility Hard disk drive System board Stuck Key see Keyboard or Auxiliary Input Device Check on page 80 Keyboard error see Keyboard or Auxiliary Input Device Check on page 80 Keyboard Controller Failed see Keyboard or Auxiliary Input Device Check on page 80 Keyboard locked Unlock key switch Unlock external keyboard Monitor type does not match CMOS Run Setup Run Load Defa...

Страница 88: ... Setup Utility System cache error Cache disabled System board CPU ID System board DMA Test Failed DIMM System board Software NMI Failed DIMM System board Fail Safe Timer NMI Failed DIMM System board Device Address Conflict Run Load Default Settings in BIOS Setup Utility RTC battery System board Allocation Error for device Run Load Default Settings in BIOS Setup Utility RTC battery System board Fai...

Страница 89: ...source battery pack and power adapter See Power System Check on page 80 Reconnect the LCD connector Hard disk drive LCD inverter ID LCD cable LCD Inverter LCD System board No beep power on indicator turns on and LCD is blank But you can see POST on an external CRT Reconnect the LCD connectors LCD inverter ID LCD cable LCD inverter LCD System board No beep power on indicator turns on and a blinking...

Страница 90: ...efore memory autosize 18h 8254 timer initialization 1Ah 8237 DMA controller initialization 1Ch Reset Programmable Interrupt Controller 20h 1 3 1 1 Test DRAM refresh 22h 1 3 1 3 Test 8742 Keyboard Controller 24h Set ES segment register to 4 GB 26h Enable A20 line 28h Autosize DRAM 29h Initialize POST Memory Manager 2Ah Clear 215 KB base RAM 2Ch 1 3 4 1 RAM failure on address line xxxx 2Eh 1 3 4 3 R...

Страница 91: ... Enable external and CPU caches 69h Setup System Management Mode SMM area 6Ah Display external L2 cache size 6Bh Load custom defaults optional 6Ch Display shadow area message 6Eh Display possible high address for UMB recovery 70h Display error messages 72h Check for configuration errors 76h Check for keyboard errors 7Ch Set up hardware interrupt vectors 7Eh Initialize coprocessor if present 80h Di...

Страница 92: ...key lock A4h Initialize Typematic rate A8h Erase F2 prompt AAh Scan for F2 key stroke ACh Enter SETUP AEh Clear Boot flag B0h Check for errors B2h POST done prepare to boot operating system B4h 1 One short beep before boot B5h Terminate QuietBoot optional B6h Check password optional B9h Prepare Boot BAh Initialize DMI parameters BBh Initialize PnP Option ROMs BCh Clear parity checkers BDh Display ...

Страница 93: ...uge Segment E9h Initialize Multi Processor EAh Initialize OEM special code EBh Initialize PIC and DMA ECh Initialize Memory type EDh Initialize Memory size EEh Shadow Boot Block EFh System memory test F0h Initialize interrupt vectors F1h Initialize Run Time Clock F2h Initialize video F3h Initialize System Management Mode F4h 1 Output one beep before boot F5h Boot to Mini DOS F6h Clear Huge Segment...

Страница 94: ...s displayed LCD inverter ID LCD inverter LCD cable LCD System board Indicator Related Symptoms Symptom Error Action in Sequence Indicator incorrectly remains off or on but system runs correctly Reconnect the inverter board Inverter board System board Power Related Symptoms Symptom Error Action in Sequence Power shuts down during operation Power source battery pack and power adapter See Power Syste...

Страница 95: ...o sound Speaker System board Power Management Related Symptoms Symptom Error Action in Sequence The system will not enter hibernation See Save to Disk S4 on page 45 Keyboard if control is from the keyboard Hard disk drive System board The system doesn t enter hibernation mode and four short beeps every minute Press Fn oand see if the computer enters hibernation mode Touchpad Keyboard Hard disk con...

Страница 96: ...5 LCD CRT Both display switching System board USB does not work correctly System board Print problems Ensure the Parallel Port in the Onboard Devices Configuration of BIOS Setup Utility is set to Enabled Onboard Devices Configuration Run printer self test Printer driver Printer cable Printer System Board Serial or parallel port device problems Ensure the Serial Port in the Devices Configuration of...

Страница 97: ... discharge or software errors FRU replacement should be considered only when a recurring problem exists When analyzing an intermittent problem do the following 1 Run the advanced diagnostic test for the system board in loop mode at least 10 times 2 If no error is detected do not replace any FRU 3 If any error is detected replace the FRU Rerun the test to verify that there are no more errors ...

Страница 98: ...operating correctly See Power System Check on page 80 1 Power off the computer 2 Visually check them for damage If any problems are found replace the FRU 3 Remove or disconnect all of the following devices q Non Acer devices q Printer mouse and other external devices q Battery pack q Hard disk drive q DIMM q CD ROM Diskette drive Module q PC Cards 4 Power on the computer 5 Determine if the problem...

Страница 99: ...Chapter 5 97 Top View Jumper and Connector Locations Chapter 5 ...

Страница 100: ...98 Chapter 5 ...

Страница 101: ...Chapter 5 99 Bottom View ...

Страница 102: ...100 Chapter 5 ...

Страница 103: ...ade it will not be noted on the printed Service Guide For ACER AUTHORIZED SERVICE PROVIDERS your Acer office may have a DIFFERENT part number code from those given in the FRU list of this printed Service Guide You MUST use the local FRU list provided by your regional Acer office to order FRU parts for repair and service of customer machines NOTE To scrap or to return the defective parts you should...

Страница 104: ... T60M955 00 54 TCXVN 001 MINI WIRELESS BOARD 802 11 A B G MOW2 INTEL MM872659 KI GLN01 002 MINI WIRELESS BOARD 802 11 A B G ROW INTEL MM874511 KI GLN01 003 MINI WIRELESS BOARD 802 11 A B G JP INTEL MM874740 KI GLN01 004 MINI WIRELESS LAN BOARD 802 11BG INTEL WM3945AGBG KI GLN01 005 WIRELESS LAN BOARD 802 11AGN INTEL 4965AGN MOW1 MINI PCI KI KDN01 001 WIRELESS LAN BOARD 802 11AGN INTEL 4965AGN MOW2...

Страница 105: ...ARD Above image is top view below image is bottom view 55 AKE0N 003 MEDIA BOARD Above image is top view below image is bottom view 55 AAMVN 013 AUDIO BOARD 55 AKE0N 001 TOUCHPAD BOTTON BOARD 55 AAMVN 005 CABLE POWER CORD 3PIN USA 27 AAMVN 001 POWER CORD 3PIN EUR 27 AAMVN 002 POWER CORD AUSTRALIA W LABEL 27 AAMVN 003 POWER CORD 3PIN UK 27 AAMVN 004 POWER CORD 3PIN CHINA 27 AAMVN 005 POWER CORD 3PIN...

Страница 106: ...27 AAMVN 011 SMART CARD READER WITH CABLE 60 TLK0N 003 HOT KEYBOARD CABLE 50 AAMVN 003 MEDIA BOARD CABLE 50 AAMVN 004 IR CABLE 8PIN VERSION A05 50 AAMVN 031 AUDIO BOARD CABLE 50 AKE0N 001 BUTTON BOARD CABLE 6 PINS 50 AAMVN 006 BUTTON BOARD CABLE 12 PINS 50 AAMVN 007 MODEM CABLE WITH RJ11 CONNECTOR 50 AAMVN 010 CASE COVER BRACKET ASSEMBLY Category No Part Name and Description Acer Part No ...

Страница 107: ... 103 LOWER CASE 60 AAMVN 001 UPPER CASE 60 AKE0N 001 MIDDLE COVER 60 AAMVN 003 ASSY THERMAL COVER 60 AAMVN 004 SUPPORT COVER 60 AAMVN 005 HDD COVER 42 AAMVN 001 Category No Part Name and Description Acer Part No ...

Страница 108: ...t gesket If you need to replace the touchpad bracket please take off the gesket from old touchpad bracket and then stick them to new touchpad bracket 33 AAMVN 001 CPU PROCESSOR CPU INTEL CORE2DUAL T7100 PGA 1 8G 2M 800 KC 71001 DTP CPU INTEL CORE2DUAL T7300 PGA 2 0G 4M FSB800 KC 73001 DTP CPU INTEL CORE2DUAL T7500 PGA 2 2G 4M FSB800 KC 75001 DTP CPU INTEL CORE2DUAL T7700 PGA 2 4G 4M FSB800 KC 7700...

Страница 109: ...ZEL FW AC06 FOR VISTA KV 00101 003 ASSEMBLY SUPLER MULTI MODULE 8X 6M AKE0N 001 OPTICAL BRACKET 33 AAMVN 002 SUPER MULTI BEZEL GBASE 42 AAMVN 013 DVD RW DRIVE DVD RW DRIVE 8X SUPER MULTI TOSHIBA TS L632D W O BEZEL KU 00809 019 DVD RW DRIVE 8X SUPER MULTI GBASE PHILIPS DS 8A1P LF W O BEZEL KU 00809 010 Category No Part Name and Description Acer Part No ...

Страница 110: ...TOSHIBA MK1237GSX GEMINI BS LF F W DL130J KH 12004 006 HDD 120GB 5400RPM SATA HGST HTS541612J9SA00 SURUGA B LF F W C70P KH 12007 010 HDD 120GB 5400RPM SATA WD WD1200BEVS 22RST0 ML80 LF KH 12008 018 HDD 160GB 5400RPM SATA SEAGATE ST9160821AS VENUS LF FW 3 ALD KH 16001 026 HDD 160GB 5400RPM SATA TOSHIBA MK1637GSX GEMINI BS LF F W DL030J KH 16004 001 HDD 160GB 5400RPM SATA HITACHI HTS541616J9SA00 SUR...

Страница 111: ...S BLACK ARABIC ENGLISH NO SPONGE KB INT00 137 KEYBOARD 17KB FV2 106KS BLACK CZECH NO SPONGE KB INT00 132 KEYBOARD 17KB FV2 106KS BLACK DANISH NO SPONGE KB INT00 131 KEYBOARD 17KB FV2 106KS BLACK ITALIAN NO SPONGE KB INT00 122 KEYBOARD 17KB FV2 106KS BLACK FRENCH NO SPONGE KB INT00 128 KEYBOARD 17KB FV2 106KS BLACK GERMAN NO SPONGE KB INT00 127 KEYBOARD 17KB FV2 105KS BLACK US ISRAEL NO SPONGE KB I...

Страница 112: ... SPONGE KB INT00 135 KEYBOARD 17KB FV2 106KS BLACK SLOVENIAN NO SPONGE KB INT00 113 LCD LCD MODULE 20 1 WSXGA AU GLARE W ANTENNA CCD 0 3M 6M AKE0N 003 LCD CABLE 20 1IN AUO W CCD CABLE 50 AF60N 001 WIRELESS ANTENNA FOR 20 1IN 25 AAMVN 002 CCD MODULE 0 3M BISON BN30V6O714320 57 TLT0N 001 CCD BRACKET 33 AAZ0N 001 LCD BEZEL 20 W LOGO 60 AKE0N 004 LCD COVER 20 W LOGO 60 AKE0N 005 LCD BARCKET L W HINGE ...

Страница 113: ...0T2953EZ3 CE6 LF KN 1GB0B 011 SO DIMM DDRII667 1GB HYNIX HYMP512S64CP8 Y5 LF KN 1GB0G 006 MISCELLANEOUS LCD RUBBER CUSHION 47 AAMVN 001 SPEAKER BUMPER 47 AAMVN 002 VGA BRACKET TOP 33 AKE0N 004 EXTERNAL ANTENNA SET 25 AAMVN 004 VGA BRACKET BOTTOM 33 AKE0N 005 NTSC ADAPTER 25 AKE0N 002 RF ADAPTER 25 AKE0N 001 ACCESSORY EXTERNAL ANTENNA SET 25 AAMVN 004 REMOTE CONTROLLER RC803V TC WITH DANULE SNOWFLA...

Страница 114: ... SCREW 86 AAMVN 002 SCREW 86 AAMVN 003 SCREW 86 AAMVN 004 SCREW 86 AAMVN 005 SCREW 86 AAMVN 006 SCREW 86 AAMVN 007 SCREW 86 AAMVN 008 SCREW 86 AAMVN 009 SCREW 86 AAMVN 010 SCREW 86 AAMVN 011 SCREW 86 AAMVN 012 SCREW 4 5Dx0 8T NI PATCH 86 AKE0N 001 Category No Part Name and Description Acer Part No ...

Отзывы: