


124
Chapter 4
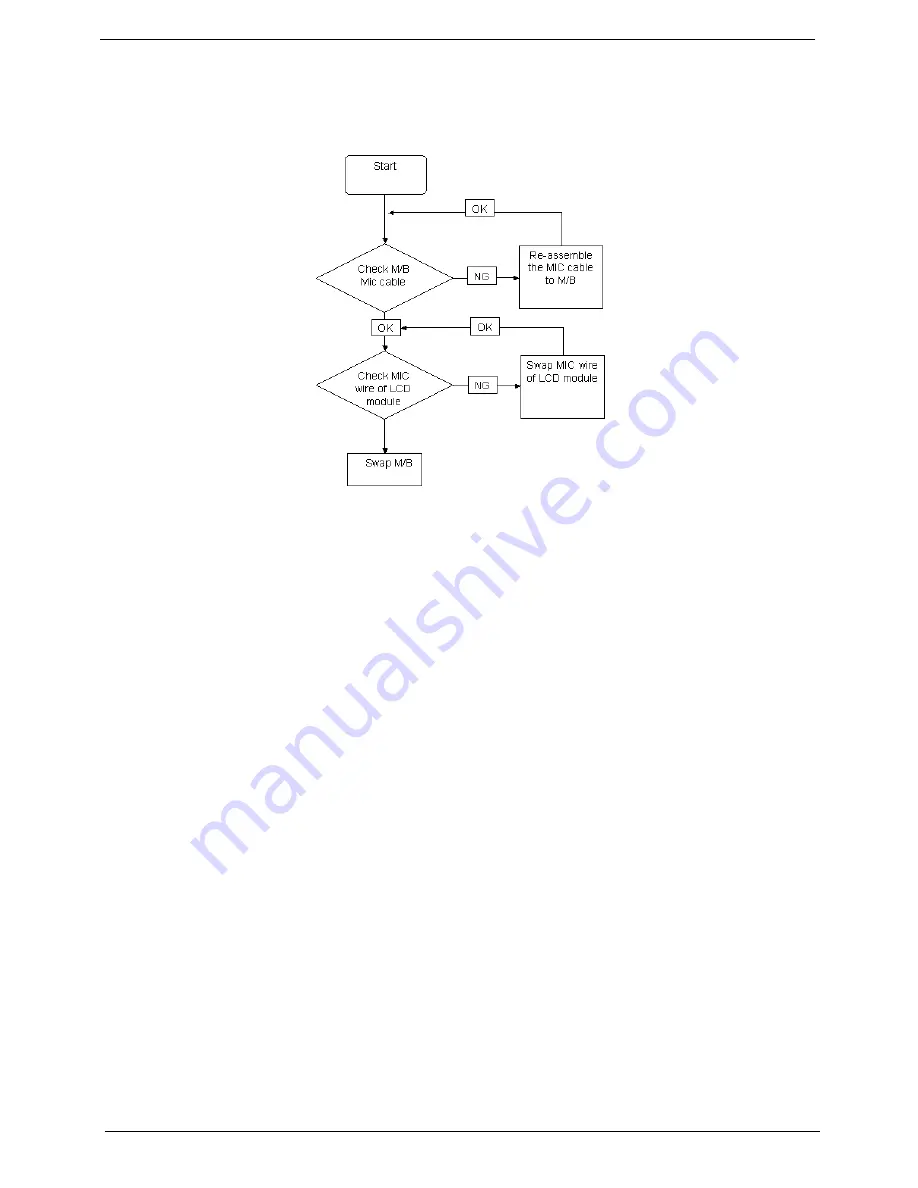
Internal Microphone Failure
If the internal
Microphone
fails, perform the following actions one at a time to correct the problem. Do not
replace a non-defective FRUs:
Microphone Problems
If internal or external
Microphones
do no operate correctly, perform the following actions one at a time to
correct the problem.
1.
Check that the microphone is enabled. Navigate to
Start
´
Control
Panel
´
Hardware
and
Sound
´
Sound
and select the
Recording
tab.
2.
Right-click on the
Recording
tab and select
Show
Disabled
Devices
(clear by default).
3.
The microphone appears on the
Recording
tab.
4.
Right-click on the microphone and select
Enable
.
5.
Select the microphone then click
Properties
. Select the
Levels
tab.
6.
Increase the volume to the maximum setting and click
OK
.
7.
Test the microphone hardware:
a.
Select the microphone and click
Configure
.
b.
Select
Set up microphone
.
c.
Select the microphone type from the list and click
Next
.
d.
Follow the onscreen prompts to complete the test.
8.
If the Issue is still not resolved, see “Online Support Information” on page 211.
Содержание Aspire 6530 Series
Страница 6: ...VI...
Страница 10: ...X Table of Contents...
Страница 14: ...4 Chapter 1 System Block Diagram...
Страница 49: ...Chapter 2 39 3 Reboot the system and key in the selected string qjjg9vy 07yqmjd etc for the BIOS user password...
Страница 50: ...40 Chapter 2...
Страница 64: ...54 Chapter 3 5 Lift the HDD carrier to remove 6 Grasp the HDD connector and pull firmly to remove...
Страница 85: ...Chapter 3 75 4 Grasp the module by the right side and lift up to remove...
Страница 93: ...Chapter 3 83 7 Disconnect the Mic cable and remove the LCD bezel...
Страница 104: ...94 Chapter 3 4 Replace the ten securing screws and screw caps on the LCD bezel...
Страница 106: ...96 Chapter 3 3 Connect fan cable to the mainboard as shown...
Страница 111: ...Chapter 3 101 2 Reconnect the TouchPad and Finger Print Reader FFCs as shown...
Страница 120: ...110 Chapter 3 7 Turn the computer over and replace the ten screws as shown...
Страница 155: ...Chapter 5 145 Jumper and Connector Locations Top View Chapter 5...
Страница 156: ...146 Chapter 5 Bottom View...
Страница 172: ...162 Chapter 6 Screw List Category Description Acer P N SCREW SCREW SCREW SCREW SCREW SCREW SCREW SCREW SCREW...
Страница 173: ...Chapter 6 163...
Страница 220: ...210 Appendix B...
Страница 222: ...212 Appendix C...


