PROBOIL 2 to PROBOIL.2X Upgrade Installation Guide v1b
8
Installing new PROBOIL2X boiler:
⚠
WARNING
:
You must not solely use the overall assembly diagram as a guide to installation, we are not liable for
any safety or performance issues as a result of not following the step by step installation guide in this guide with due
care.
1)
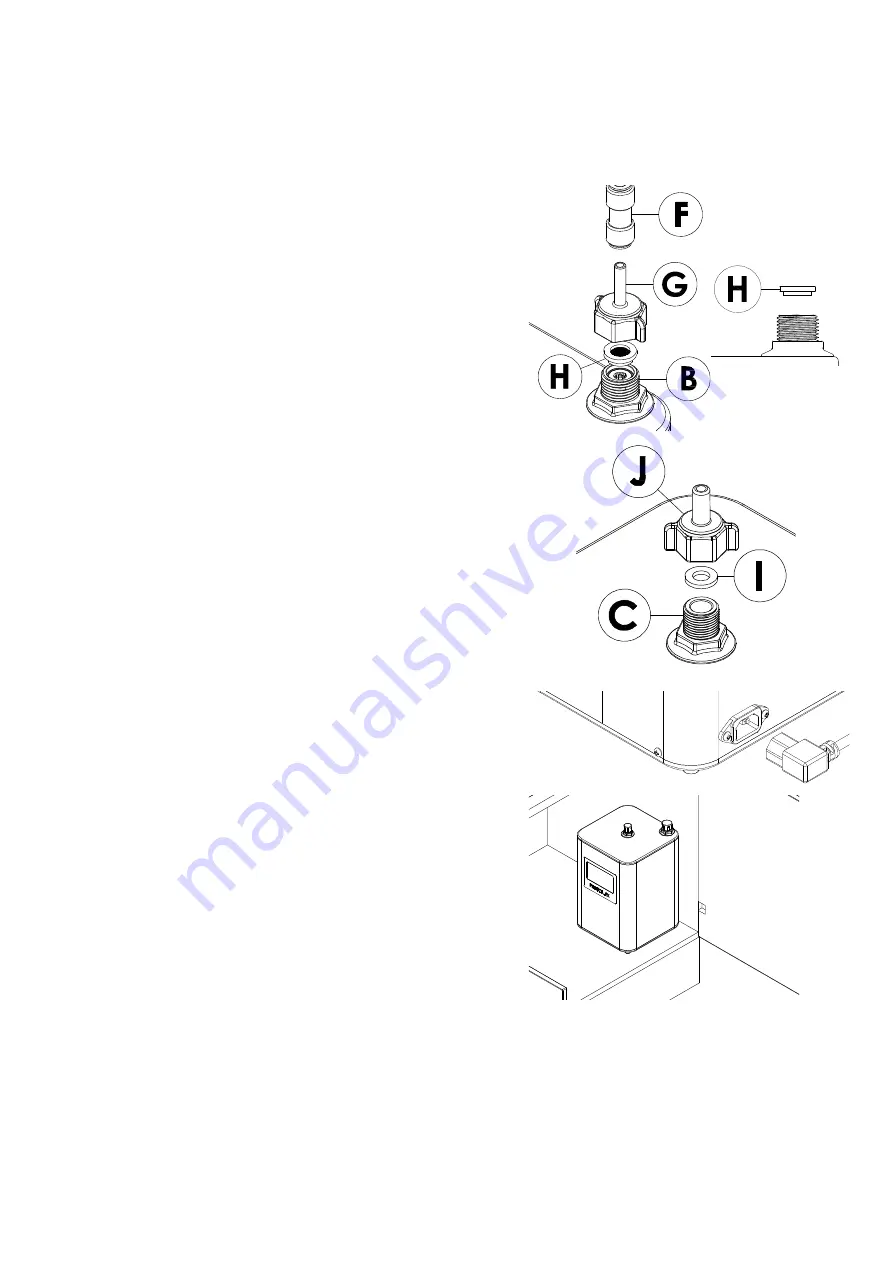
Insert the ½” rubber meshed seal
(H)
into the ½” boiler inlet
(B)
, ensure the orientation of the seal is as shown.
2)
Screw the ½” blue wingnut inlet connector with integral/
internal “flat” rubber seal
(G)
hand tight (
do not use a
spanner or overtighten
) on to the boiler ½” inlet male
(B).
3)
Check that the red 3/8” x 8mm boiler outlet connector
(J)
has pre-inserted internally the 3/8” rubber seal
(I)
,
an
additional seal is supplied, ensure to use only 1 x 3/8”
rubber seal in this connection.
4)
Screw the red 3/8” x 8mm boiler outlet connector
(J)
hand
tight (
do not use a spanner or overtighten
) on to the boiler
3/8” male outlet
(C)
.
5)
Plug the power cable
(D)
securely into the socket on the left-
hand side of the boiler
(A)
.
6)
Hook the boiler keyhole slots onto its wall fixing screws
(M)
and check it is secure.


