Problem Solving
PROBLEM
POSSIBLE PROBLEM
POSSIBLE SOLUTION
Trouble assembling/
disassembling
attachments
1. Trouble assembling
attachments
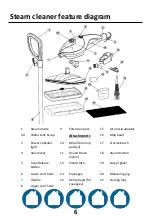
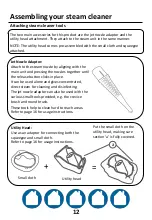
1. There are a number of attachments that can be used
with this steam cleaner. All attachments attach to the
connector in the main body in the same manner. The
black clip of the attachments should protrude through the
hole in the connector to be secure. Refer to pages 10-14
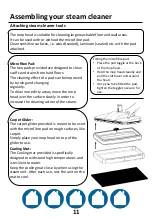
of the instruction manual provided. For attaching the mop
pad/carpet glider, refer to page 11. The handle is pushed
in to the main body, with the pin aligned correctly so that
it fits in to the mould and clicks in to place (page 10). To
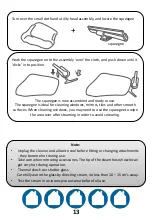
connect the squeegee, refer to pages 12-13.
2. Trouble disassembling
attachments
2. Disassembling the attachments should be
straightforward. To disassemble, press in the clip that is
protruding through the hole in the connector of the main
body, and pull the attachment away. For the squeegee,
you cannot access the clip and so this will have to be
disassembled carefully.
3. Trouble converting
from steam mop to
handheld.
3. Disassemble the handle by pushing in the small black
button on the side of the handle connector, then pulling
away the pole. Attach the required accessory in the same
manner that the mop head was attached, with the black
clip protruding through the hole in the connector.
Filling/Emptying
water tank
1. Trouble filling the
water tank.
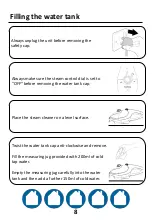
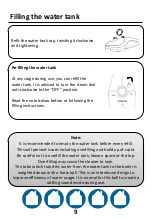
1. Make sure the cleaner is unplugged. With the unit on a
level surface, turn the water tank cap on the top of the
cleaner anticlockwise until loose and remove. Fill the
measuring jug provided with 200ml cold tap water and
pour the contents of the jug in to the tank, then add a
further 150ml water. Put the cap back in to the tank and
turn clockwise to secure. For instructions on refilling the
tank, refer to page 9 of the instruction manual provided.
2. Trouble emptying the
water tank.
2. Unplug the steam cleaner. Wait a minimum of 5
minutes for the unit to cool. Turn the cap anticlockwise
and remove. Hold the cleaner with both hands and safely
pour any remaining water into a sink. Secure the safety
cap back on the cleaner.
19
Содержание pro A21SM3001
Страница 27: ...Model number A21SM3001 R3a...

