EN
Article No.: 0301697_EN_a
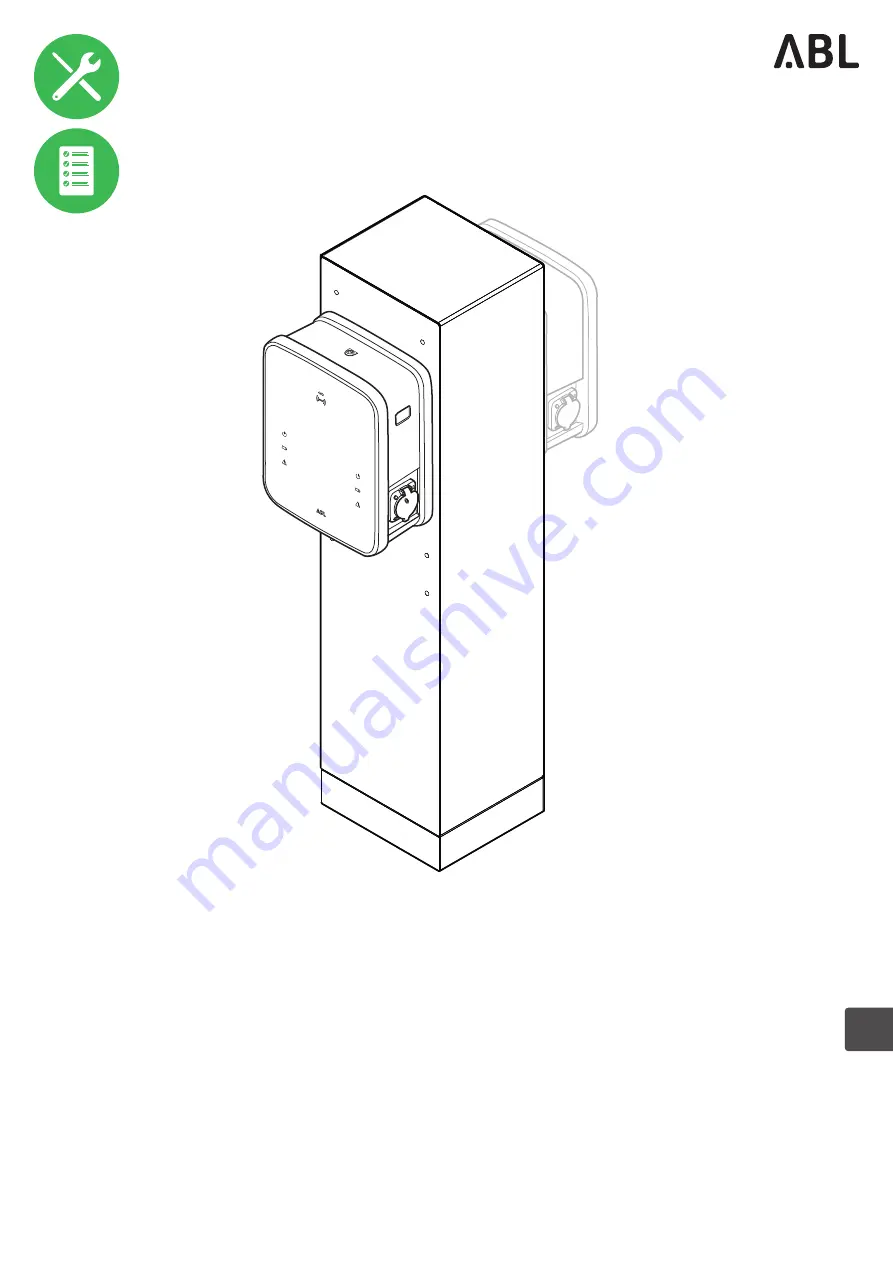
Installation manual
POLEMH6
Страница 1: ...EN Article No 0301697_EN_a Installation manual POLEMH6...
Страница 2: ...o abl de www ablmobility de Customer Service 49 0 9123 188 0 service abl de www ablmobility de de service support Revision 0301697_EN_a version 10 12 2021 Th i n k b e f o r e y o u p r i n t NOTE Ple...
Страница 3: ...tions for the mechanical installation of the POLEMH6 13 Laying the EMH9996 foundation 14 Installing the POLEMH6 on the EMH9996 foundation 16 Specifications for the mechanical and electrical installati...
Страница 4: ...visit https www ablmobility de en Intended use The POLEMH6 mounting pole is designed for the outdoor installation of one or two eMH3 Wallboxes In order to en sure the necessary stability the POLEMH6 c...
Страница 5: ...e NOTE Indicates important information for operation or installation Sections marked with this symbol indicate further important information and features necessary for successful operation Actions mar...
Страница 6: ...nnected electric devices or the device itself must be resolved by a qualified specialist electrical contractor Should one of the following malfunctions occur please contact the specialist electrical c...
Страница 7: ...ter it has been installed without any techni cal faults and subsequently approved by a qualified specialist electrical company NOTE Changes to functions and design features Please note that all techni...
Страница 8: ...ck A D C B D A These four thread points are used to attach the mounting plate of the eMH3 Wallbox The required M8 25 rounded head screws are included with the POLEMH6 B These two thread points are use...
Страница 9: ...below via two recessed empty conduits DN 100 NOTE Using a custom foundation These instructions describe how to install the POLEMH6 on the EMH9996 concrete foundation In principle it is possible to mak...
Страница 10: ...mount the base of the POLEMH6 mounting pole using the washers and M10 35 hexagon socket screws supplied B The two empty conduits are used to feed the supply and data cables through the foundation int...
Страница 11: ...ation on the POLEMH6 in section Technical spec ifications on page 28 Items supplied The product is delivered including the following components POLEMH6 mounting pole 1 piece Key for unlocking the hous...
Страница 12: ...nting pole POLEMH6 h 420 mm w 420 mm d 420 mm WPR36 Weather shield for installation on an exterior wall or the mounting pole POLEMH6 h 142 mm w 515 mm d 285 mm CABHOLD Cable holder with charging plug...
Страница 13: ...es installed on the POLEMH6 in a group installation suitable data cables must also be laid to the installation location Suitable collision protection must be provided on site to provide the POLEMH6 wi...
Страница 14: ...cklaying tools Concrete screed mixed Vacuum lifting tool optional Laying the EMH9996 foundation The optional EMH9996 concrete foundation from ABL provides a level installation surface for the POLEMH6...
Страница 15: ...ed anchors for screwing the POLEMH6 in place As the POLEMH6 can be mounted on the foundation in any direction 0 90 180 270 the empty conduits on the side of the EMH9996 can be aligned with the supply...
Страница 16: ...r connection to the high current terminals in the small distribution board of the POLEMH6 7 Run data cables with sufficient length approx 2 0 m through the same or the second empty con duit for the su...
Страница 17: ...mmendations when connecting the power and data cables Power line To connect to the terminal block on the lowest standard rail of the small distribution board a cable length of approx 0 8 m from the fo...
Страница 18: ...ower line through the lower PG cable gland into the case of the small distribution board and secure the cable gland NOTE Strain relief for the power line A cable clamp is recommended to secure the sup...
Страница 19: ...Ground and short circuit 5 Cover or bar access to adjacent components under voltage The supply cable must not be reconnected to the electricity grid until Step 4 in the section Electrical connection o...
Страница 20: ...Installing the eMH3 Wallbox on the POLEMH6 This section describes how to install an eMH3 wallbox on the POLEMH6 Proceed as follows 1 Screw the mounting plate of the eMH3 Wallbox to one side of the mou...
Страница 21: ...e the spring loaded mechanism of the PE terminal and attach the protective earth conductor y Use the connection pattern for TN systems on page 24 to allocate the wires 1 5 m NOTE Detailed information...
Страница 22: ...ic components cover onto the wallbox housing and fix it into place with the screw you removed in Step 3 WARNING Proper routing of the data cables Run the data cables through the two openings at the bo...
Страница 23: ...NGER Dangerous electrical currents Always observe the 5 safety rules 1 Cut power source 2 Secure all cut off devices 3 Verify absence of voltage 4 Ground and short circuit 5 Cover or bar access to adj...
Страница 24: ...Connection pattern for 3 phase TN system Designation Wire strand colour recommended Labelling Phase 1 current carrying conductor Brown L1 Phase 2 current carrying conductor Black L2 Phase 3 current ca...
Страница 25: ...allation of a second eMH3 Wallbox The POLEMH6 is designed for the installation and operation of two eMH3 Wallboxes Please observe the following instructions when installing a second wallbox Make sure...
Страница 26: ...th the connection pattern for 3 phase TN systems Safety instructions for start up and operation Before initial operation of the wallbox installed on the POLEMH6 you must observe the following safety n...
Страница 27: ...stream RCCB MCB The internal RCCB MCB of the wallbox are not switched on Check the RCCB MCB on the wallbox NOTE Detailed information on other causes of errors The installation instructions for the eMH...
Страница 28: ...anslucent colour film Integrated components Small distribution board with three top hat rails 200 35 mm and high current terminals 35 mm 5 pin two bridged terminals per pin C profile rail Locking mech...
Страница 29: ...Version 0301697_a Last updated 10 December 2021 All rights reserved Any information contained in this manual may be changed without prior notice and does not represent any obliga tion on the part of...
Страница 30: ...MADE IN GERMANY ABL SURSUM Albert Bu ttner Stra e 11 91207 Lauf an der Pegnitz Germany 49 0 9123 188 0 49 0 9123 188 188 info abl de www ablmobility de...