


SOTOX A™ MOBILE ANALYSER | USER GUIDE
11 | EN
2. GET TING STARTED | 3. PRINTER
2.9 SD card slot
The analyser has a microSD card slot. Refer to section
2.1 SoToxa Mobile Analyser at a glance
for the location of the SD card cover panel. The SD card socket
can only be accessed by unscrewing the SD card cover panel. For this, a small Phillips head screw driver is needed. This tool is not supplied with the system.
Please contact Product Support if access to the SD card is required.
The SD card can also be used for applying firmware updates to the analyser, adding new test cartridge types or versions to the analyser and exporting
of diagnostic data from the analyser to the card. Information on how to use the SD card for updating information on the analyser is covered in section
10.1 Updating firmware
.
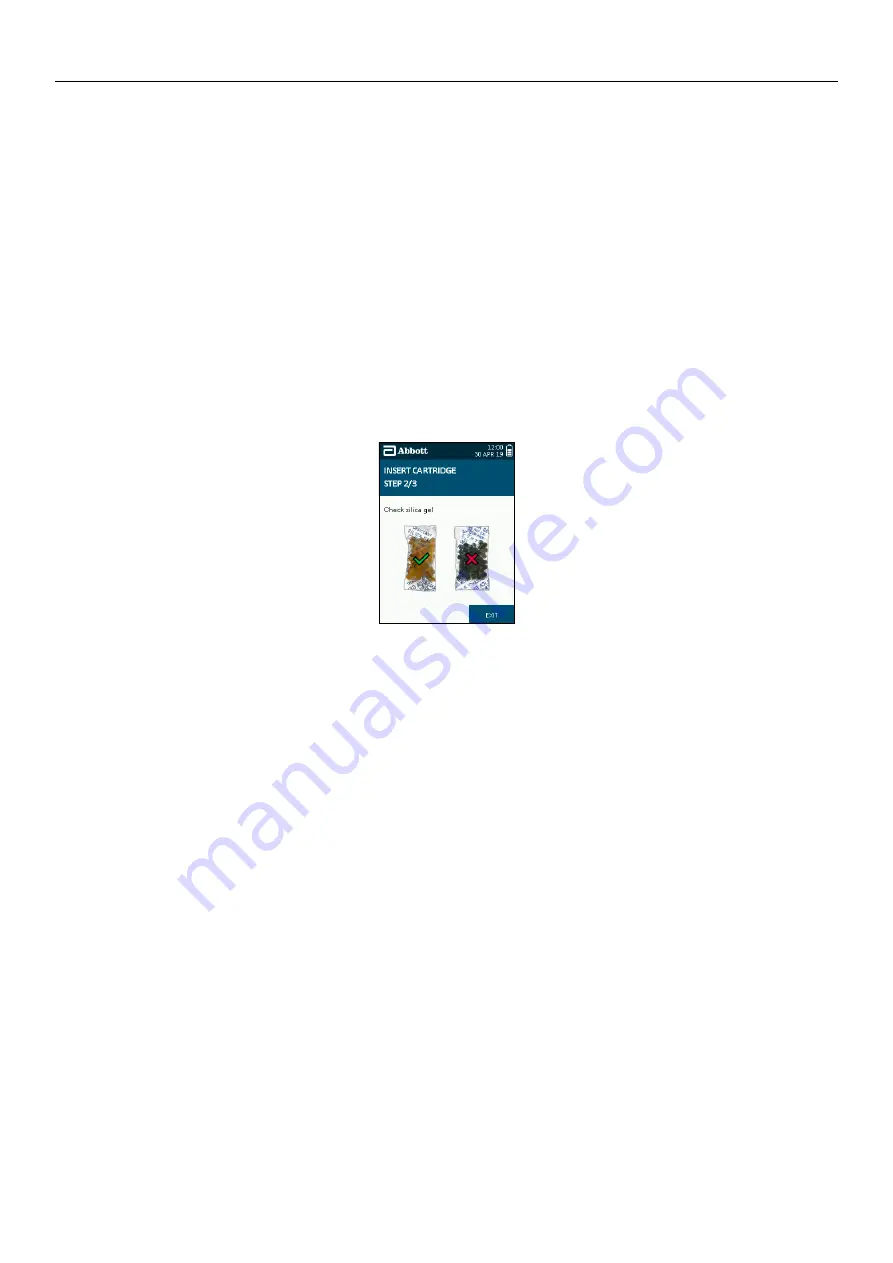
2.10 Silica gel packs
Each foil wrapped test cartridge is packed with a silica gel packet. The silica beads are designed to change in colour when moist and act as an indication that
the kits have been stored correctly and have not been exposed to water vapour in the air. The silica packs are made from an environmentally friendly, synthetic
silica indicating gel that is impregnated with a colour changing agent.
The silica gel packs are yellow/orange when dry, indicating that the kit has been stored correctly and has not been exposed to the external environment. When
moisture has been absorbed, the silica packs will turn to light green, indicating that water vapour has entered the packaging.
The silica gel pack should be checked each time a test cartridge is opened. If the silica gel pack is green, discard the test cartridge and contact Product
Support, as the performance of the product may have been compromised. If the silica gel has burst, discard the test cartridge and contact Product Support.
Slight discolouration of the silica beads is normal. When the majority of the beads within the pack are green, the test cartridge should not be used.
3. Printer
3.1
Connecting the printer
To connect the SoToxa Mobile Analyser to the printer use the RJ12 connector cable provided. Attach this cable to the base of the printer and to the RJ12
printer connector on the top of the analyser, behind the rubber flap. Refer to section
2.1 SoToxa Mobile Analyser at a glance
for the location of connections.
Switch the printer on by pressing the power button on the top of the printer. The green status light on the printer will then come on. To turn the printer off,
press the power button again so that the status light goes off.
3.2
Loading paper
The printer is supplied with one roll of paper already loaded. To load a new roll of paper into the printer, open the paper cup lid and remove the spool and any
remaining paper. Reel off a few centimetres from the new roll of paper and hold approximately 5cm of paper outside of the printer. Place the new roll into the
paper reservoir with the paper feeding forwards from the bottom of the roll and the leading edge over the tear bar. Close the lid by applying equal amounts of
pressure on each side of the paper cup lid until the lid is in the locked position.
Please contact Product Support to order replacement printer paper rolls.
3.3
Charging the printer
The printer will only charge when it is offline and connected to the analyser via the RJ12 printer cable and when the analyser is powered by the mains. This is
indicated by the printer’s green LED status light flashing every 1–2 seconds.
The printer will not charge if it is online, indicated by the printer status light remaining on; or if the analyser is not connected to the mains.
The printer will take approximately 2–3 hours to charge.
See section
2.5 Mains power
, for more information on how to connect the analyser to the mains.
Содержание SoToxa TOX400PHO
Страница 1: ...USER GUIDE EN SoToxa MOBILE ANALYSER...


