symbol can be changed either by double click the symbol or via the object property
window.
Select and toggle
Show Texts using the IED Fonts
to get a view how it will look
like later on the real HMI display.
Doing Link to draw lines
The line width has to fit to the line width used for the symbols. The standard size is
2. Choose the line width in a selection box placed in the upper area above the page.
A line that is not connected to a symbol may be done in any line width in the range
1 - 5. But it needs to be simple connection points to be drawn.
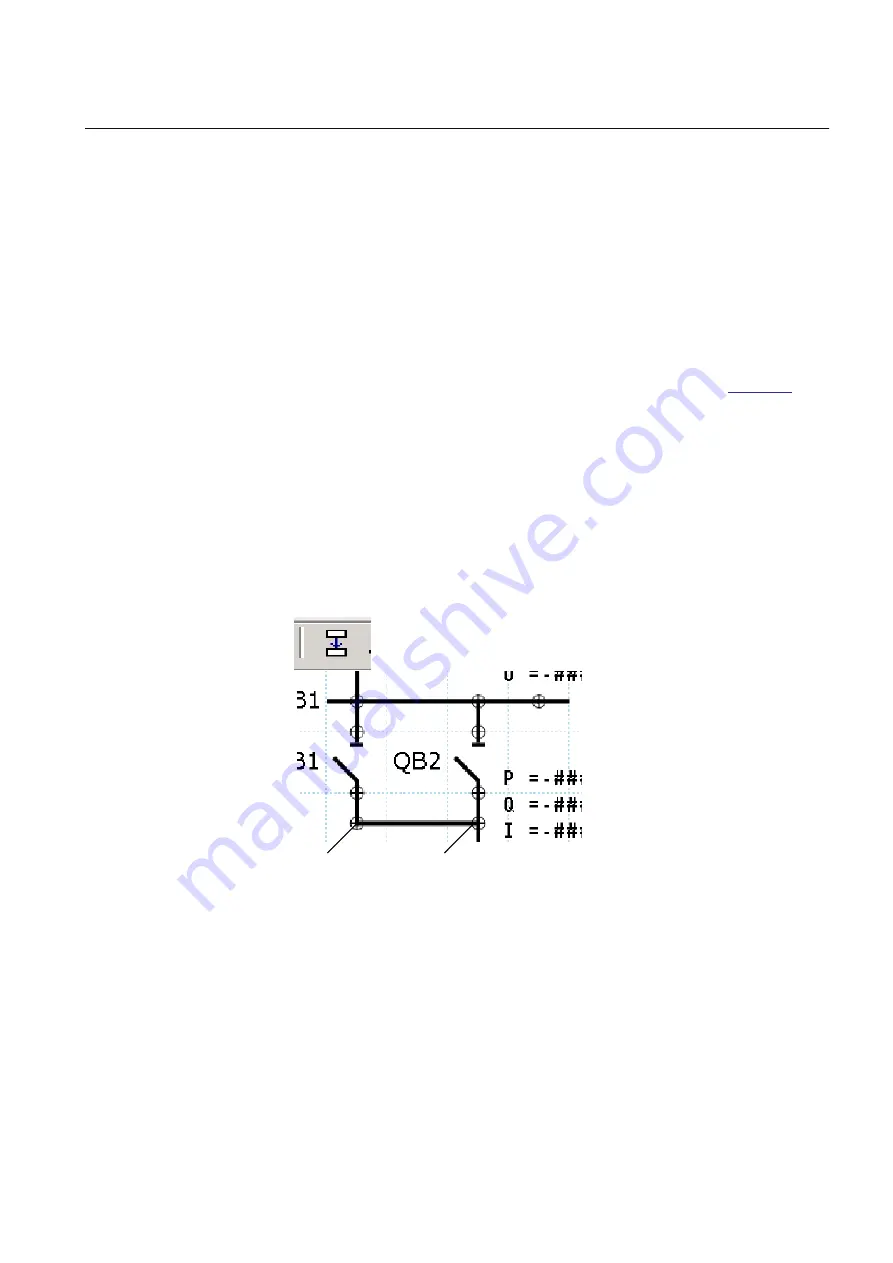
Procedure to draw lines when the apparatus symbols are placed, see
1. Place the apparatus or transformer symbols by drag and drop in a raster box.
2. Place the connections symbols by drag and drop in a raster box.
3. Click the
Link
icon to enable direct line drawing.
4. Center the mouse pointer on the center of a connection point; visible in two
circles at the endpoints of a line, to draw a line.
5. Click to start and move the mouse pointer to the destination connection point.
Center once again the mouse pointer and click to drop the line.
6. Draw all line elements that are necessary.
7. Click
Select
in the menu bar to finish the line drawing.
en05000598.vsd
start point
end point
Line draw icon
IEC05000598 V1 EN
Figure 48:
GDE: Drawing a line
6.2.2
Bay configuration engineering
A page with a single line diagram and measurements contains active living objects.
The object values are updated by the IED periodically (measurement) or in case of
an event. Once the symbols are placed on the HMI page they must be linked to the
1MRK511240-UEN B
Section 6
Local HMI engineering
670 series
65
Engineering Manual


