


L ST 3 0 0 |
CO M PAC T U LT R A S O N I C L E V EL T R A N SM I T T ER | L S T 3 0 0 – EN R E V. E
19
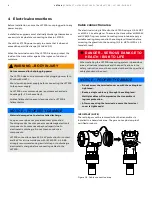
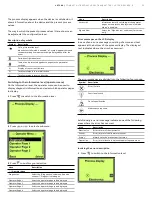
Wiring
Wire the transmitter as follows:
1
Remove the cap from one of the two electrical connection
ports located at both sides in the upper part of the
transmitter housing .
2
If needed, fit various adaptors and bushings to the ½ inch
internal NPT threads of the connection ports to comply with
plant wiring (conduit) standards .
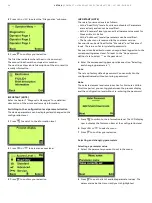
3
Remove the housing cover of field terminals, side . However,
in an explosion-proof installation, do not remove the
transmitter covers when power is applied to the unit .
4
Run wiring through the open port . Connect the positive lead
to the + terminal and the negative lead to the – terminal .
IMPORTANT (NOTE)
Do not connect the power across the test terminals, which
could damage the test diode in the test connection .
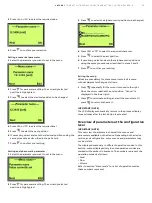
5
Plug and seal the electrical ports . Make sure that when the
installation is completed, these openings are properly sealed
against entry of rain and corrosive vapors and gases .
6
If applicable, install wiring with a drip loop . Arrange the drip
loop so that the bottom is lower than the conduit connection
and the transmitter housing .
7
Put back the housing cover, turn it to seat O-ring into the
housing, and then continue to manually tighten the cover
until it contacts the housing metal-to-metal .
Содержание LST300 Series
Страница 26: ...26 LST300 COMPACT ULTR ASONIC LEVEL TR ANSMITTER LST300 EN REV E...
Страница 27: ...LST300 COMPACT ULTR ASONIC LEVEL TR ANSMITTER LST300 EN REV E 27...
Страница 28: ...28 LST300 COMPACT ULTR ASONIC LEVEL TR ANSMITTER LST300 EN REV E...
Страница 59: ...LST300 COMPACT ULTR ASONIC LEVEL TR ANSMITTER LST300 EN REV E 59 Note...


