MOBILITY DHH800-MFC CONFIGURATOR INSTRUCTION MANUAL
3.5 Mobility MFC Configurations Settings
3.5.1 Lockout Feature
The Mobility MFC HART Communicator can be programmed to lock out certain standard functions that a
supervisor may wish to control. The functions included are used to set up the Mobility MFC for normal use,
change online HART device configurations, create offline HART device configurations, update the installed
DOFs list (HART device profiles), or to update the Mobility MFC’s operating firmware. For example, locking
out the Configs feature turns the Mobility MFC into a read only HART communicator while locking out DOFs
and Firmware prevents unauthorized updates. The lock out can be limited to individual Lockout Details items
or all Lockout Details items can be locked out at one time.
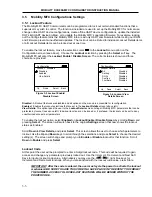
To enable the lockout feature, move the selection cursor
to the
Lockout
menu option on the
Configuration screen (see above). Choose the
Lockout
selection by pressing the
Select
soft key. The
Mobility MFC will enter the
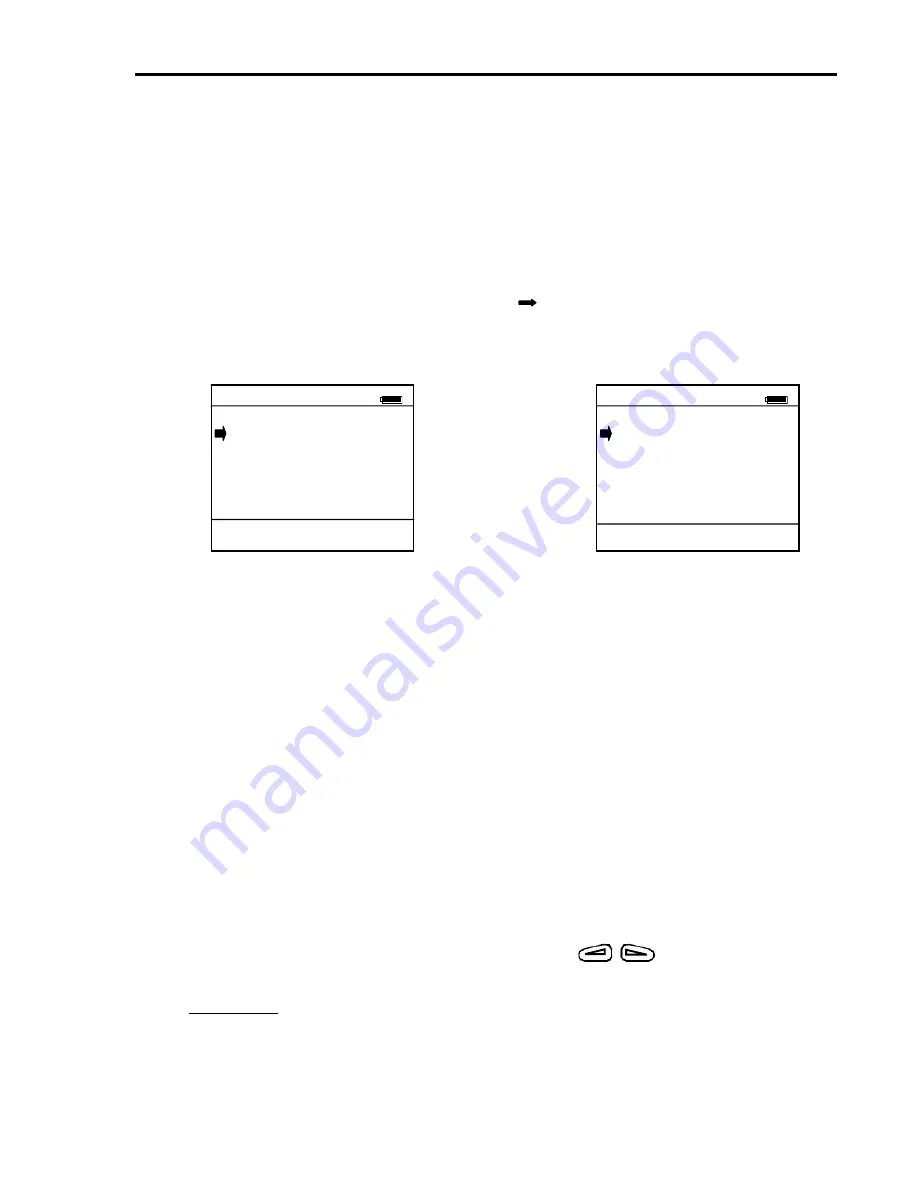
Lockout Enable / Disable Screen
. The current status is shown and three
choices are provided:
Configuration
#
Lockout: Disabled
Disabled
Enabled
View Details
Up Down Select Back
Configuration
#
Lockout Details
All
:
Disabled
Setting
:
Disabled
DOFs
:
Disabled
Configs
:
Disabled
Firmware :
Disabled
U
p Down Select Back
Figure 3-5 Lockout
Enable/
Disable Screen
Figure 3-6 Lockout View
Details Screen
Disabled:
All lockout features are disabled and all options on the menu are accessible for reconfiguration.
Enabled:
Enables the lockout selections that are set in the
Lockout Details
screen (above left)
.
View Details:
This option takes the user to the
Lockout Details
screen listing all Mobility MFC parameters that can be
protected by lockout (see above left). Individual functions can be locked or, if preferred, the lockout can be set to deny
unauthorized access to all parameters.
To enable the lockout option, select
Enabled
on
Lockout Enable / Disable Screen
by scrolling
Down
and
pressing
Select
. The screen will switch back to the original
Settings
screen that now shows the lockout
status as Enabled.
Scroll
Down
to
View Details,
and press
Select
. This screen allows the user to choose which parameters to
lockout. Use the
Up
and
Down
keys to scroll through the selections and press
Select
to choose the desired
setting(s). The screen will change and prompt you to
Enable
or
Disable
lockout for that function. Scroll
Down
to
Enable
and press
Select
.
Lockout Code
At this point the user will be prompted to enter a 3-digit lockout code. This code will be required to gain
access and change any parameter previously locked out. Use the Increment, Decrement and Next Soft
Keys to input a lockout code value. Alternatively you may use the light blue keys for
Increment and Decrement functions. When you are satisfied with the lockout code value, press Store.
IMPORTANT: After the code is entered, the user must cycle the power to activate the lockout
mechanism! BE SURE TO SAVE THIS CODE IN A SAFE PLACE IN THE EVENT YOU FORGET
THE NUMBER.
ACCESS TO LOCKED-OUT FEATURES WILL BE DENIED WITHOUT THE
PROPER CODE.
3-3

